
12 Days of Back to School and Teacher Gifts
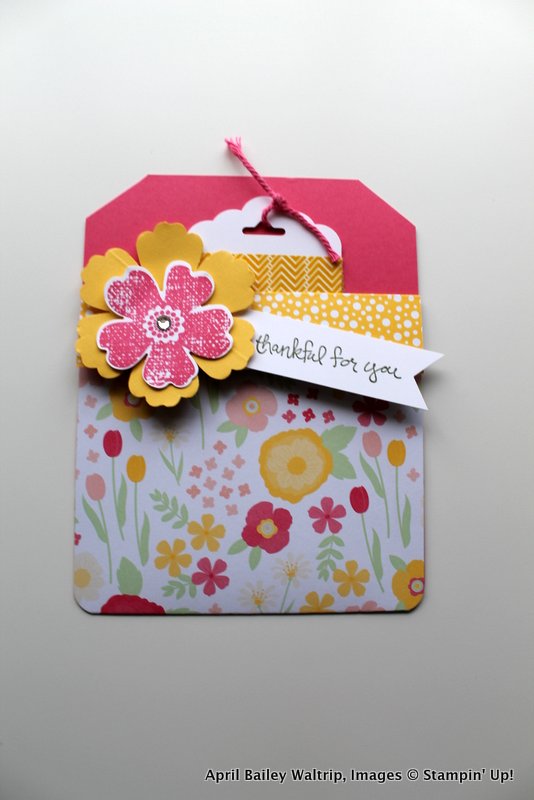
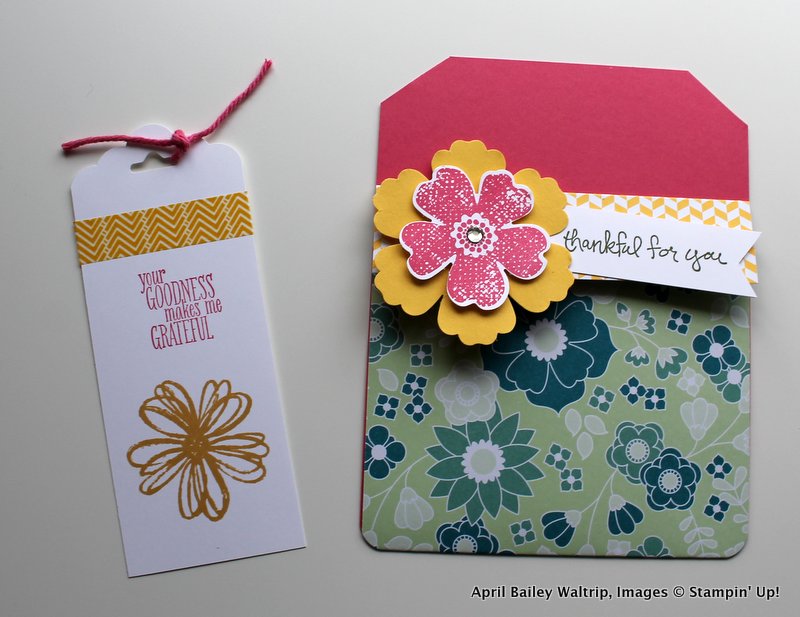
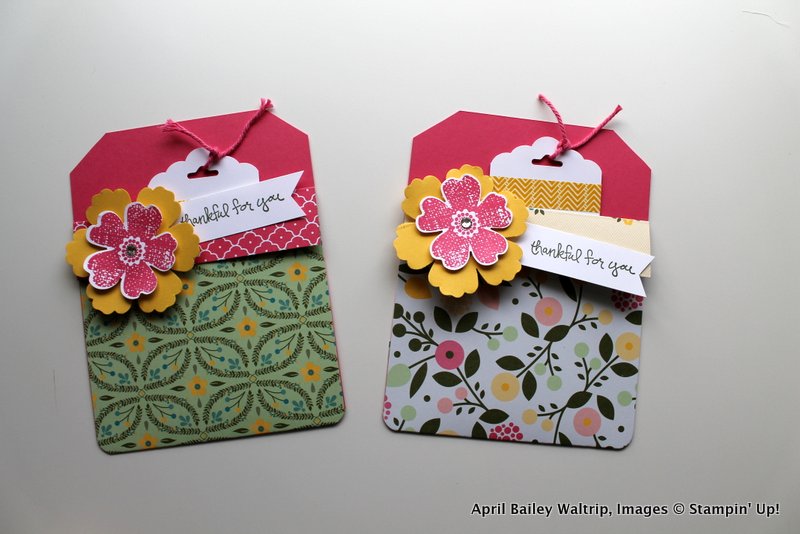
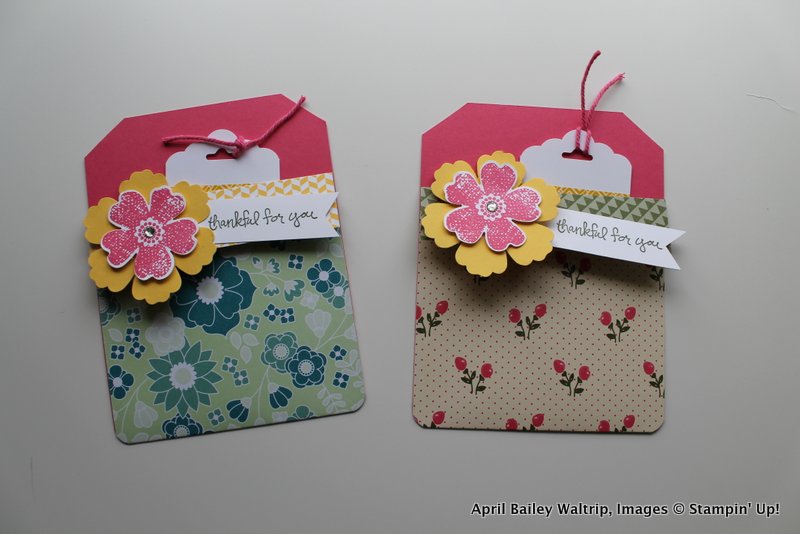
So far I’ve shown you a Chalkboard Thank You card, Post It Note desk holder, and today I will show you how to make this adorable Card with a Bookmark tucked into the front, which is perfect for any teacher or reader. Alright, are you ready to see it??
Stampin’ Up! supplies:
- Stamps: Good Greetings (Hostess Exclusive), Flower Shop, Something to Say (tag)
- Paper: All Abloom Paper Stack, Strawberry Slush, Crushed Curry, Whisper White
- Ink: Strawberry Slush, Mossy Meadow, Crushed Curry
- Accessories: Stampin Paper Trimmer, blossom punch, pansy punch, Project Life corner rounder punch, Strawberry Slush thick baker’s twine, Dimensionals, Scalloped Tag Topper Punch, Rhinestones, Beach House Washi Tape
Directions:
- Cut the Strawberry Slush card base to 4 1/4″ x 5 1/2″. Round corners with Project Life corner punch.
- Score All Abloom DSP sheet at 1″ from the top and 4″. (No cutting needed!)
- Stamp and punch flowers for decorating the front. Stamp a 2″ piece of White with the Flower Shop stamp and sentiment from Something to Say. Add washi tape to top of tag, punch and tie with thick bakers twine.
- Stamp Good Greetings in Mossy Meadow and flag end.
- To adhere All Abloom DSP, put adhesive on bottom flap and fold around bottom. Only put a thin line of glue the two outer sides with the 2 way glue pen, so that you don’t seal the pocket.
Ta-da!
What do you think of the Post It Note holder? Comment below to let me know and stay tuned tomorrow for a Bookmark Card!
12 Days of Back to School & Teacher Gift Crafts
You can see the posts you missed here:
Day 4: Hershey Bar Treat Holder
Day 6: Project Life First Day of School Journaling Card
Day 7: Project Life 12×12 Layout
Day 8: Flower Pot DSP Covered Notebook Tutorial
Day 10: Water Bottle Sweet Taffy DSP Tag
5 thoughts on “12 Days of Back to School Crafts: DAY 3”