
How to Make a Coffee Themed Gift Card Holder
Full Tutorial with Photos
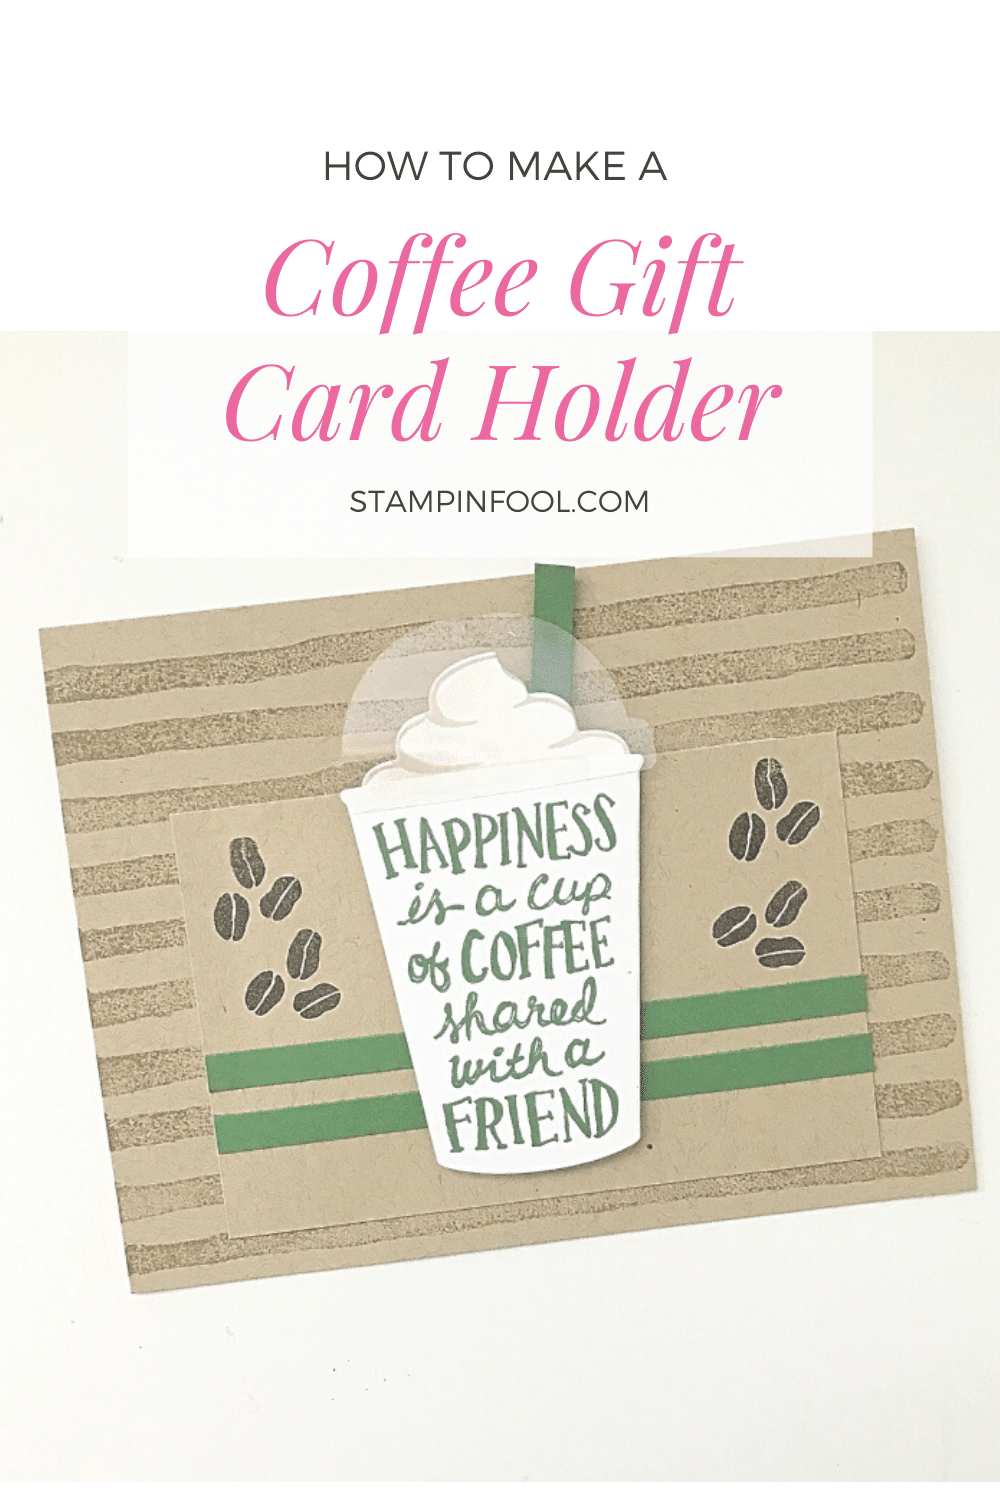
How stinkin’ cute is this coffee cup gift card holder?!! Y’all know I love Starbucks. I really, really love it. I have stamping at Starbucks events, half of my Instagram stories are filled with photos of my Starbucks choice of the day. If you lived in my house you would hear my husband ask me how much I spent at Starbucks this month every time we sit down to go over our budget.
Do you have a coffee loving friend also? If you do, this is the perfect way to give them a gift card. This card features a pocket on the front that you can slip the gift card into.
It’s sweet perfection for your coffee loving friend!
Supply List
You’ll need these supplies to get started. You can use ink, stamps, or markers to letter the front of the card. I used stamps here in the example, but most of the card elements are easily reproducible with brush tip markers.
- Card stock paper: Kraft paper, white, green
- Acetate paper
- Ink: Light brown, Green, Espresso
- Or Brush tip markers (I love these dual tip markers)
- Stamps: Coffee Break & Framelits Bundle, Brush Strokes background stamp
- Die Cut: Coffee (this is similar)
- Paper Trimmer
- TomBow & Tear Tape adhesive
- Dimensionals
- Big Shot
Dimensions
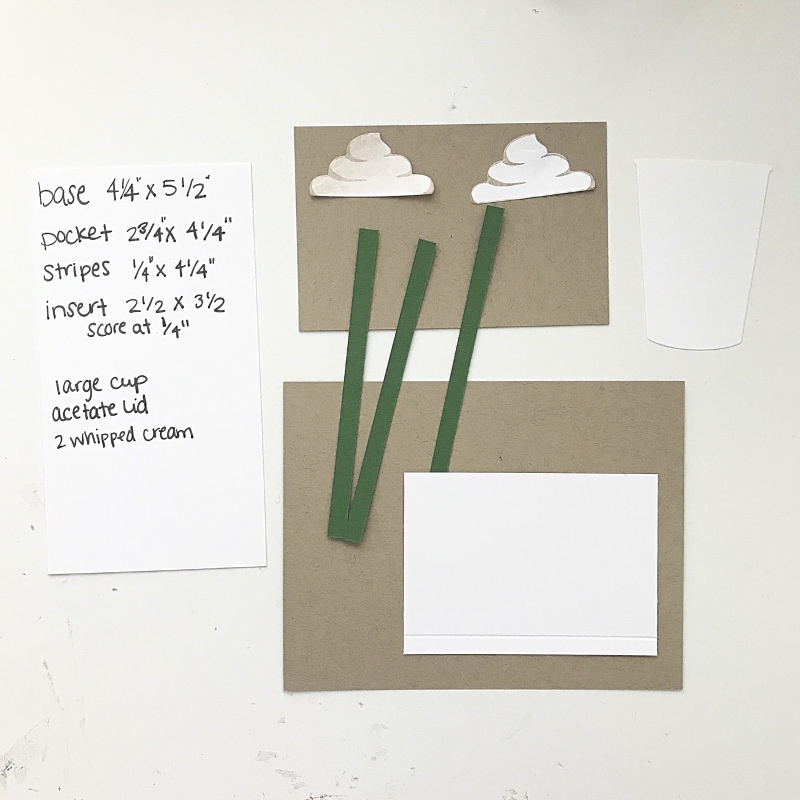
Now that you have the supplies ready to make this coffee gift card holder, I want to give you the dimensions. Normally, I would jump right into the directions, but with this card I found it was easier to cut all of the pieces first, then assemble them.
Make sure you follow the precise order, otherwise things won’t line up.
- Card base: 4 1/4″ x 5 1/2″ light brown card stock
- Front Pocket: 2 3/4″ x 4 1/4″ light brown card stock
- Stripes & Straws: 1/4″ x 4 1/4″ Green, Straws cut in half lengthwise
- Gift Card Holder insert: 2 3/4″ x 3 1/2″ White card stock
- 1 Large Coffee cup (die cut)
- 2 whipped toppings- Stamp/outline in light brown first, then die cut
- 1 acetate round lid die cut
Directions
Next, let’s get started assembling this coffee gift card holder since you have cut and prepped all of the supplies and paper.
Cut
Cut all pieces described above.
Brush Stokes
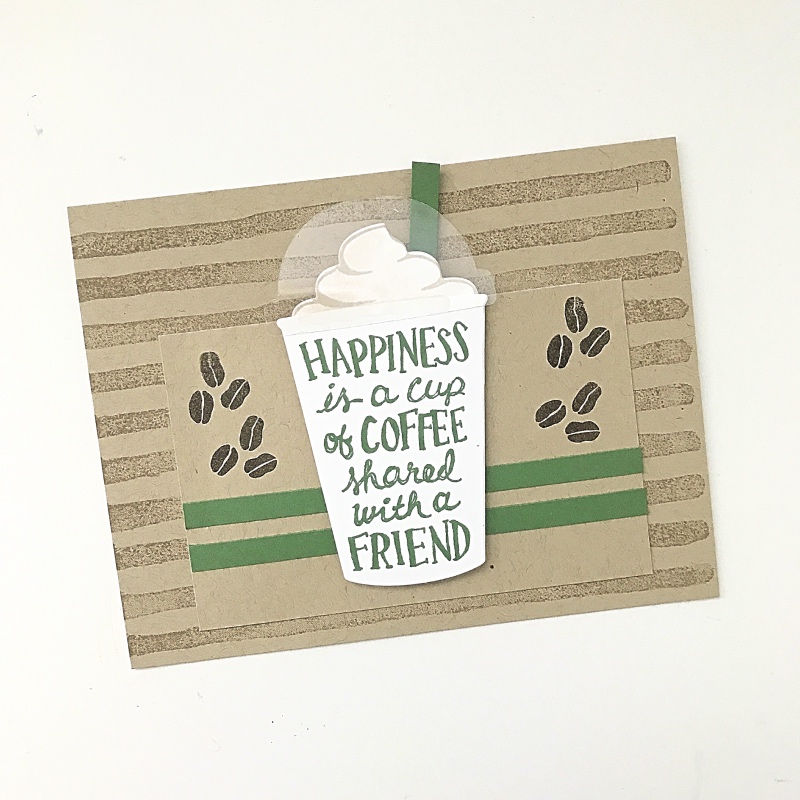
Create the brush stroke affect on the card base by drawing lines in light brown across the card.
Adhere two 1/4″ green stripes to the front pocket. I lined up the bottom of the pocket with grid paper.
Create the Pocket Insert
Score the White Pocket Insert at 1/4″ on the long edge & fold towards you so that it creates a lip. You can place a gift card here. See the photo below for additional visual help.

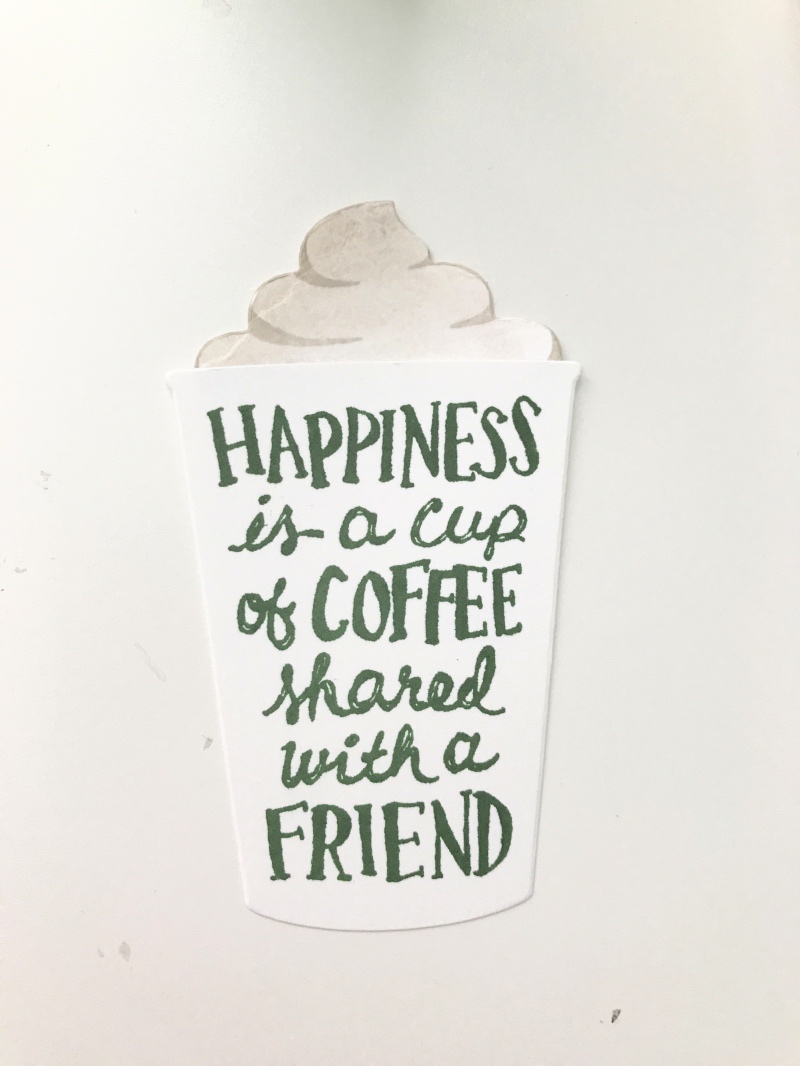
Make the Greeting
Next, make the greeting by writing a sentiment on the large white coffee cup die cut piece of card stock. Alternatively, you can stamp a sentiment in green ink on large Coffee Cup die cut piece.
I love this saying “Happiness is a cup of coffee shared with a friend.” It sums up perfectly what this coffee gift card holder will mean to you and your sweet friend.
Add Coffee Beans
Stamp or draw coffee beans on outer edges of card pocket with dark brown Espresso ink.
Adhere the pocket
Next, use TomBow glue to glue three edges: side, side, bottom, of the front pocket to the middle of the card base. Leave the top edge without adhesive so that the gift card can still slide into the pocket. Make sure the glue is right along the edge so that there is plenty of room for the coffee gift card insert. Set the card aside to dry for a few minutes (2-3 minutes should be enough).
Make the Insert
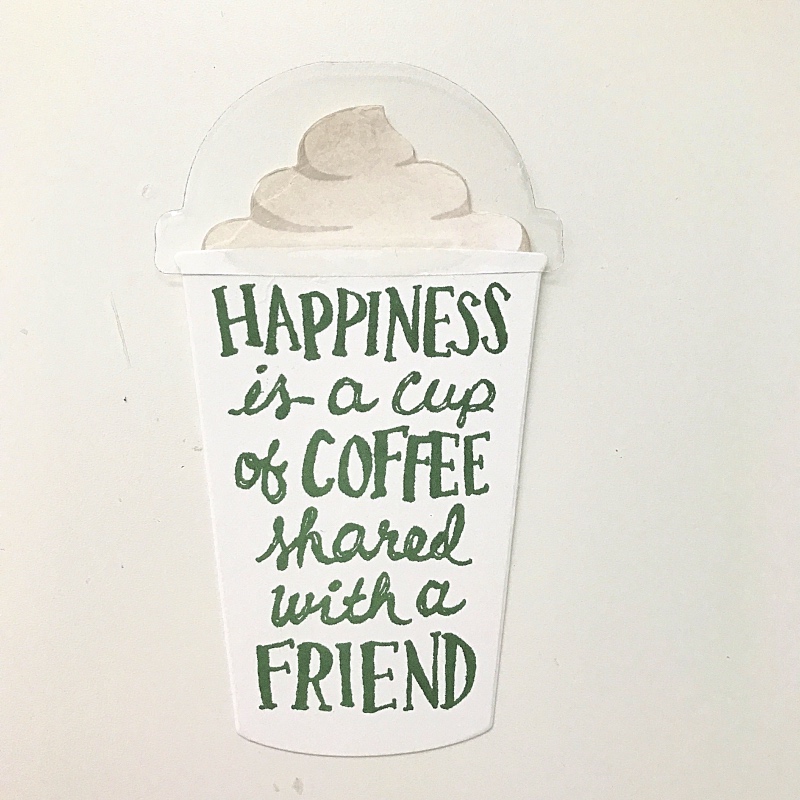
Next, we will make the gift card insert. We already scored the white card stock piece. Now, run a thin line of glue on the back bottom of one whipped cream and adhere to top of insert, in the middle, with most of the whipped cream above the top of the insert.
Adhere the straw (half of the skinny green strips mentioned above) to the insert, pointing slightly to the side with about 1″ above the top of the insert.
Add Whipped Cream
Grab the large stamped cup and second whipped cream die cut. Adhere a thin line of glue to the front bottom of the whipped cream. Place the middle top of the cup over the glue and press to seal. Let dry 30 seconds.
Glue on the Clear Lid
Get the clear acetate lid die cut piece. Run a thin line of liquid glue over the middle top of the coffee cup (right under the whipped cream) and adhere the acetate rounded lid die cut. Press firmly so that glue disperses (This will hide the glue well once it dries).
Troubleshooting: The lid should only by glued to the top of the coffee cup, not the card itself. If it’s glued to the card, you won’t be able to slide the gift card into the pocket.
Put the insert into the Pocket
Place dry insert into the front pocket. Push down so that the whipped cream is peeking out as far as it can without the insert showing across the top.
Put 4 dimensionals on the back of the finished coffee cup. NOT ON WHIPPED CREAM, only on the cup portion.
Adhere the coffee cup to the front of the pocket making sure the whipped cream from the cup covers the whipped cream on the gift card insert.
Ta-Da! You’re finished. Enjoy a coffee!
What do you think? Isn’t this the sweetest coffee gift card holder. I can’t wait to gift Starbucks cards to teachers, friends and coworkers in this extra special gift card holder.
ADORABLE ????????????????????♥️Thanks For Sharing!! SO CUTE!! G-d♥️Bless????