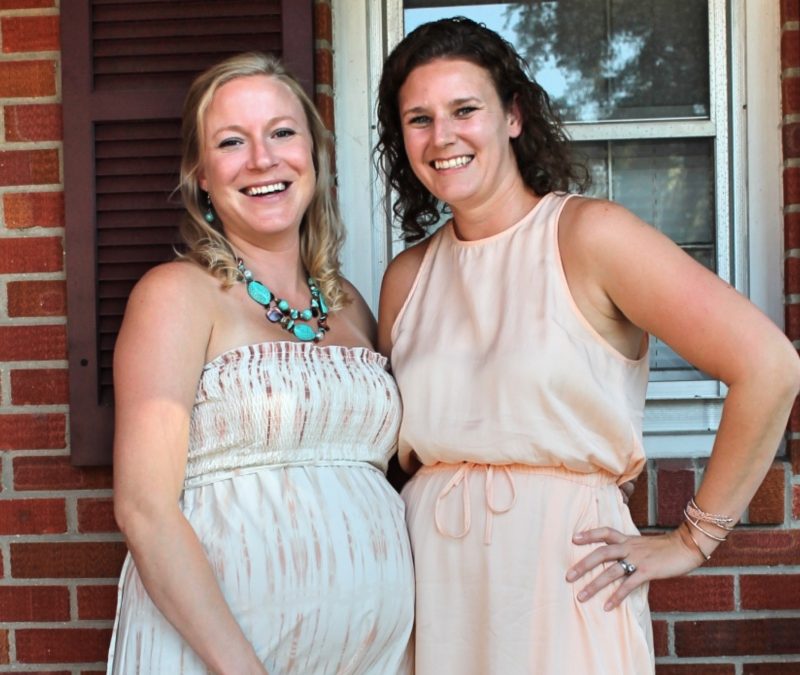
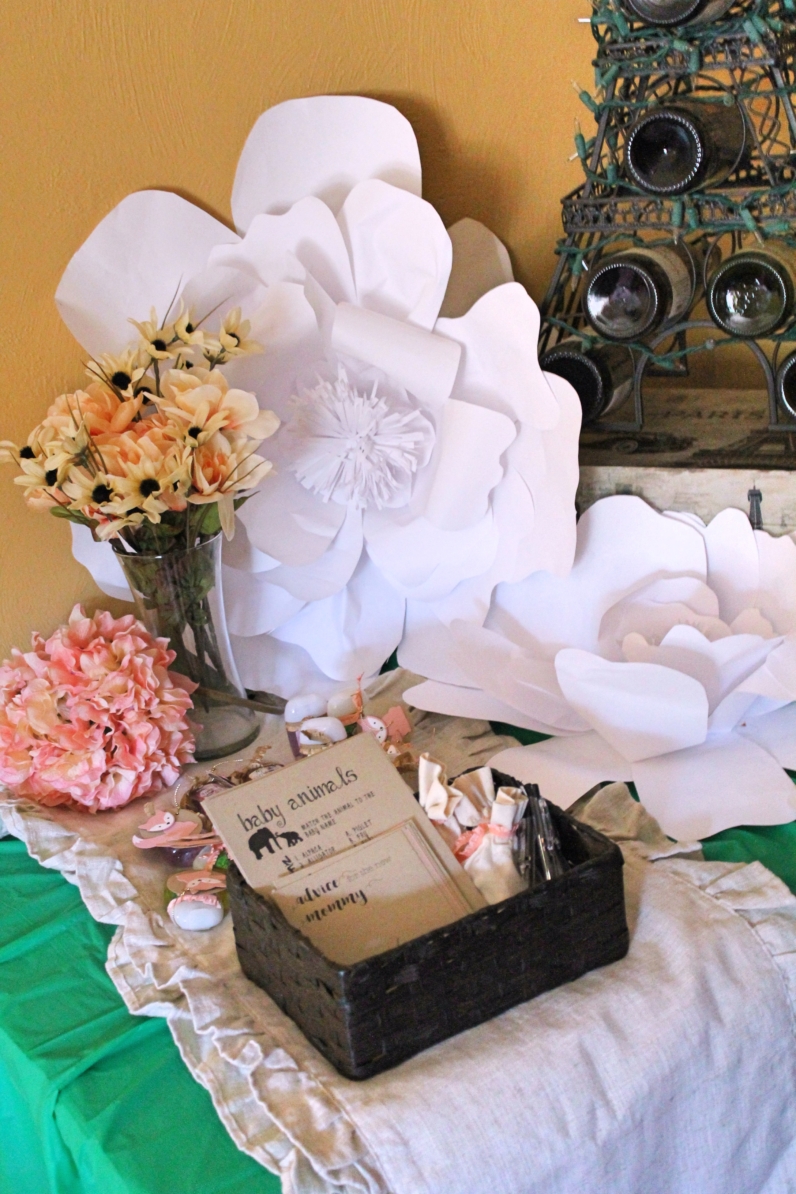
I love party planning and I had the honor of planning my best friend’s baby shower. To say I was excited is an understatement. I was STOKED!! And, on top of it, we were going with a Woodlands theme for the new baby girl. I started by hitting Pinterest and looking at ideas for throwing a great shower. Combined with the ideas I had floating around in my head, I’ll show you what I came up with, give you a list of basics for throwing a Woodland baby or bridal shower, and a how to on the baby shower gift favors.
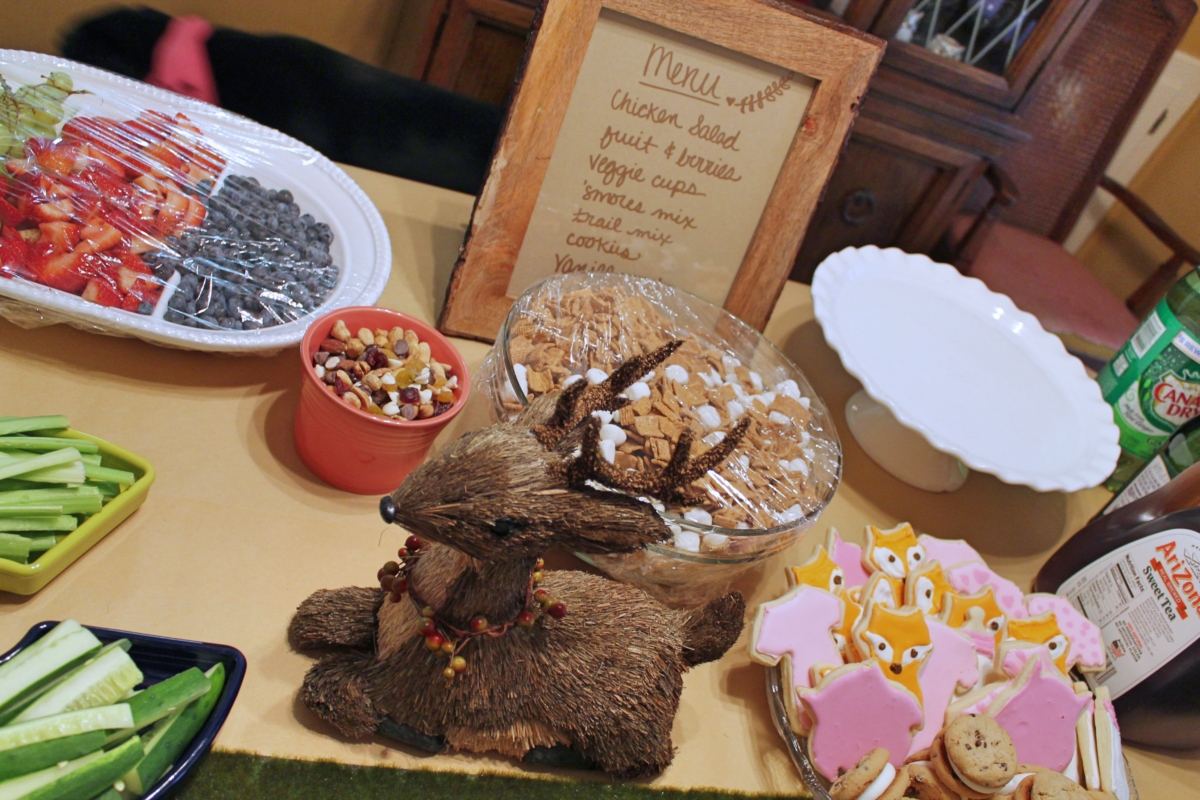
I started out with a menu. We both love food- all the food. I wanted a simple menu, but filling enough to keep everyone happy and have a little leftover for momma so she would have snacks on hand for the next few days! Let me just say that I had plenty left over, except for the chicken salad on apples. It went like crazy and I put out two batches. (See recipe below).
Menu:
- Almond Chicken Salad, on granny smith apple slices and on hawaiian rolls
- fruit platter
- veggie cups with quartered cucumbers, celery, carrots and ranch dressing
- cheese board (water crackers, gorgonzola, aged cheddar, alluette spread)
- some premade trail mix in a bowl
- ‘Smores mix (Golden Grahams, chocolate chips, mini marshmallows)
- cookies (baby & woodland themed sugar cookies & choc chip cookie sandwiches)
- vanilla vanilla cake (8″ four layer, from walmart- aaaamazing)
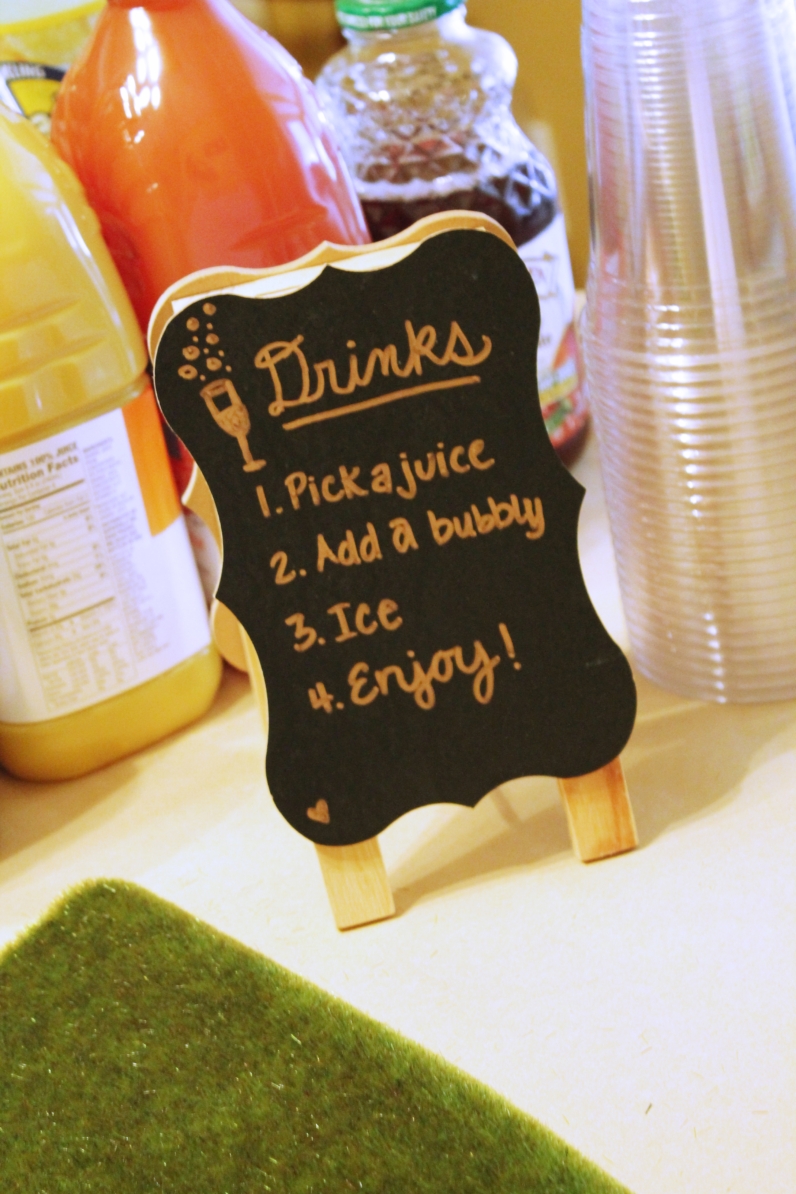
Bubbly Bar
A quick list of things that make a super easy, super chic baby shower are:
- cute invitations
- burlap or ribbon bunting/banner
- craft paper roll for a table runner
- menu or food tent signs
- drink menu, clear cups/mason jars, ice, juices & sparkles (ginger ale, lemon lime soda, Welch’s sparkling white grape)
- party food: cheese platter & crackers, apple slices topped with chicken salad, veggie cups, sweets, cake
- handmade tag for favors
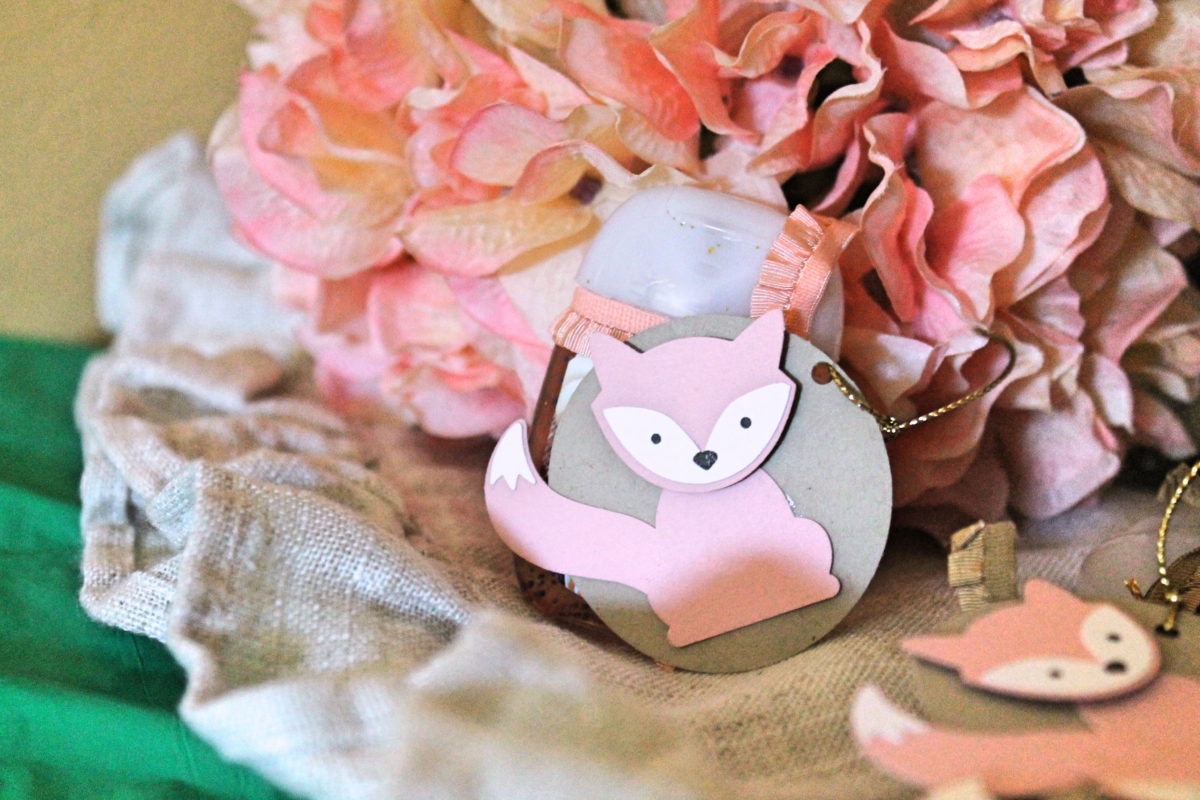
Here is a close up of the favor table. I punched 2″ circles of Crumb Cake, gold embossed the backs with a stamp, used Blushing Bride for the Foxy Friends punch and stamped eyes and nose. Really simple, but super cute. I tied them with gold cording to ruffled ribbon around the hand sanitizers from Bath & Body Works. 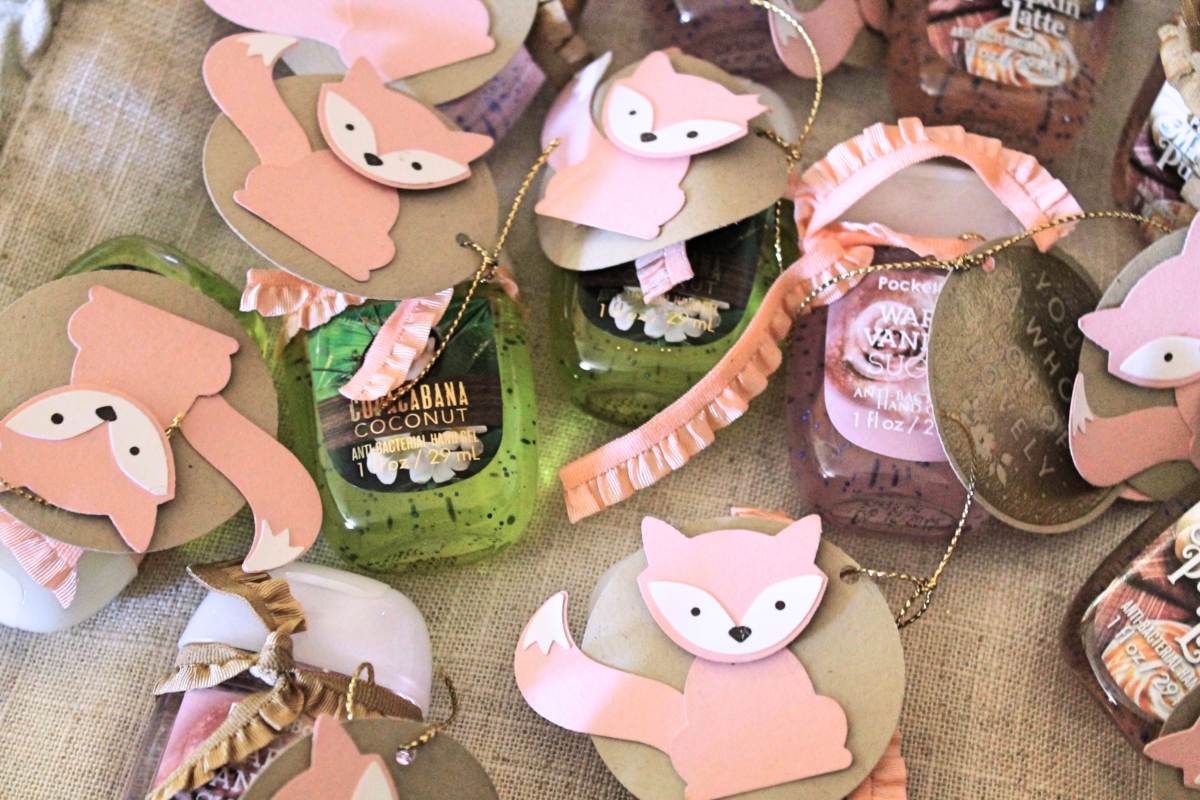
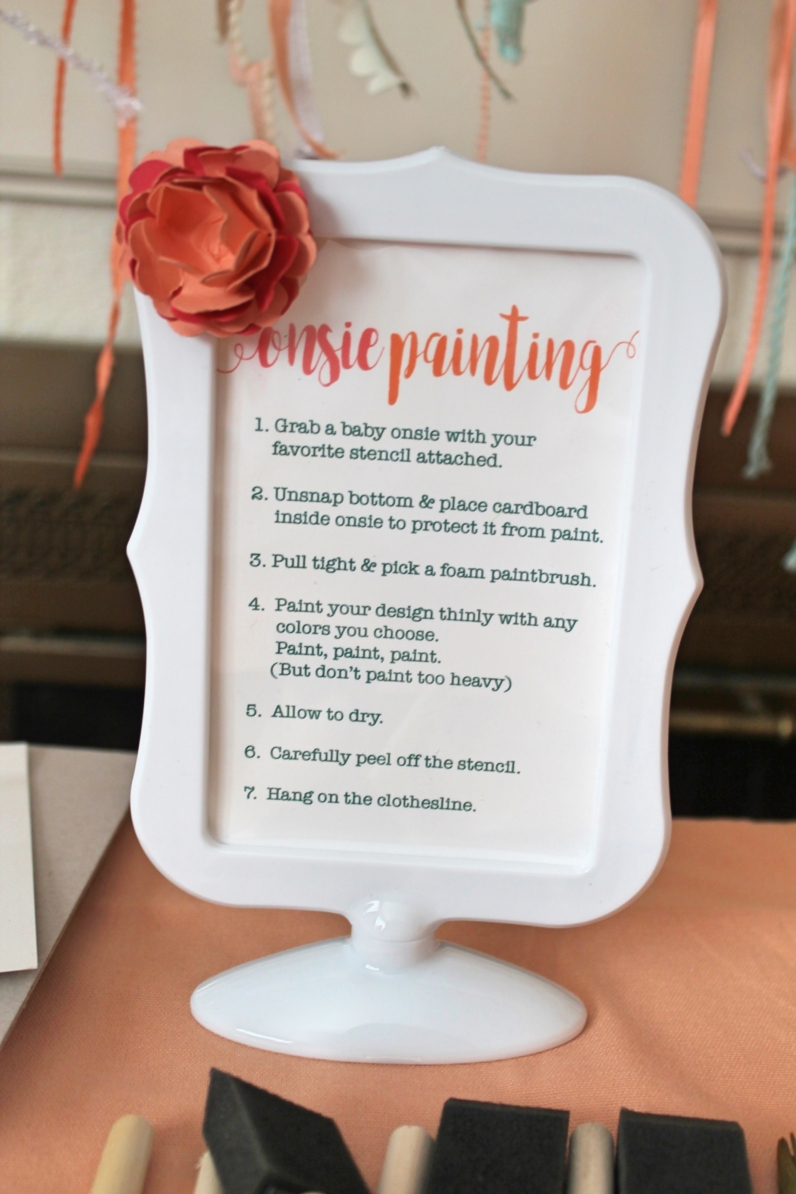
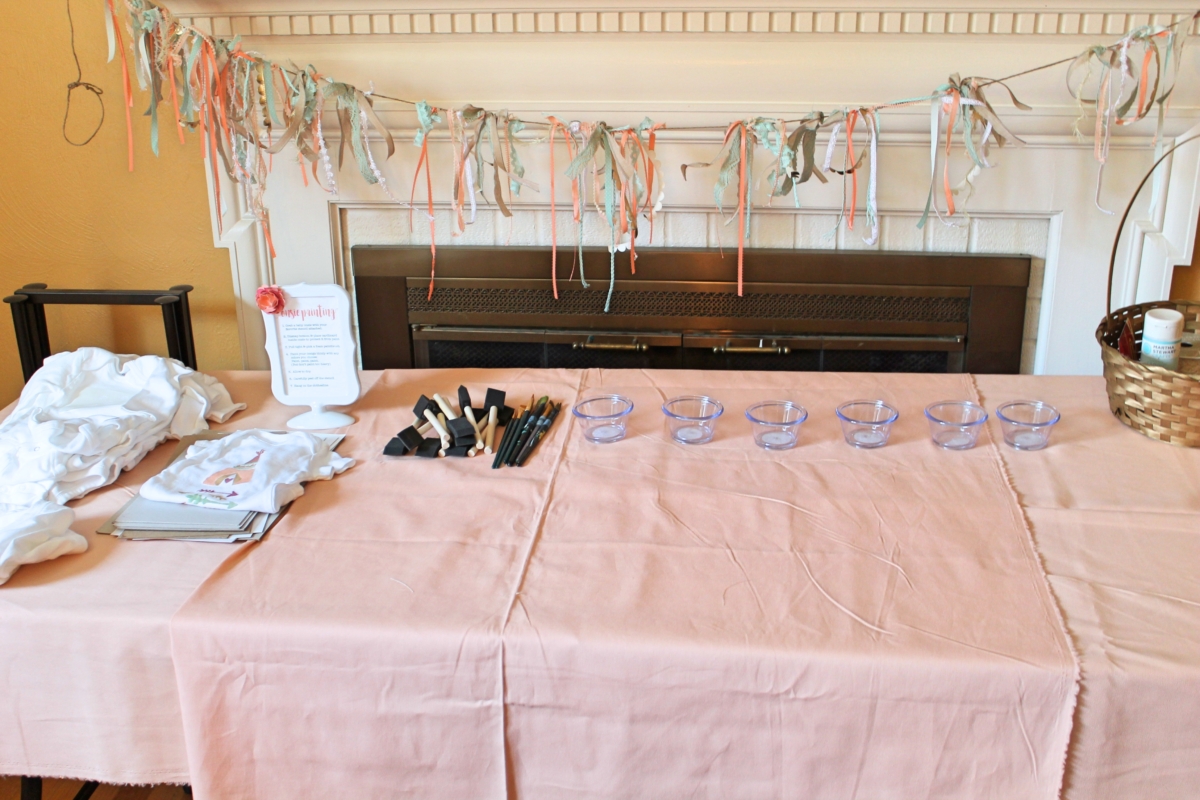
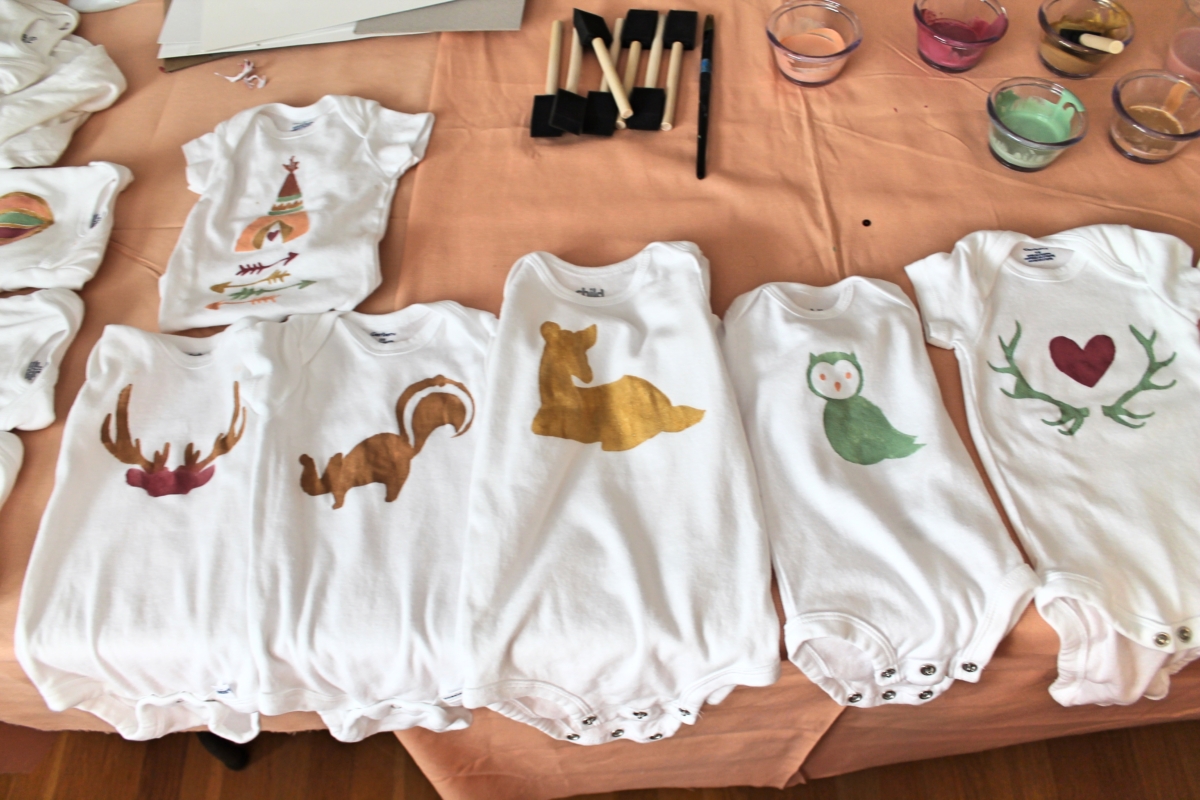
Another way to make this baby shower special was to be strategic about the “games”. Who likes baby shower games? No one. {I literally asked this question at the shower, and the response was accurate.} So, instead of the eat candy out of a diaper, taste baby food, what’s in your purse, how huge is the momma run of the mill standard baby shower games, we painted onesies.
Let me take a minute to talk about this. I’m going to be brutally honest, as a mother and a party planner. I have seen hundreds of tutorials. I have read a thousand articles. I have been to baby showers and decorated diapers with sharpies, I have painted burp clothes with puffy paint, I have painted onesies with markers. I have had these given to me. You know what I did with them? Here’s a secret- I cleaned with them. I tossed. I did not keep and I certainly didn’t put my sweet newborn baby in them.
Moms aren’t going to keep these handmade masterpieces where you can’t tell if its a turtle or a goat painted on it in bright, bold kindergarten colors. {On a quick side note, we did hand cut fabric on iron on backing and those I kept and my sweet babes wore. Totally acceptable).
But, I have a solution. Painted onesies. But you just said no one likes them and moms throw them out. Not if they are done right ladies! I have a specific ingredient list to make this work. Don’t deviate, it won’t work.
Supplies:
- Craft Paint (five colors in a similar palate)
- Foam brushes
- 1 pack of detail brushes
- 6 little paint cups (one for water)
- fabric paint medium (Martha Stewart)
- Onesies – cotton, in multiple sizes (NB, 3 month, 6 month, 9-12 month) Be aware of the season and what is appropriate for that age/season. Long sleeves for winter, short for summer.
- Cardboard to go in between onsie
- Freezer paper
- Iron
- Silhouette cutting machine
Directions:
- Wash onesies & tumble dry low.
- Pick outline silhouette images for your theme.
- Using Silhouette machine, cut them out of freezer paper (leaving the outline and negative space open). One or more for each onsie. Remove from cutting mat. Cut freezer paper to size of once. {See detailed Silhouette Instructions below; you’re welcome.}
- Heat iron, lay the freezer paper image on the onsie waxy side down. Cover with a tea towel. Iron for 20-30 seconds or until freezer paper is bonded, including all edges. Repeat with all onesies and stencils.
- Put paint and medium into cups. Add a water cup for cleaning brushes. Lay out a tea towel to dry brushes.
- Mix medium and paint well.
- Choose a onsie. Unsnap and insert cardboard to middle for firm surface and to protect from bleeding. Paint onsies. Lightly. Not to heavy.
- Let dry. (About 20 minutes)
- Peel off stencil freezer paper.
- Admire.
- Air dry overnight. Wash on gentle.
** I explained how to paint them to my guests and that there were plenty to paint one or two each. That they should grab a drink and some food and half could be painting while the other half were snacking. This worked really well so that it was not too crowded and everyone, including the mom to be got a chance. I also bought mom a t-shirt to paint.
** I stuck with my woodland theme and choose gold, light peach, light mint green, light brown (fawn), and a magenta.
** Mix the paint with fabric medium 1:1, meaning half paint, half medium. I squirted the paint in the cups, then the medium and swirled around with a foam brush.
** It was easy to paint with more than one color on the onesies & add detail with the smaller brushes.
Detailed Silhouette Directions
I tried this by trial and error. I read many directions, but non that were specific enough to actually work. I almost quit. I tried cutting with a blade or exacto knife- a straight blade doesn’t cut curves. Lesson learned. Stick to the silhouette.
** To make the stencils, I imported dark, solid silhouette images into Silhouette Studio. > Click the trace box. > “Select trace area” and make a box around the objects. > Deselect high pass filter. This will turn the image all yellow, making the outline cuttable. > Click “Trace”. > Go to the Cut Settings tab. > Style: Cut. Cut settings: 2 for the blade, type: heat transfer material. > “Send to Sihouette”. > Make sure you actually ratchet the blade down to 2.
Here’s where you can purchase the products to make these adorable onesies!
So what do you think? Isn’t this the sweetest baby shower? XOXO