HOW TO MAKE AN EXPLOSION BOX FOR FATHER’S DAY
To show your love for that special dad in your life, I’m going to show you how to make an explosion box for Father’s Day. Explosion boxes make great personal Father’s Day gifts and they are an inexpensive DIY you can do with the kids.
So keep reading for the supply list, step by step directions for making an explosion box card for father’s day and ways you can personalize your handmade explosion box.
Father’s Day
Admittedly I am a terrible gift giver. I am a little too practical and tend to not buy anything. I’m the one that shows up to birthday parties without a gift (gasp). But, I have been intentional about Father’s Day since I got married.
The first year, before we had kids, I made a handmade card and inked the dog’s paw on it as a keepsake. It was a hit. Husband loved it and kept it out the entire year.
Since then, every year for Father’s Day I do a couple of things: 1) make a handmade card 2) get the dog and kid(s) hand or footprints into the card or on a piece of artwork 3) get it framed to hang in Husband’s office. He has graciously hung every card, framed drawing, and canvas painting that the babies or me have made.
Related Posts: DIY Father’s Day #1 DAD Canvas, DIY Wood Photo Transfers and Monster Father’s Day Footprint fun.
What is an Explosion Box?
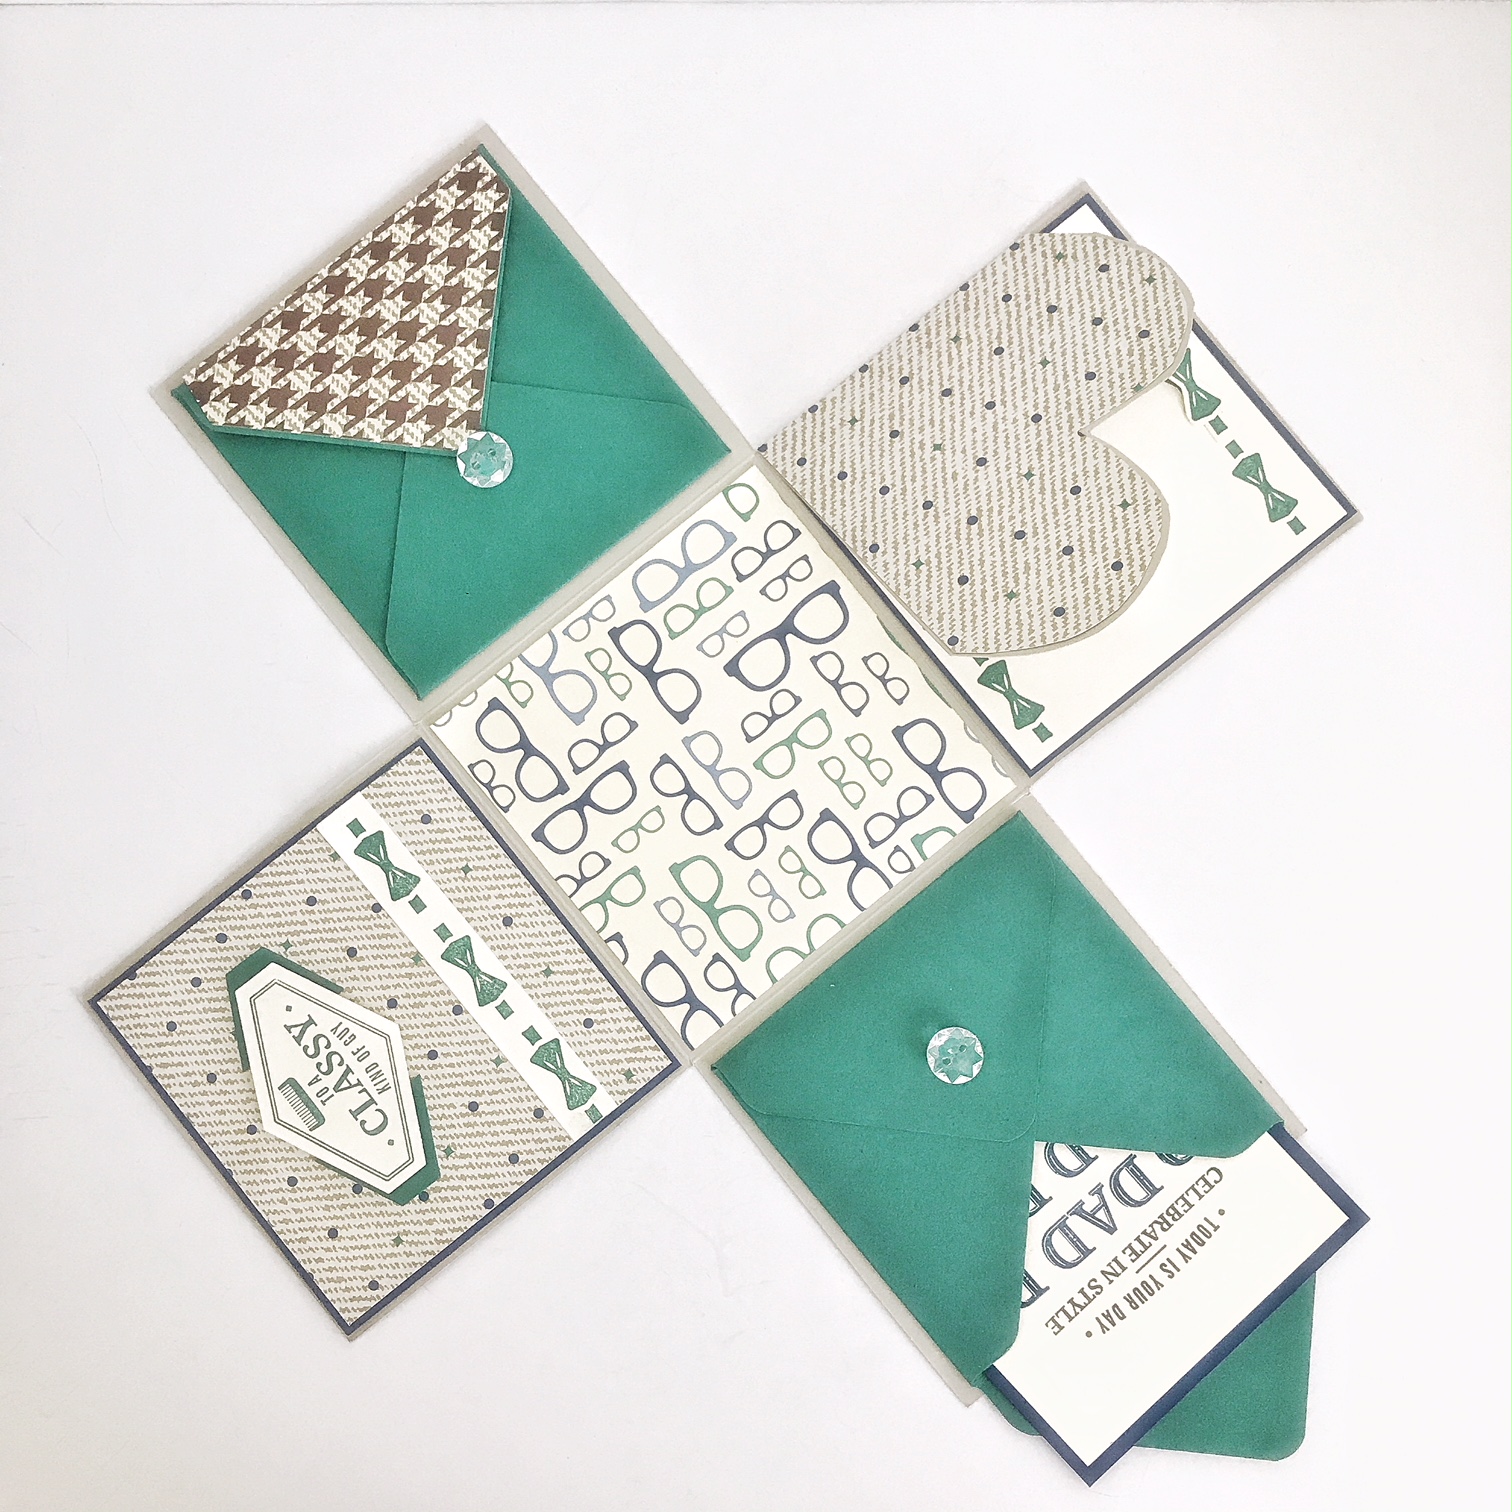
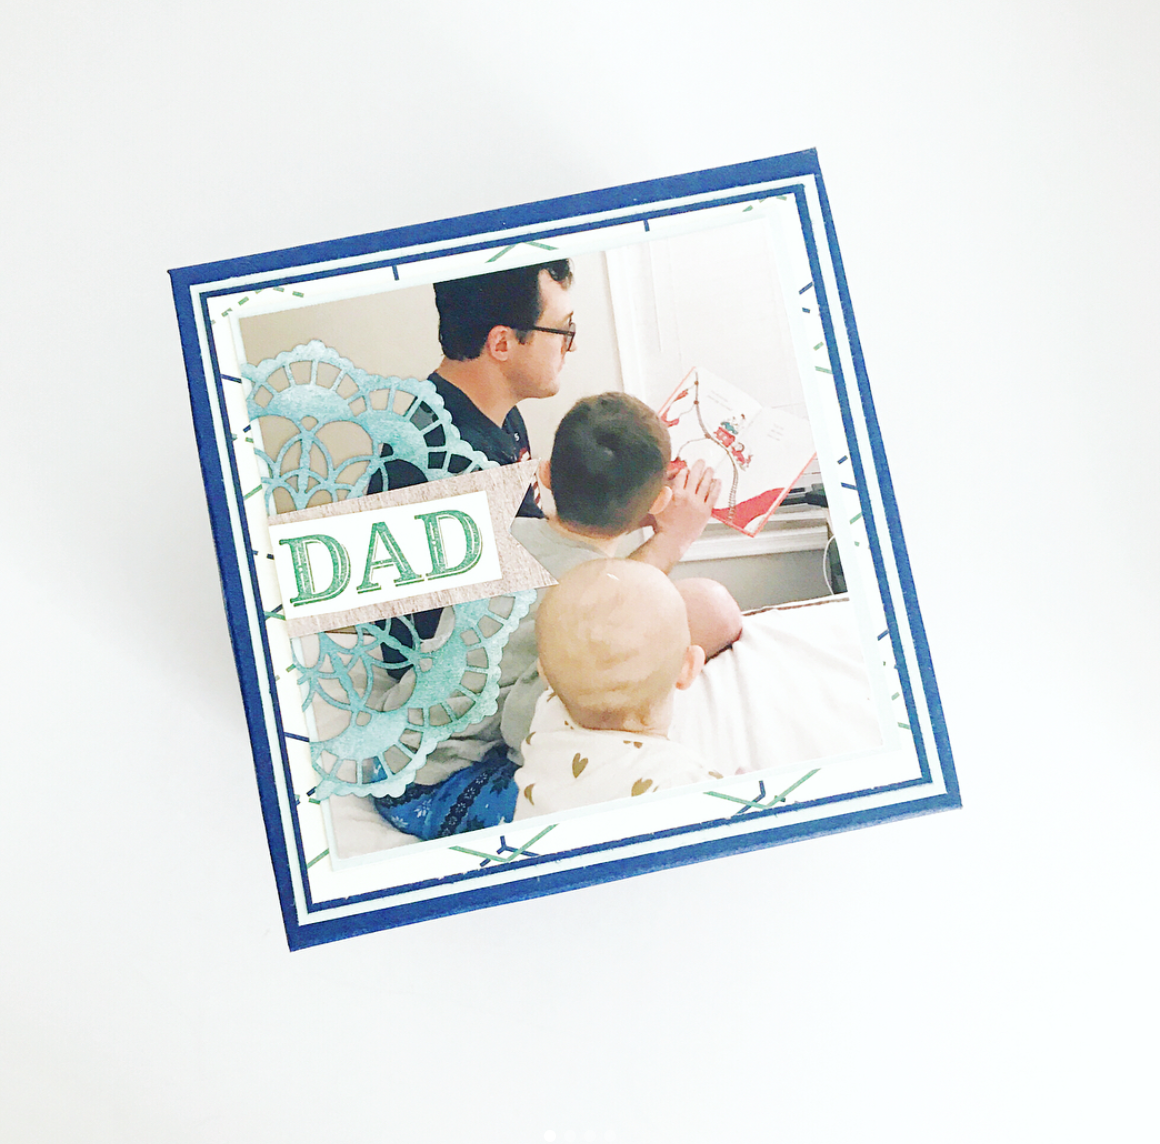
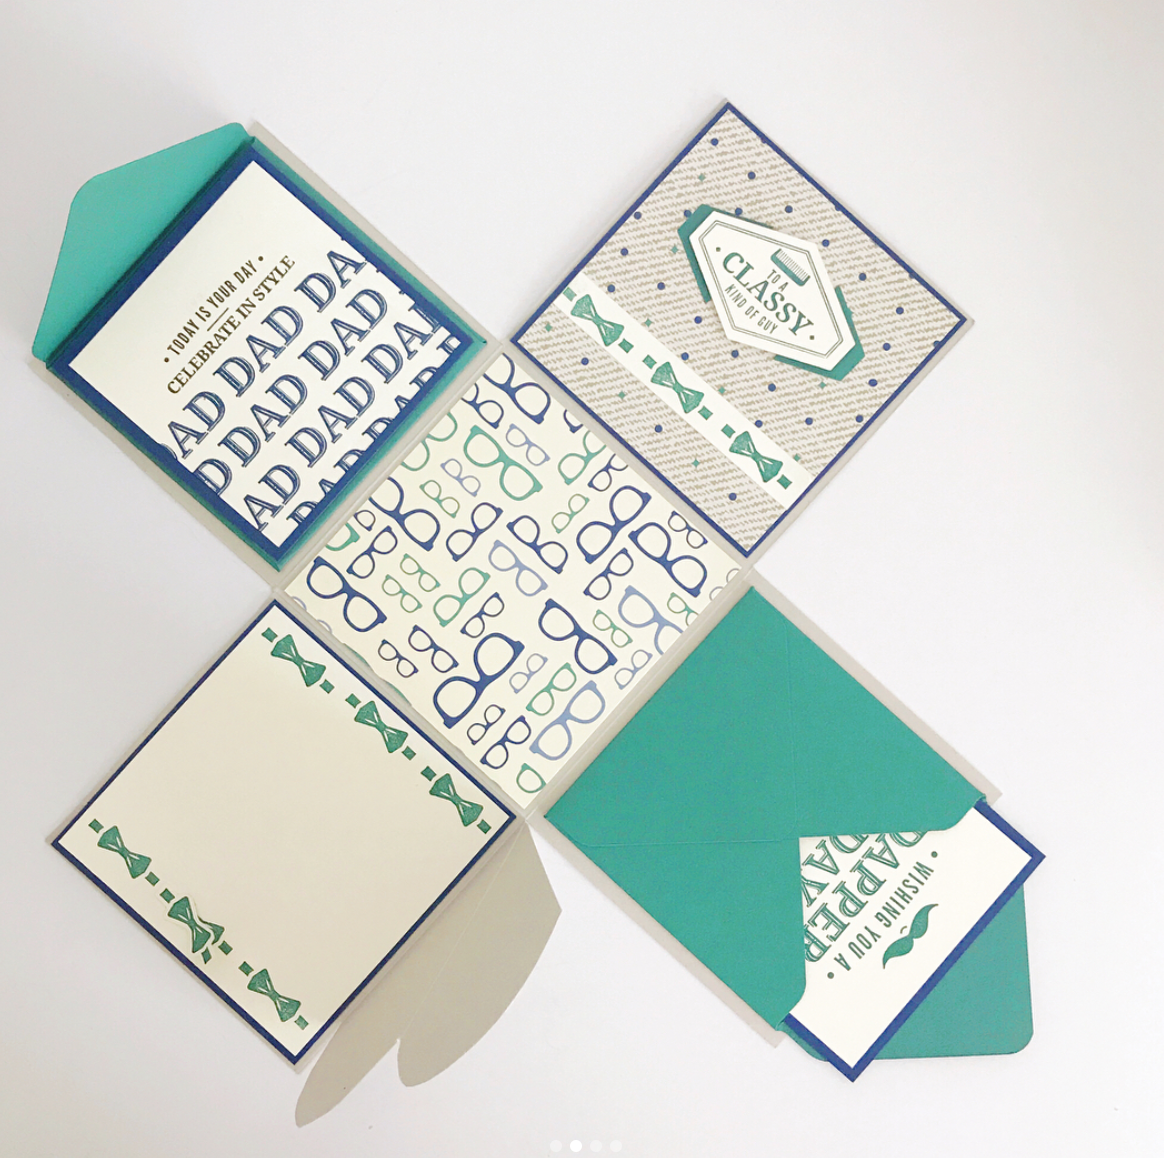
An explosion box or exploding box, whichever you prefer, is a cardstock handmade card. It starts out as a little card stock box and when you lift off the paper lid the sides fold down and outward, exploding open.
Often times the layers of card stock are decorated with photos or mini cards inside. Other times, a little gift will be hidden in the center- think earrings, candy, a tea light candle, or a rolled up dollar bill. For this example, I have added photos of the kids with dad and a few small envelopes with single layer cards in them.
Supplies
Before we get started, grab the supplies that you will need to make the father’s day explosion box. Here’s the list:
- 12″ x 12″ card stock in 4 colors
- Paper trimmer
- scrapbook paper (I really like this, this, or this)
- stamps and ink
- scissors
- printed photos
- Tombow liquid glue or tape runner
- Anything else that you want to decorate the box with: pictures, colored paper, favorite quotes, stickers
Explosion boxes have become my go-to handmade gift. They are thoughtful, relatively easy to make, can hold photos or memorabilia. The look on the dad’s face when he opens the box is priceless. We love looking at the photos and talking about the memories.
HOW TO MAKE AN EXPLOSION BOX
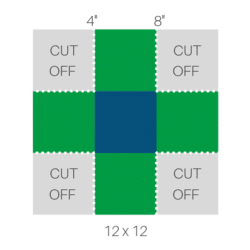
You can print this Explosion Box Template as a quick reference for the measurements. *Note: It is not to scale. You should use 12″ x 12″ card stock for the box, but the template will be printed on 8.5×11 paper.
Outer Box/Base Layer
- Score 12″ x 12″ card stock at 4″ and 8″.
- Rotate 90º and score at 4″ and 8″ again.
- Cut out corners at the 4″ & 8″ score lines.
Layer 1
- Score 11.25″ x 11.25″ card stock at 3.75″ and 7.5″.
- Rotate 90º and score at 3.75″ and 7.5″ again.
- Cut out corners at the 3.75″ & 7.5″ score lines.
Layer 2
- Score 10.5″ x 10.5″ card stock at 3.5″ and 7″.
- Rotate 90º and score at 3.5″ and 7″ again.
- Cut out corners at the 3.5″ & 7″ score lines.
Layer 3
- Score 9.75″ x 11.75″ card stock at 3.25″ and 6.5″.
- Rotate 90º and score at 3.25″ and 6.5″ again.
- Cut out corners at the 3.25″ & 6.5″ score lines.
Lid
- Cut card stock to 6.25″ x 6.25″.
- Score on all sides at 1″.
- Cut one tab on each corner.
- Decorate the lid before gluing tabs to the sides of the lid.
Decorate
Next, you can begin to decorate the layers of the explosion box. To add card stock or scrapbook paper, size down each square by 1/8″ from the layer size. For example, if the layer has 4 x 4 boxes, the decorative card stock will be 3 7/8″ x 3 7/8″. Then a scrapbook paper layer can be added to that cut to 3.75″ x 3.75″.
Keeping with the Father’s Day theme you can cut adventure themed scrapbook paper or add stickers showing dad’s interests.
Photo Tip
To make the perfect size printable photos for an explosion box I use the Project Life iPhone App (see more here) and collage two or four pictures into one, then print, cut and glue them where I need. It is a great way to get them down to a 2″x 2″ or 3″x 4″ size which fits into the boxes quite well.
More ways to decorate:
- photos of the kids and dad
- colored scrapbook paper
- favorite quotes
- stickers
- stamps and ink
- buttons
- ticket stubs/memorabilia
- mini envelopes
- notes/letters tucked into pockets
- song lyrics
- handprints/footprints of kids
- fun size candy/chocolate
Conclusion
There are many ways to decorate your Father’s Day Explosion Box. And with these directions, I have demystified the cuts and measurements for you. Grab your craft supplies and make this one of a kind gift for your loved one! Below is a measurement cheat sheet and the entire layers downloadable PDF for you to print and use as a how to guide.
Measurement Cheat Sheet
Here’s one more resource for those of you who can figure it out with the measurements in front of you and don’t want specific directions or fluff.
Explosion Box Template (pdf- click to download)
- Outer box: 12 x12 paper; score & cut at 4″, 8″
- 1st layer: 11.25″ x 11.25″; score & cut at 3.75″ & 7.5″
- 2nd layer: 10.5″ x 10.5″; score & cut at 3.5″ & 7″
- 3rd layer: 9.75″ x 9.75″; score & cut at 3.25″ & 6.5″
- Lid: 6 1/4″ x 6 1/4″, scored at 1″ on all sides. Cut tabs.
Happy crafting and I hope you’ve enjoyed How to Make an Explosion Box for Father’s Day. Feel free to email me photos of your creation!
Resources:
A great Instructable on Explosion Boxes and Pockets
Inexpensive Glass Pebble Magnet Craft




1 thought on “How to Make an Explosion Box for Father’s Day”