
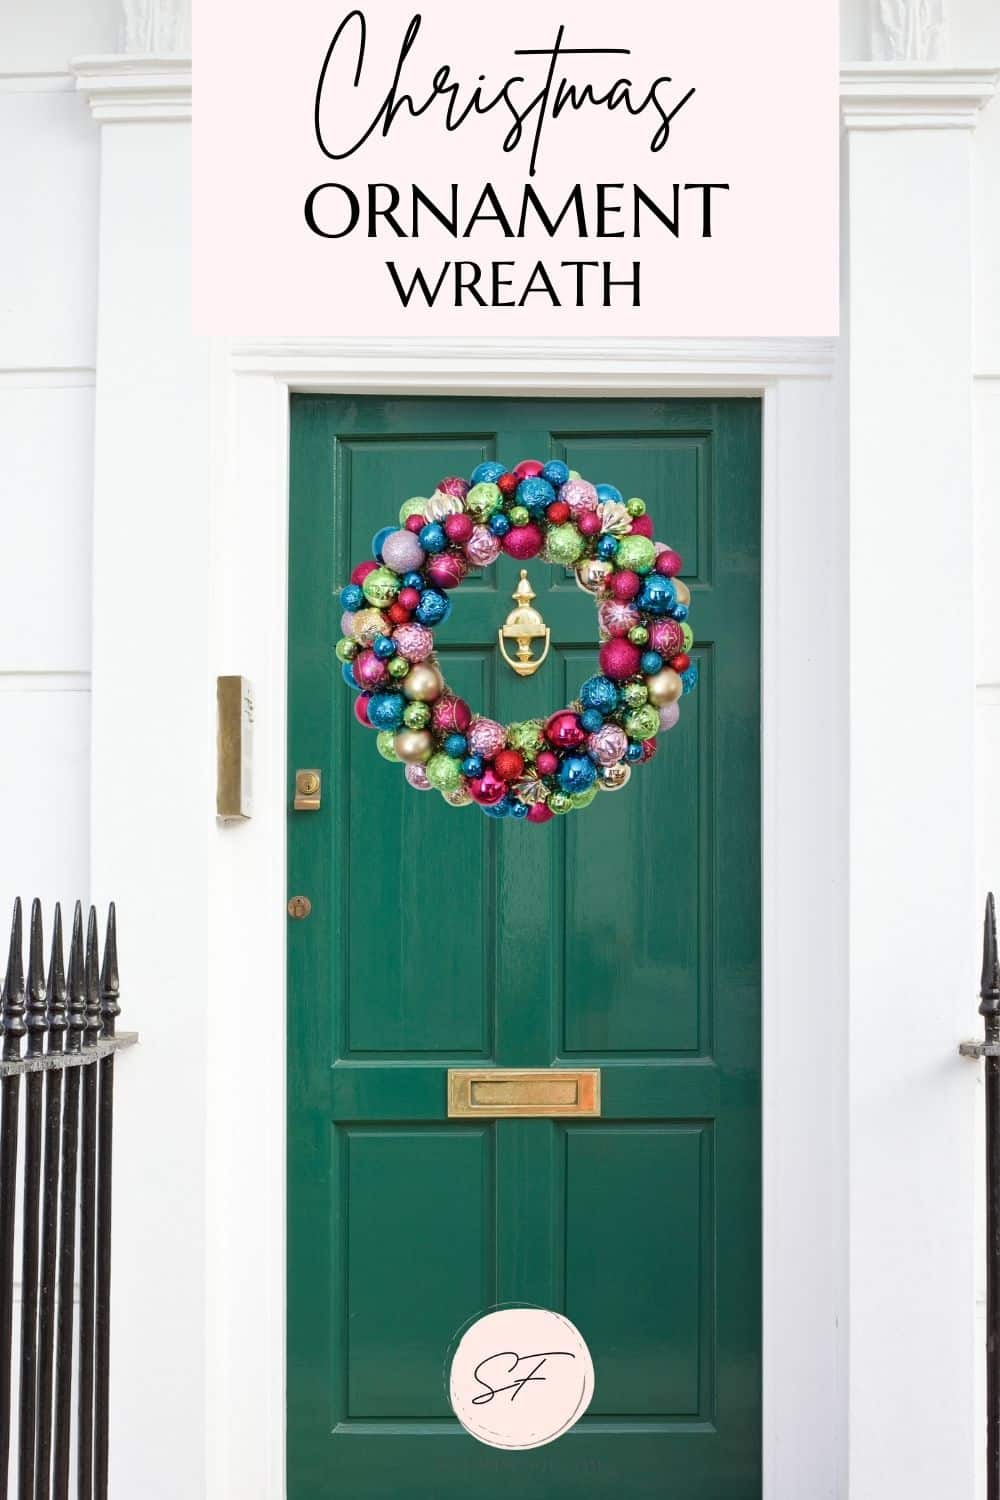
HOW TO MAKE A DIY CHRISTMAS ORNAMENT WREATH (2022)
Easy step-by-step tutorial to learn how to make a DIY Christmas Ornament Wreath. Add color to your front door with a vintage style handmade ornament wreath.

How to Make An Ornament Wreath
I love a good DIY Christmas craft, don’t you?
Are you ready to learn how to make a DIY ornament wreath? I am so excited to share this tutorial with you. I know you are going to love the end result!
This step by step tutorial will teach you how to make an ornament wreath in no time.
LASY MINUTE DIY CHRISTMAS DECOR
If you’re like me, you may often find yourself scrambling at the last minute to throw something together for a holiday, hostess gift, teacher present, or school costume.
The same goes for Christmas decor. I sometimes slip up and wait until the last minute to get it all done and find myself searching for DIY decorations. Here is my short list of super simple last minute Christmas decor that you can quickly and easily put together in a moments notice.
- Wreaths
- Ornaments
- Garland
- Candles
- Snowflakes
- Tablescape
YouTube Tutorial for How to Make A DIY or Vintage Ornament Wreath
Before we jump in, I’ve done all the hard work for you. This simple to make ornament wreath is even easier with this step by step video tutorial. I suggest reading the post or watching the video first so you have an idea of what to do.
Then gather your supplies and pull the video and instructions back up so that you can follow along. Pause the video at each step and work alongside me to make this gorgeous holiday ornament wreath.
You can go about making this wreath a few different ways. Let’s talk about the most common combinations so that you can start thinking about what color way wreath you want to make.
Vintage
If you have a large vintage ornament collection or run across them at a thrift store, they make bright, bold wreaths. Shiny Bright vintage ornaments are heavy glass and come in different shapes and sizes. I love the divots and stars of these ornaments.
If you don’t own any, in addition to thrifting, you can purchase them on Etsy or Ebay. Be cautious of the safety of the materials- there is a possibility of mercury in some of them. You can buy realistic dupes (modern, but look vintage) Christmas ornaments at Anthropologie, World Market & West Elm, both online and in store.
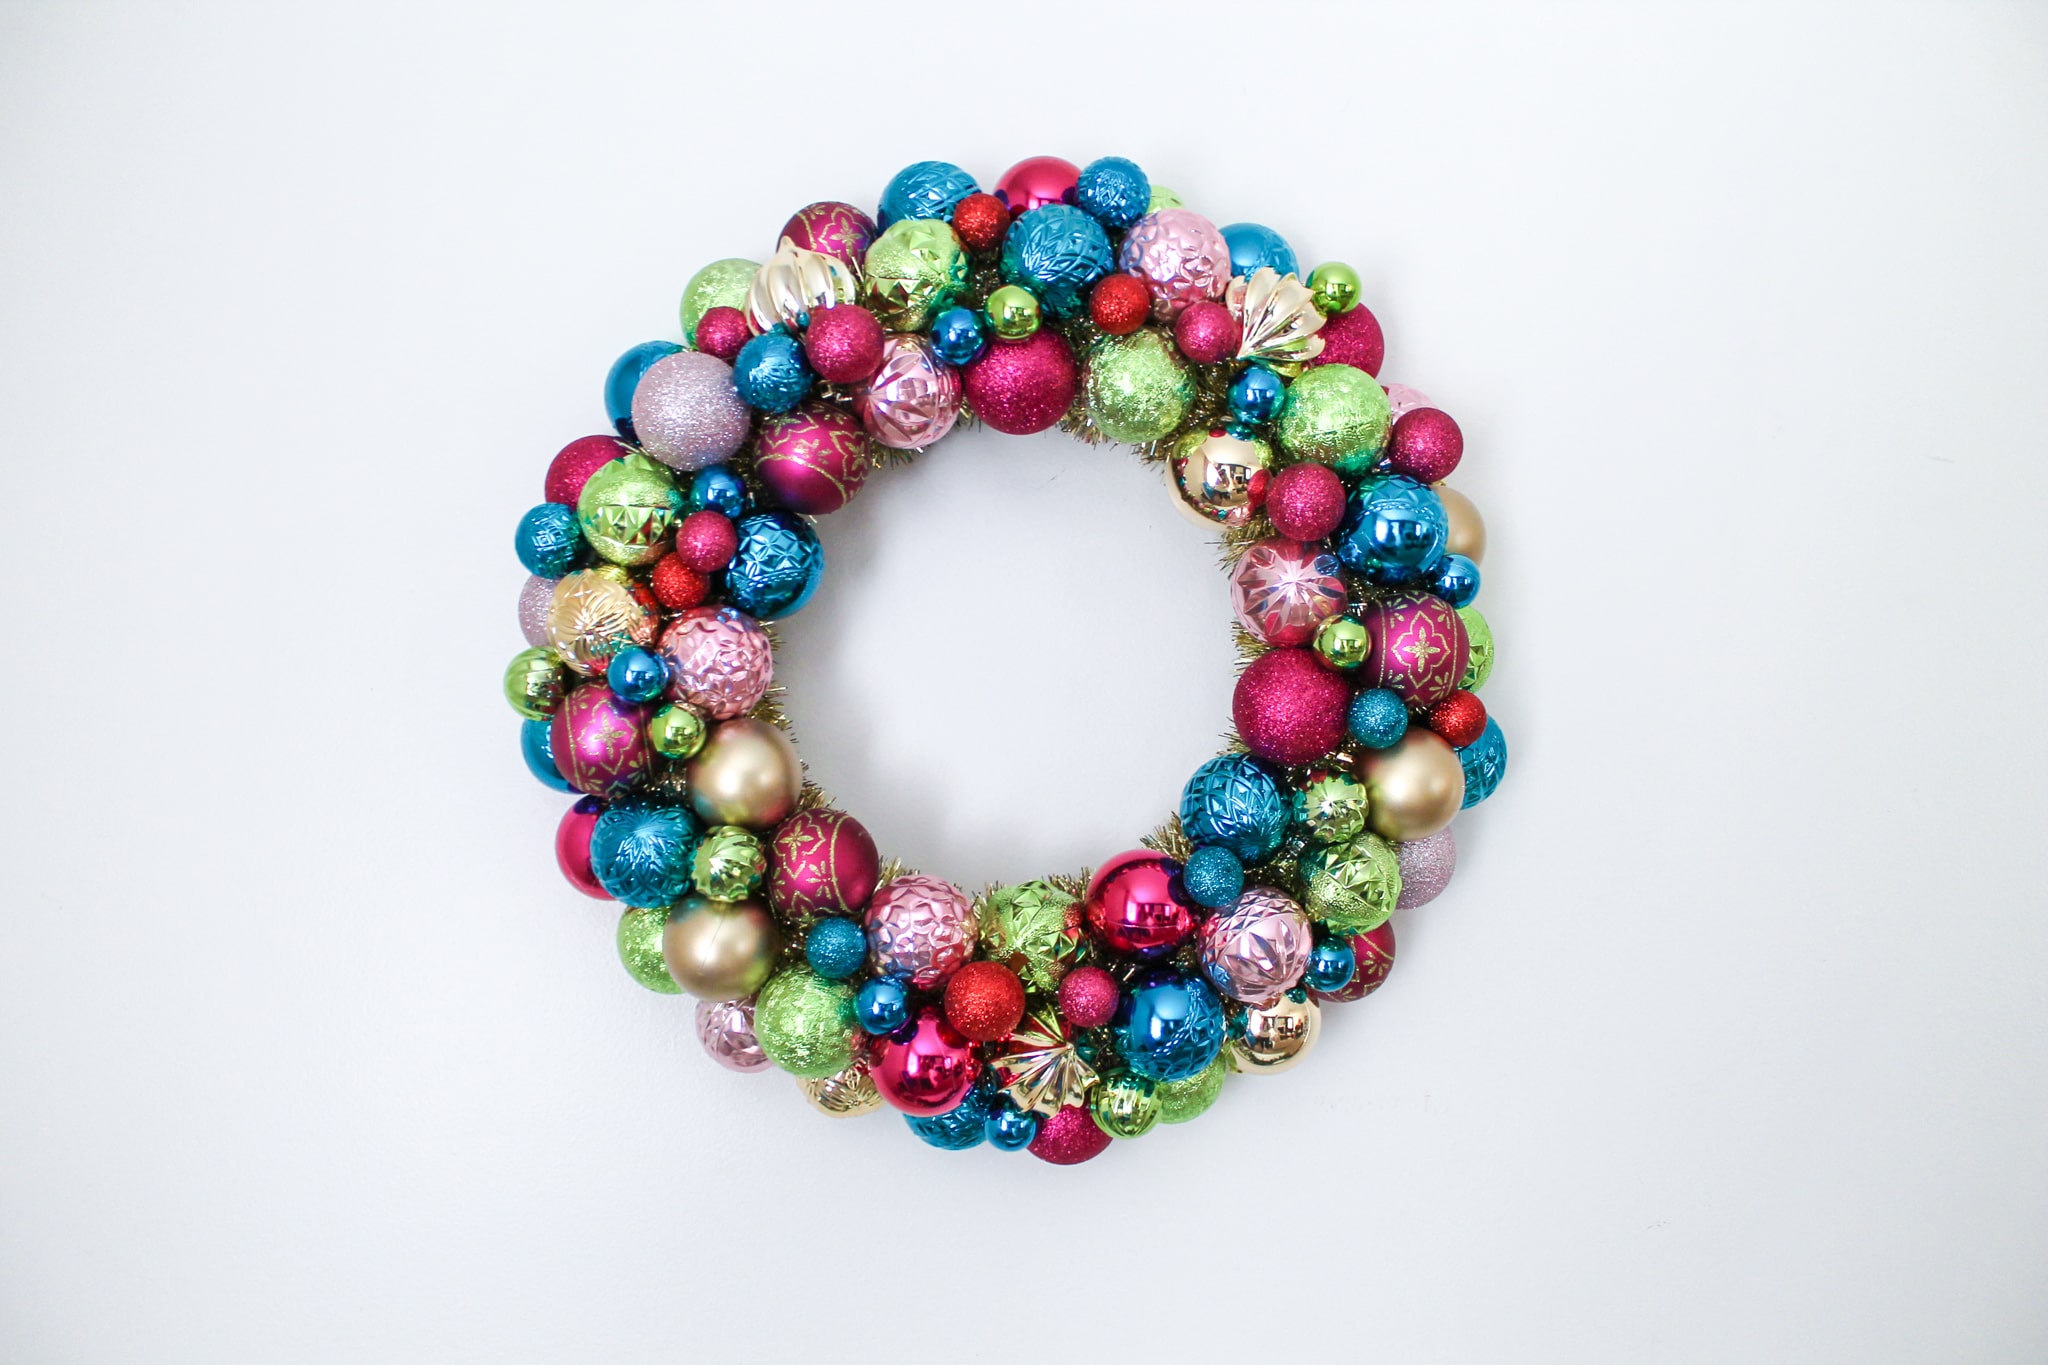
Colorful
Next up is a bright, colorful wreath made with pink, green, blue and purple baubles. The beauty of DIY is that you can customize your wreath in any way that you want. You can make it with primary colors, or pinks and purples or all blues and greens. Any of these combinations would make for a special wreath that matches your decor or represents your personal style.
Monochromatic
Lastly, is the monochromatic marvel. Monochromatic means using only one color, sometimes in varying shades. For this type of ornament wreath, you could use silver or gold or even varying degrees of greens or blues. The main goal would be keeping it all of the ornaments in one color family for a solid color wreath.
Have you decided what type of ornament wreath you want to make? Now that you have an idea, you’ll know which ornaments you’ll want to buy.
Project Time
This project will take: 35 Minutes
Project Cost
The cost of the supplies is: $35
I priced similar wreaths at a few home decor stores. They ranged from $49.99 to upwards of $200 depending on the ornaments used.
You can’t buy a huge, beautiful wreath like this for the same cost of making it. I love a good deal & a good DIY! Are you ready to get started?
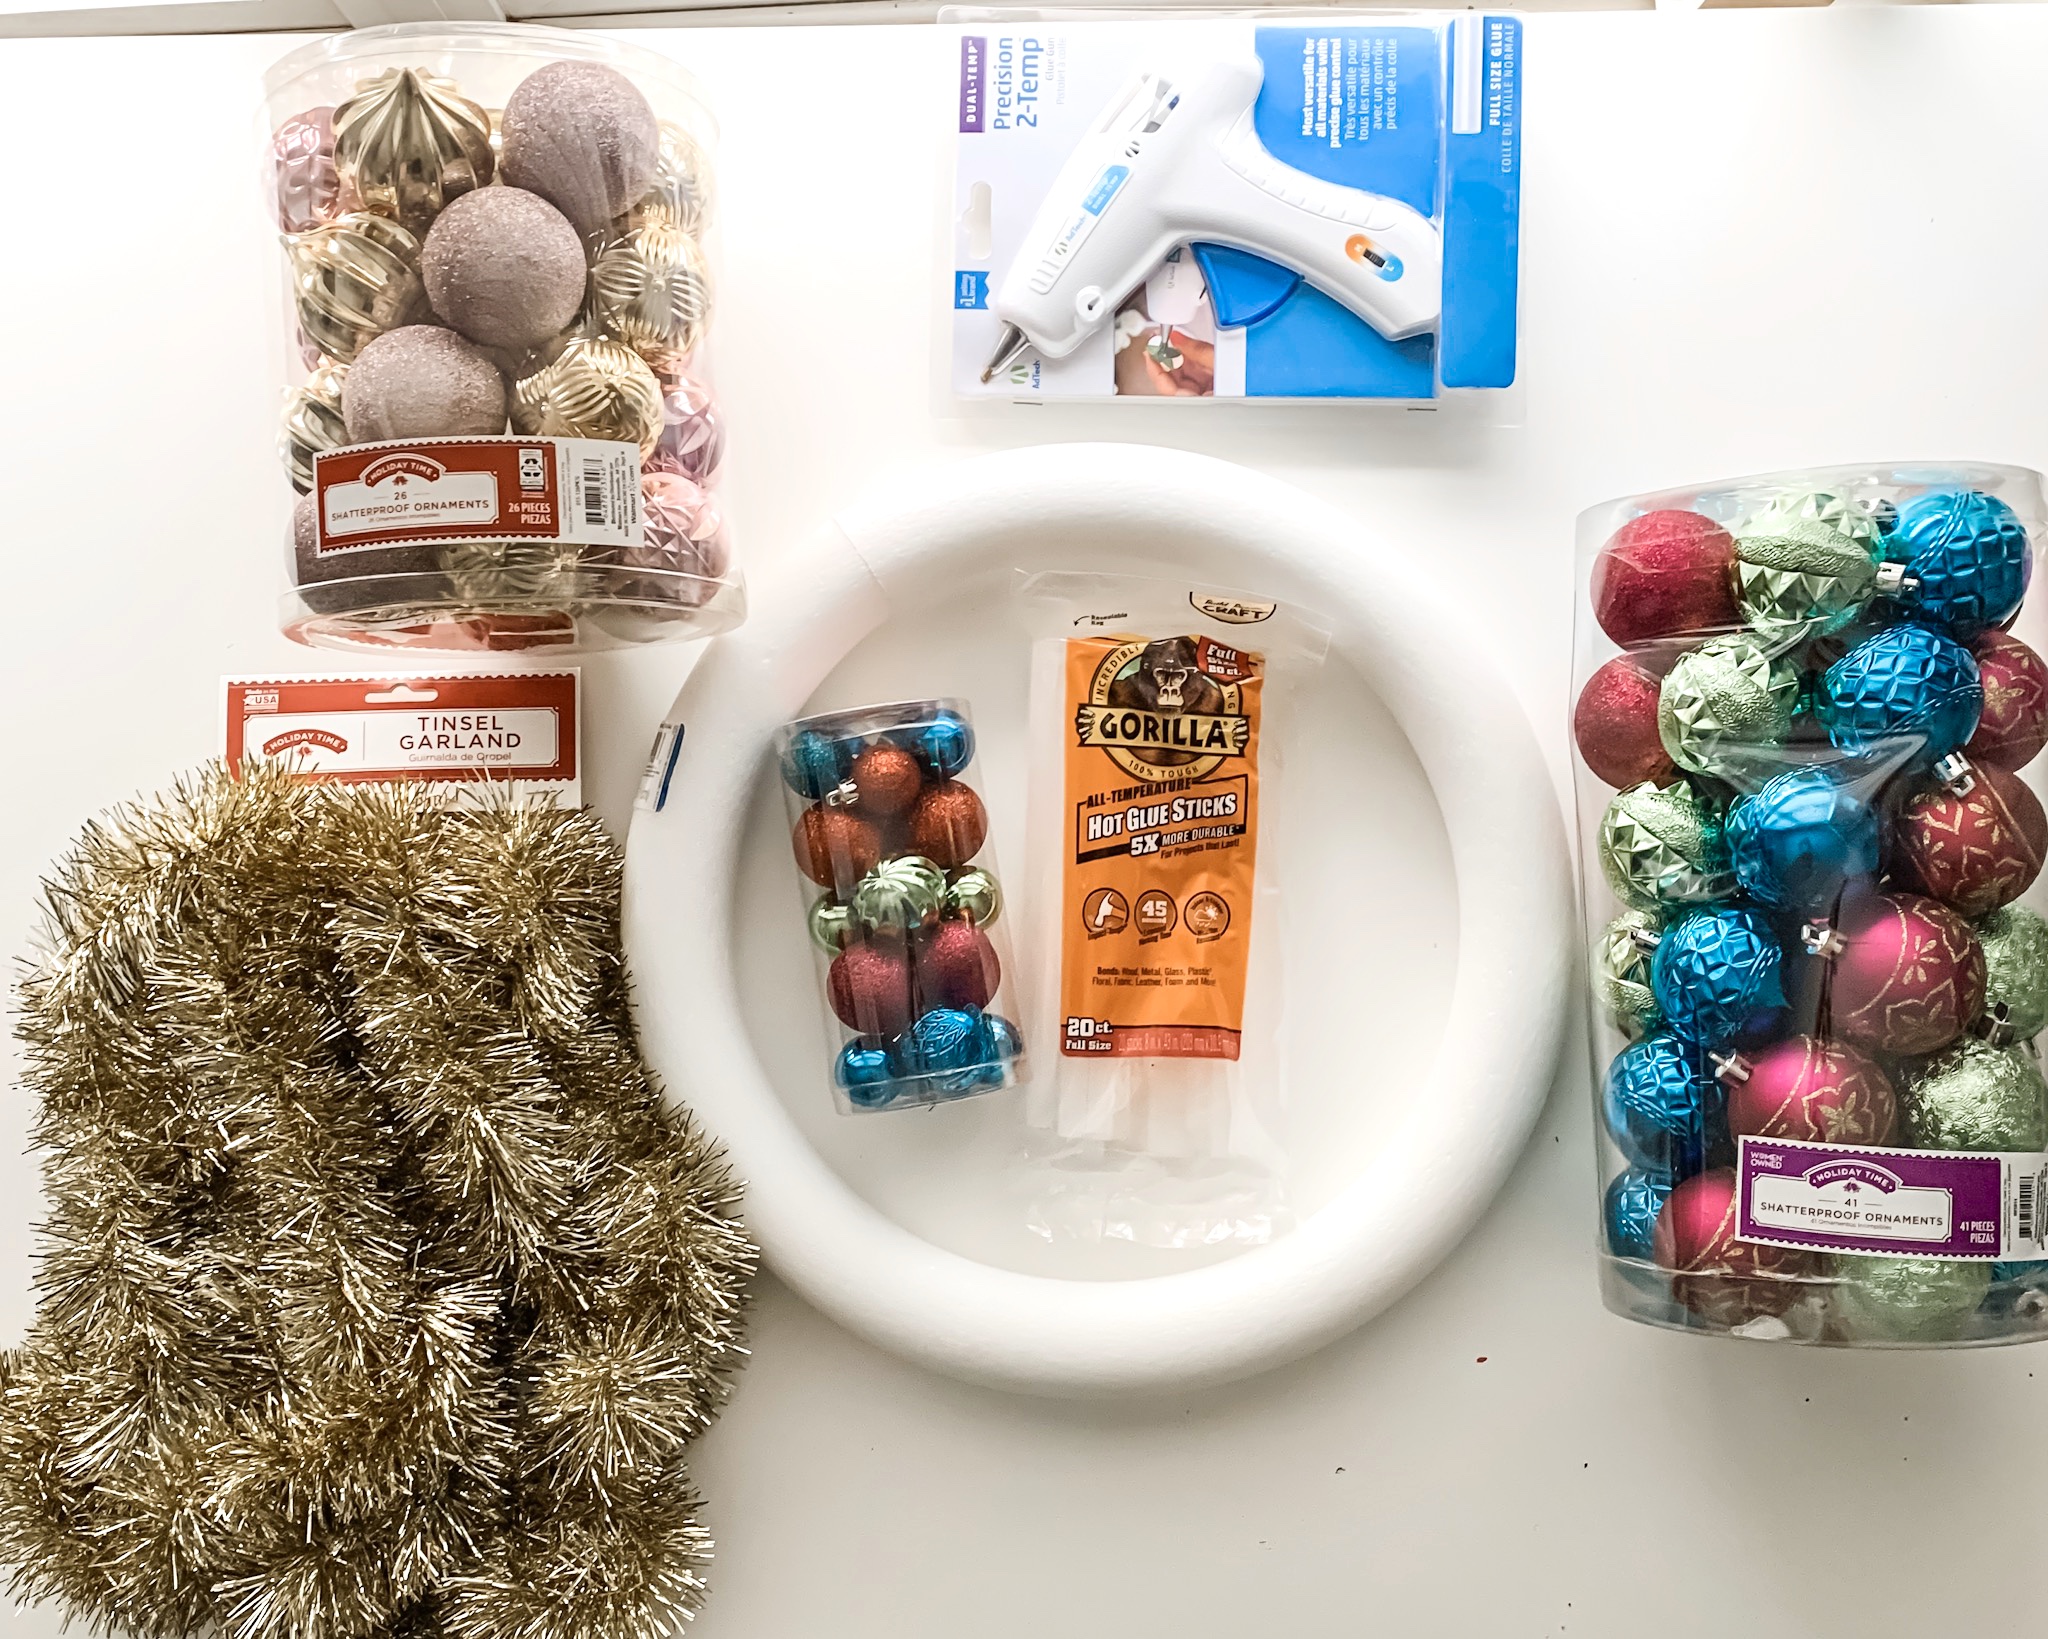
Ornament Wreath Supplies
This post contains affiliate links- meaning when you purchase through the link and I receive a small commission. It feeds my Starbucks addiction & for that I thank you! You can see my full disclosure policy here.
- High heat hot glue gun
- Gorilla large glue sticks
- 15″ foam wreath form
- 15′ thick tinsel garland
- Silicone craft mat
- 90 Shatterproof ornaments in multiple sizes & shapes
Here is a breakdown of why I specified these supplies:
- The foam wreath form needs to be large, but not huge. At 15″- 16″, it’s a good size, but not too heavy or too bulky.
- Tinsel garland. I’m not sure how to describe the thick, full tinsel garland other than you will know it when you see it. It will be shorter in length than the thin garland. It should be around $3-$4 for 15 feet. There will be skinny garland, but you’ll want to skip over that and go for the good stuff. Buy two packages of it so that you have a fully covered wreath.
- A silicone craft mat is a must. It’s a small floppy silicone craft sheet that is used for gluing. Because it is silicone, the glue doesn’t stick. It peels off easily and is great to catch glue gun drops or wipe off glue strings. It comes in around $4 for a 6-8″ mat. It’s also called a glue gun mat, craft sheet, silicone sheet, non stick craft mat. They come in all sizes, but for most projects the small one will do the trick.
- For the shatterproof ornaments, you will need approximately 75-90 ornaments to fill the 15″ wreath form. I purchased a set of 40 multi colored, a set of 25 silver and gold, and 2 packs of 20 mini baubles. I would classify the sets at medium/standard.
- There is no size listed, but this was the most common ornament pack at Walmart. I did see larger ornaments (in a smaller quantity pack), but they look too large to fit well on the wreath. The best advice I can give is to go with a large quantity of ornaments that are about the size of a cuties orange, but smaller than an apple.
- Go for more! You can definitely go bigger and fuller. So if you are up for challenge, buy 100-125 ornaments and make your wreath fuller.
HOW TO MAKE A DIY CHRISTMAS WREATH WITH ORNAMENTS Step-by-step Instructions
1. Gather supplies
Gather all of your crafting supplies. You’ll want to have a large workspace with your supplies laid out. Plug in your glue gun to get it warming up. I used high heat because I’m dangerous, kidding- I’m impatient.
If you want to get fancy with vintage ornaments, you’ll need to plan ahead. Buy them in the off season from eBay or online vintage Instagram sales. Shinybrite ornaments are gorgeous! I suggest unboxing the ornaments and putting them into open bins so that they are easy to grab.
Unwrap the garland and have it ready to go.
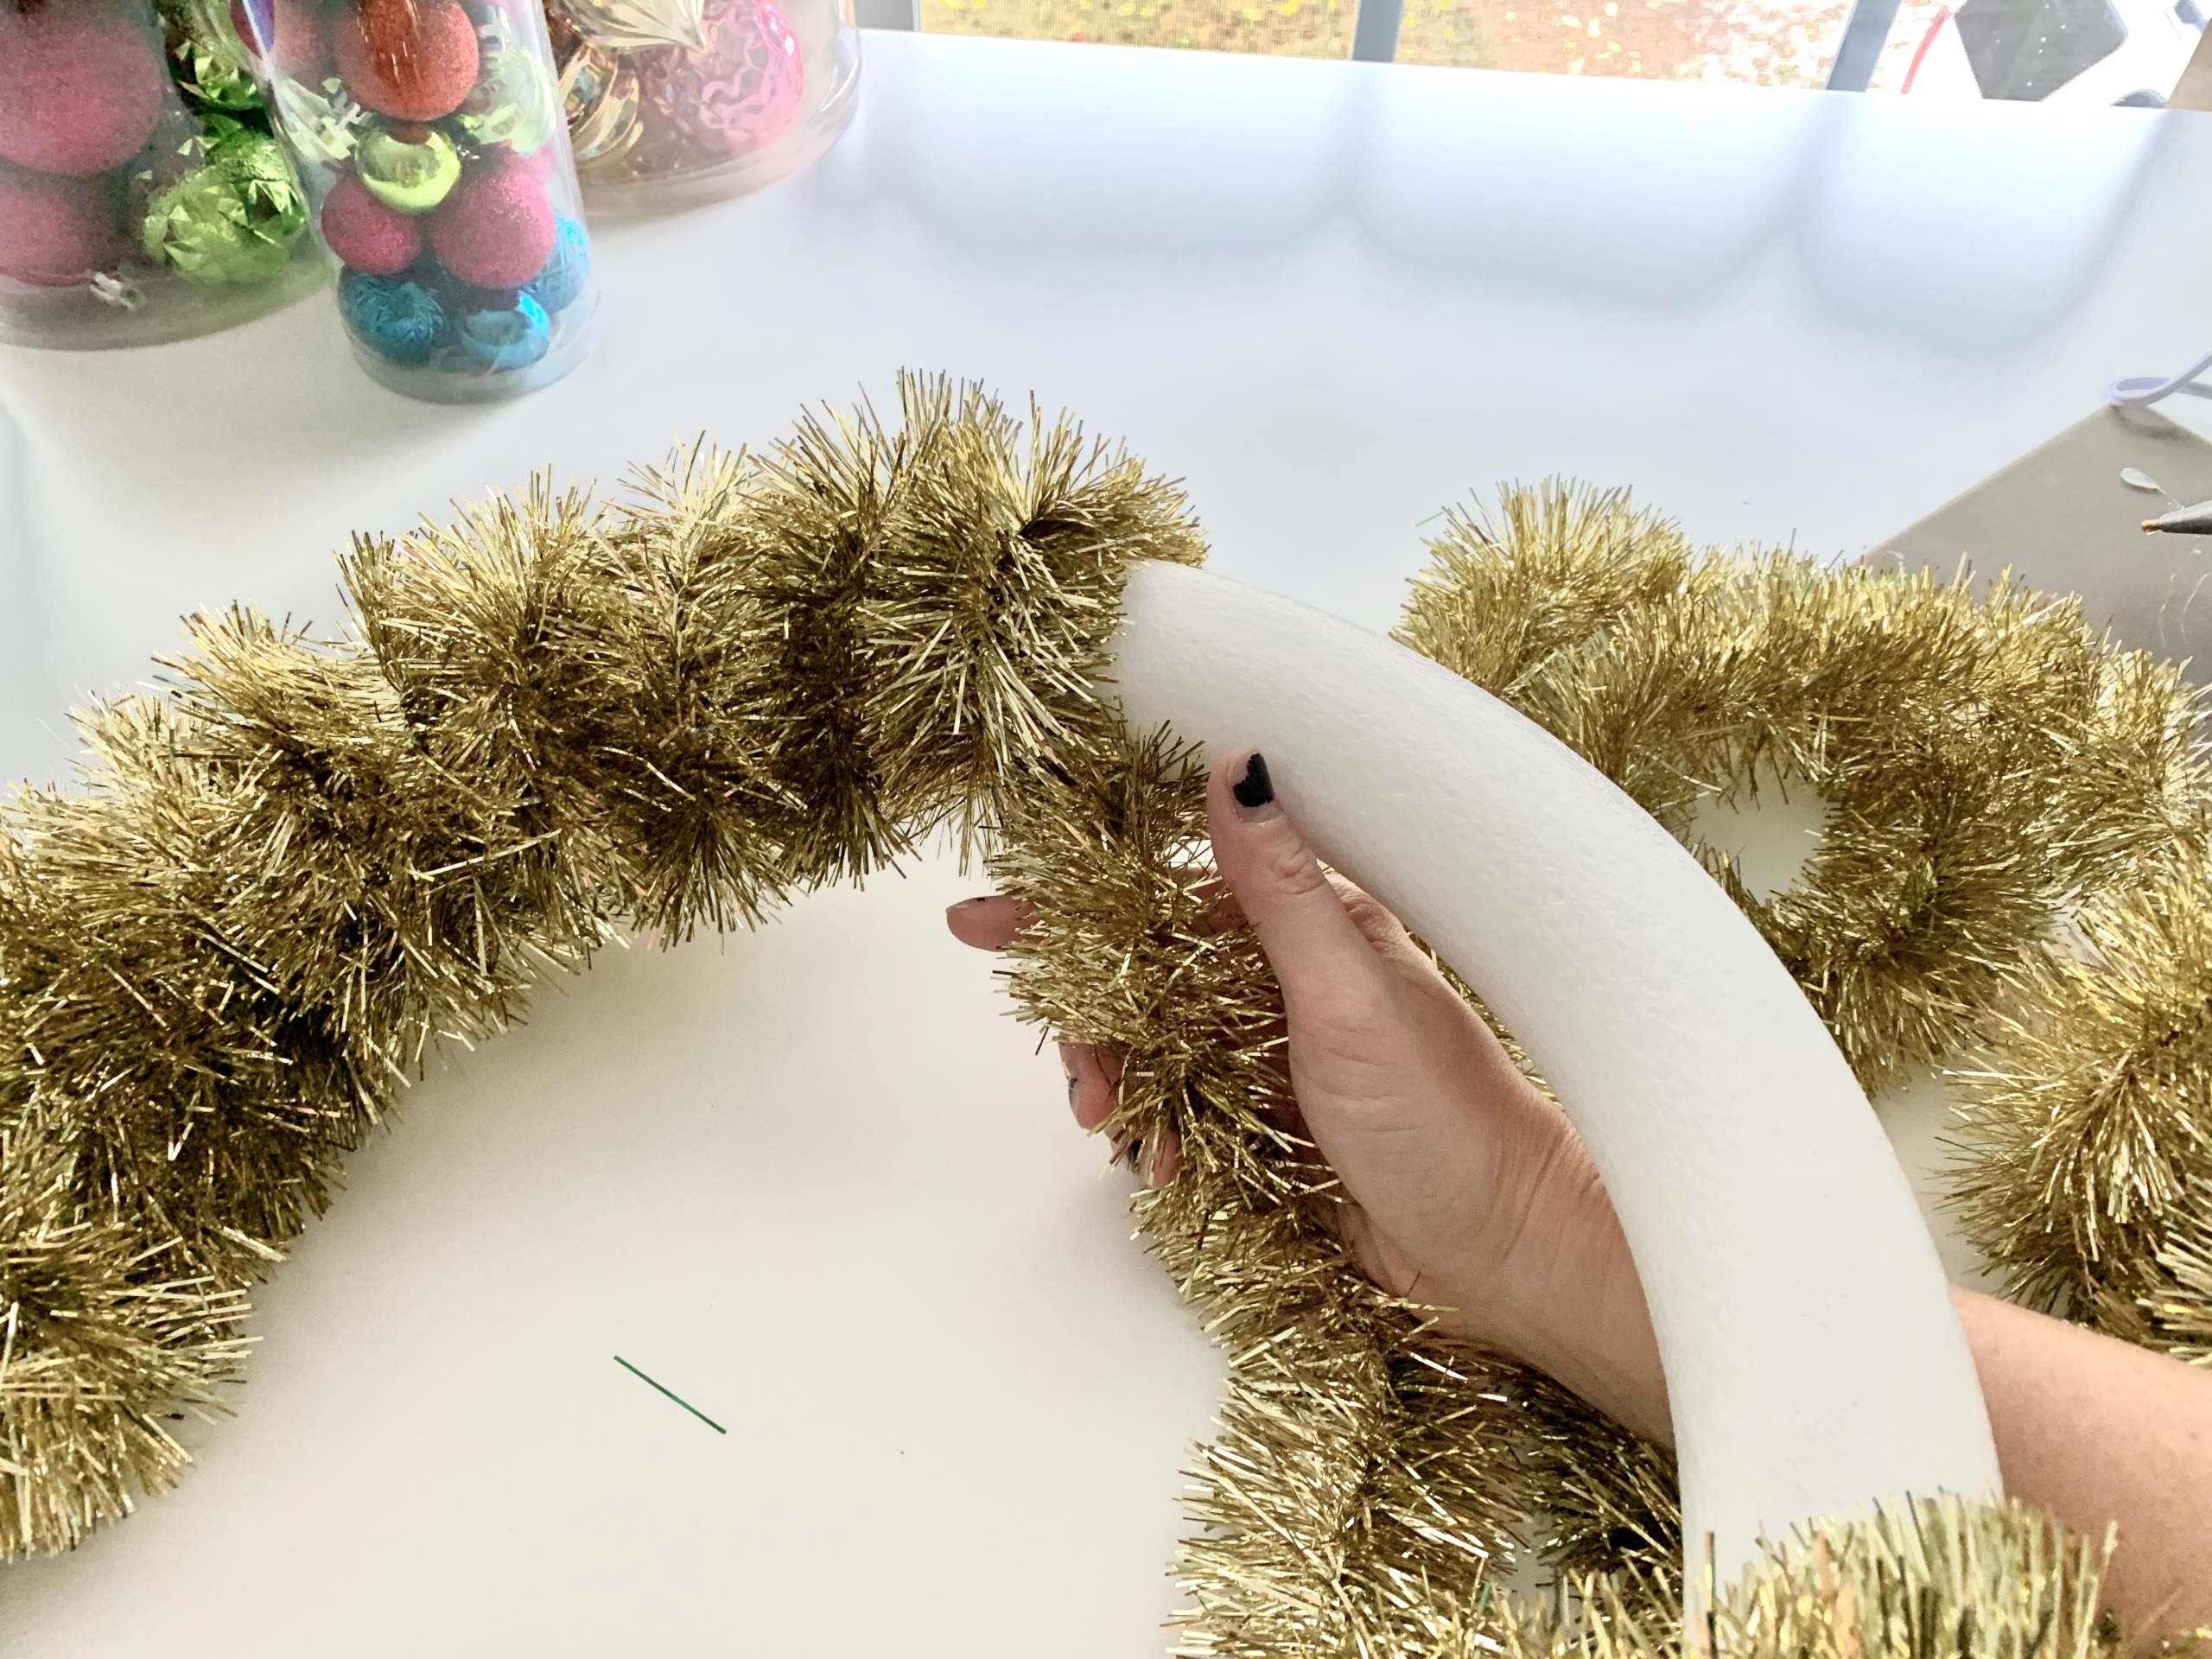
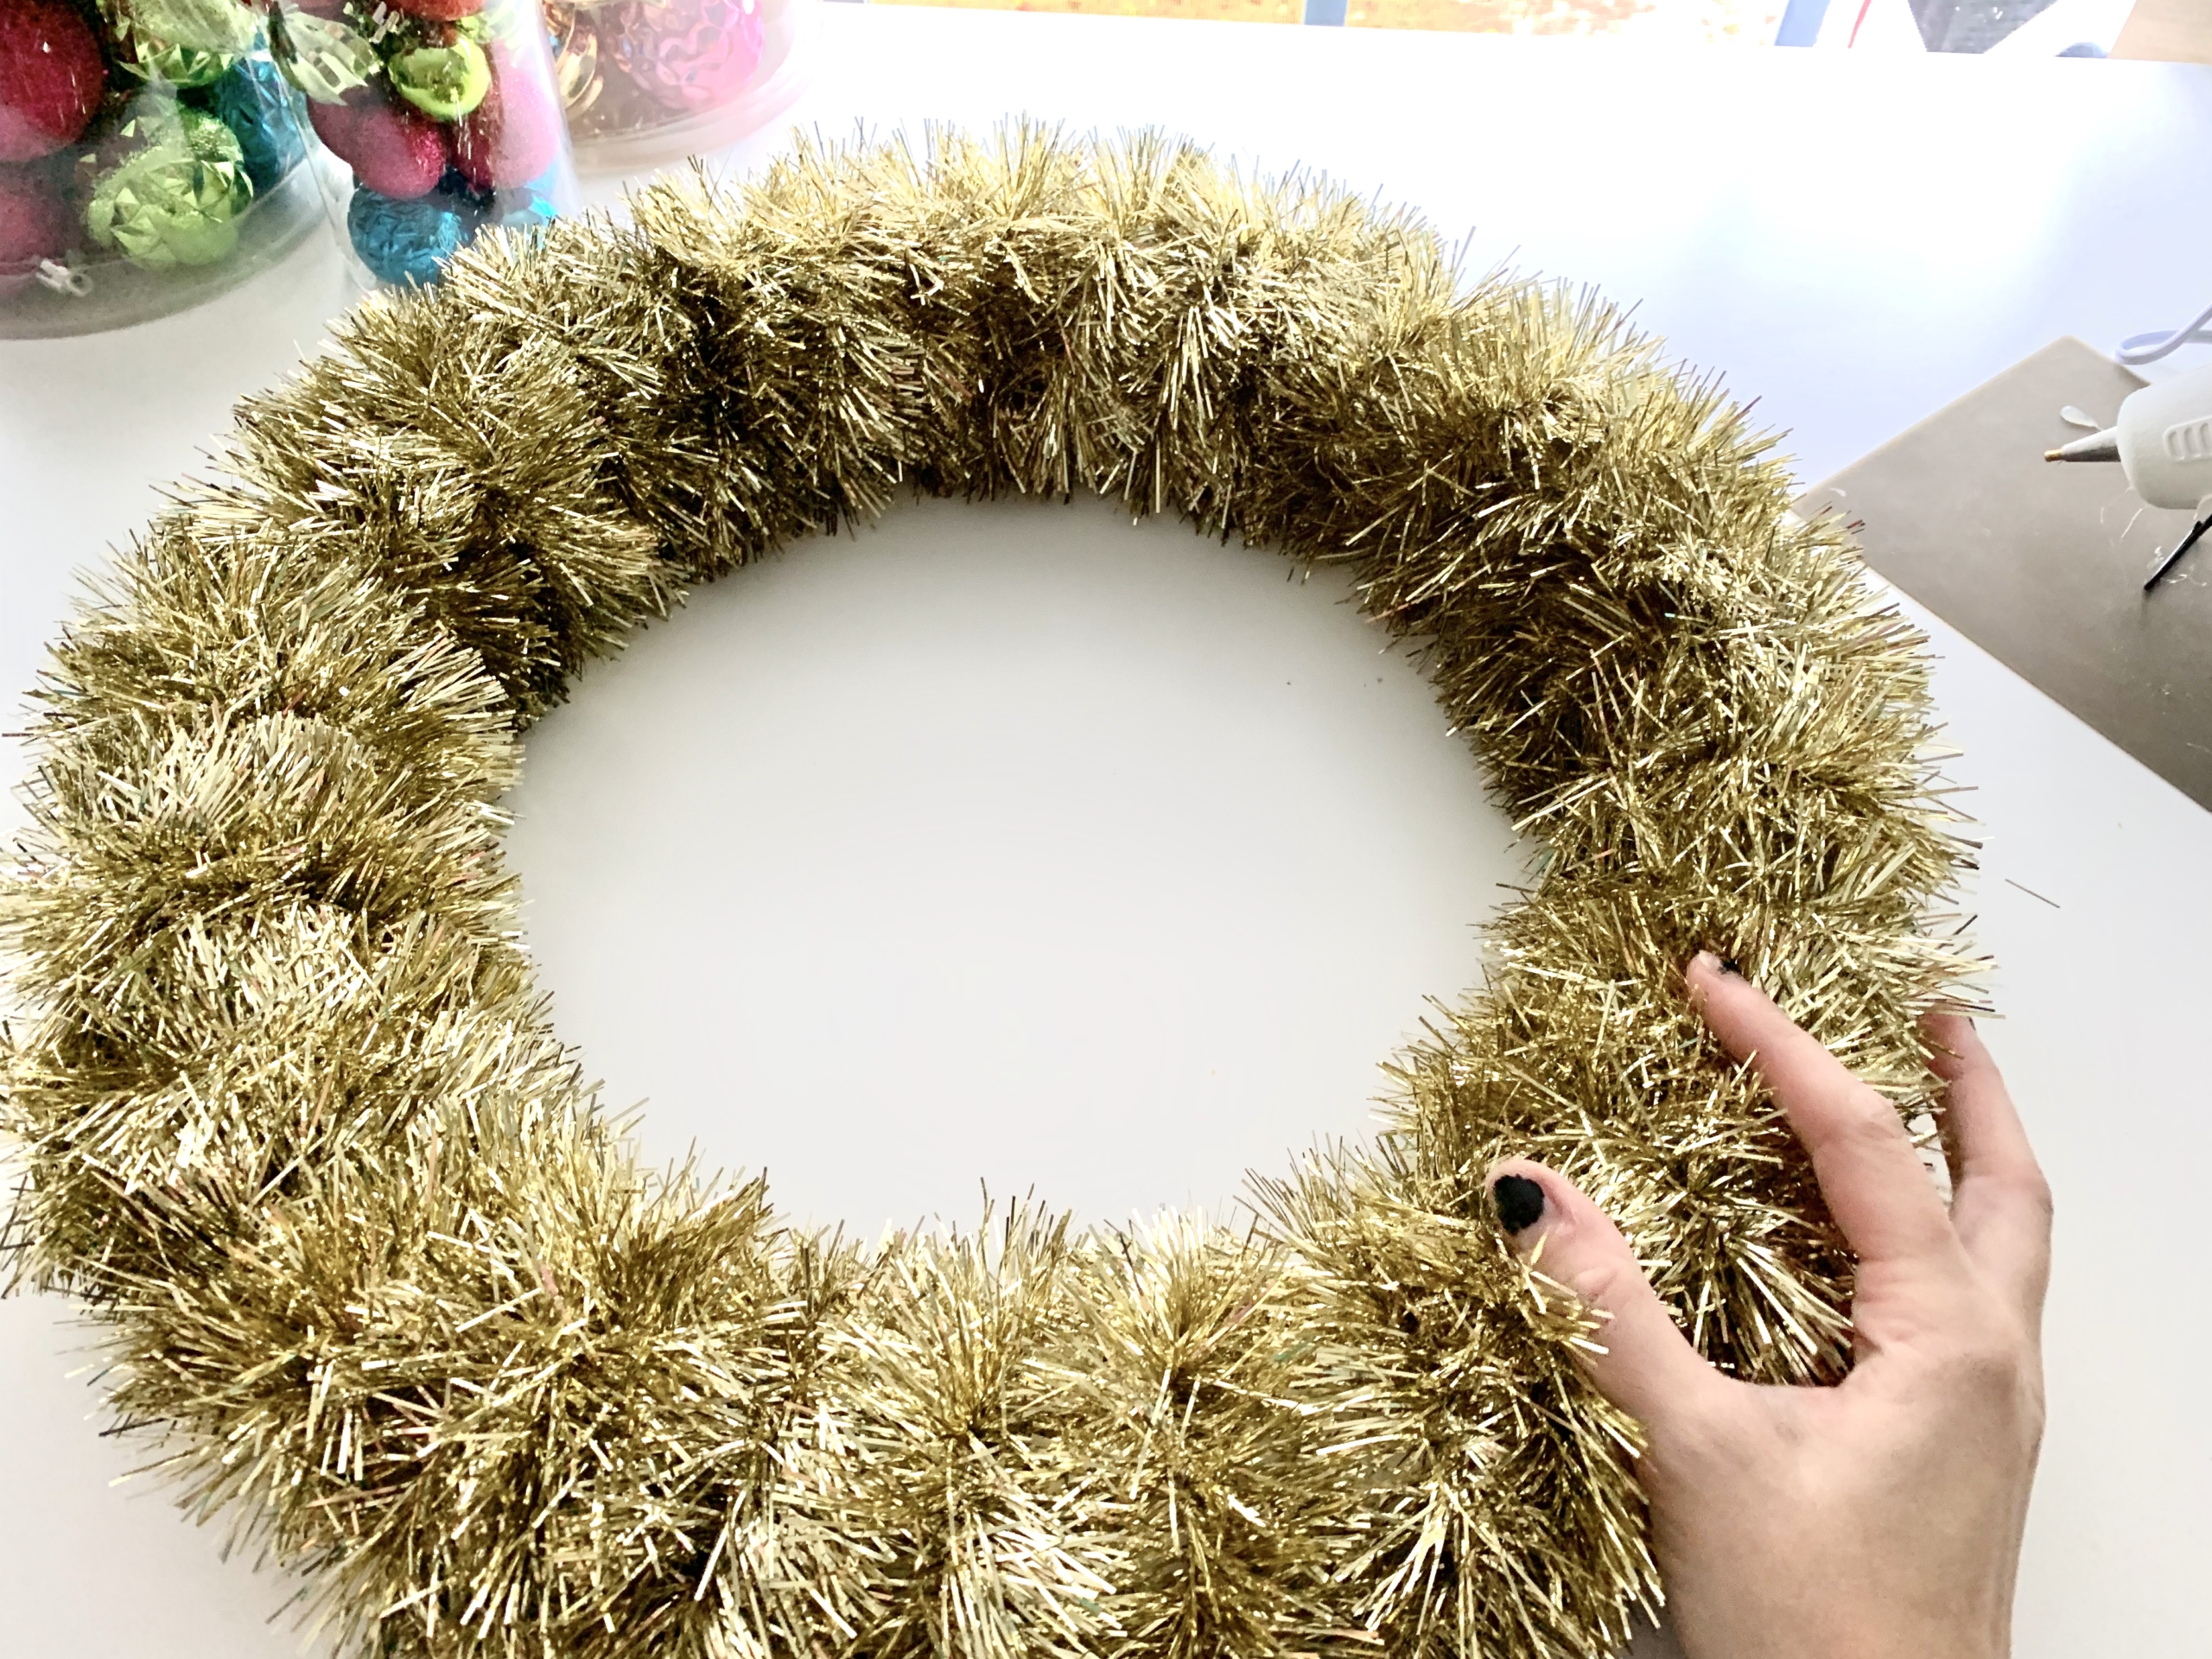
2. Wrap the wreath
To begin, place a blob of hot glue on the wreath. Press the start of the tinsel garland into the glue and hold for a few seconds. This will be the back of the wreath. You should work with this side up.
Prepare the rest of the wreath by wrapping the tinsel garland around the wreath form gluing every few turns.
With 15′ garland you will need to start a new strand 3/4 the way around the wreath. Start with a blob of glue and holding the new strand. Repeat the wrapping and gluing every 3-4 turns until you have finished.
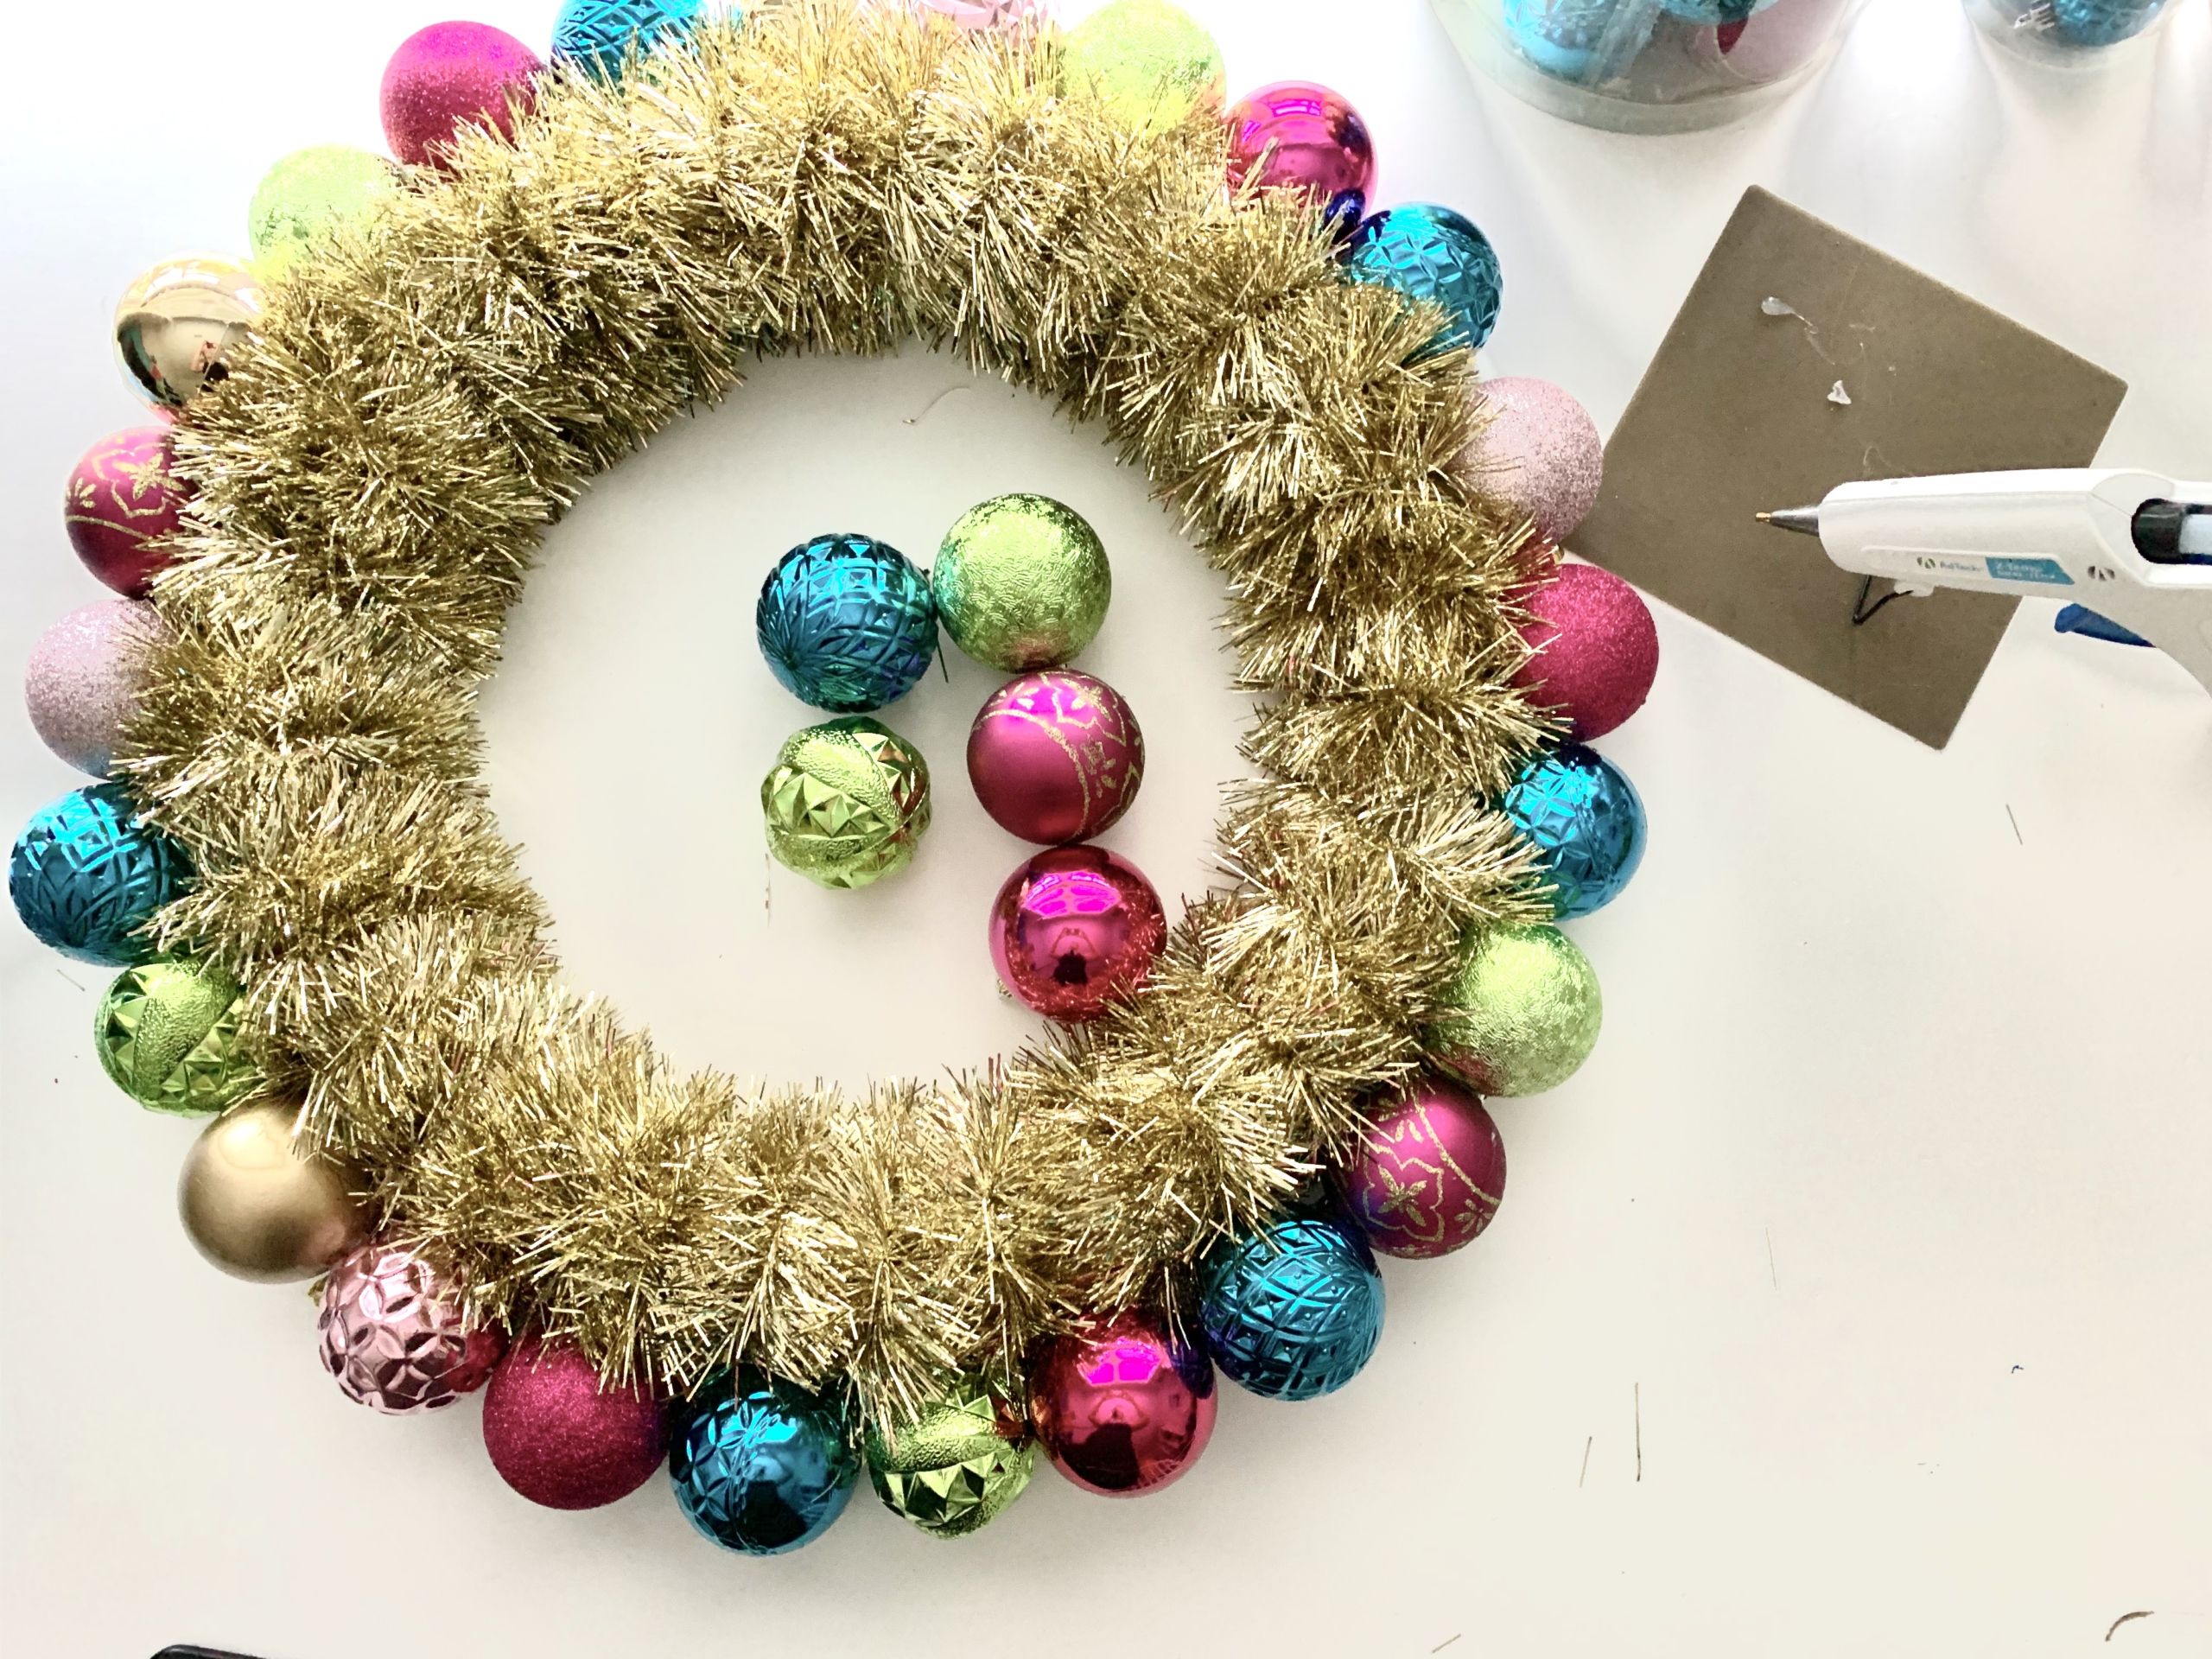
3. Begin Gluing the Outer Ring
After the wreath is entirely wrapped with garland, it’s time to begin gluing ornaments around the outer ring of the tinsel covered wreath. First, flip the wreath over so the start of the garland is on the back.
Luckily for you, I have tried this a number of ways and figured out what works and what doesn’t. The most effective way to get the ornaments to hold well is to put a blob of hot glue on the tinsel and hold the ornament to the glue firmly for a few seconds.
At first it will feel loose, but after a minute it will be firm. You don’t need to hold the ornament the entire time it’s drying. By the time you finish with the outer layer of ornaments, the first ones you glued will be firm and won’t wiggle.
Tips:
- Glue the ornaments on the wreath with the hanger side down or towards the back. You don’t want those to show.
- Make contact with the tinsel as the hot glue holds the ornament better than to the wreath form or by putting the glue directly onto the ornament.
- For the outside rim, dab a small dot of glue in between the two ornaments side by side.
- Alternate colors so that the same color baubles aren’t next to each other (unless your wreath is monochromatic)
4. Glue front facing ornaments
You’re making progress. You’ve finished the outside rim of the wreath. Now you can start gluing the same standard size ornaments around the wreath to fill in a second row from the outermost ring.
After you have filled in the second row, make a third row it ornaments.
Both of these rows will be the front facing ornaments.
I did not fill the inside rim of the wreath form. It felt too bulky.
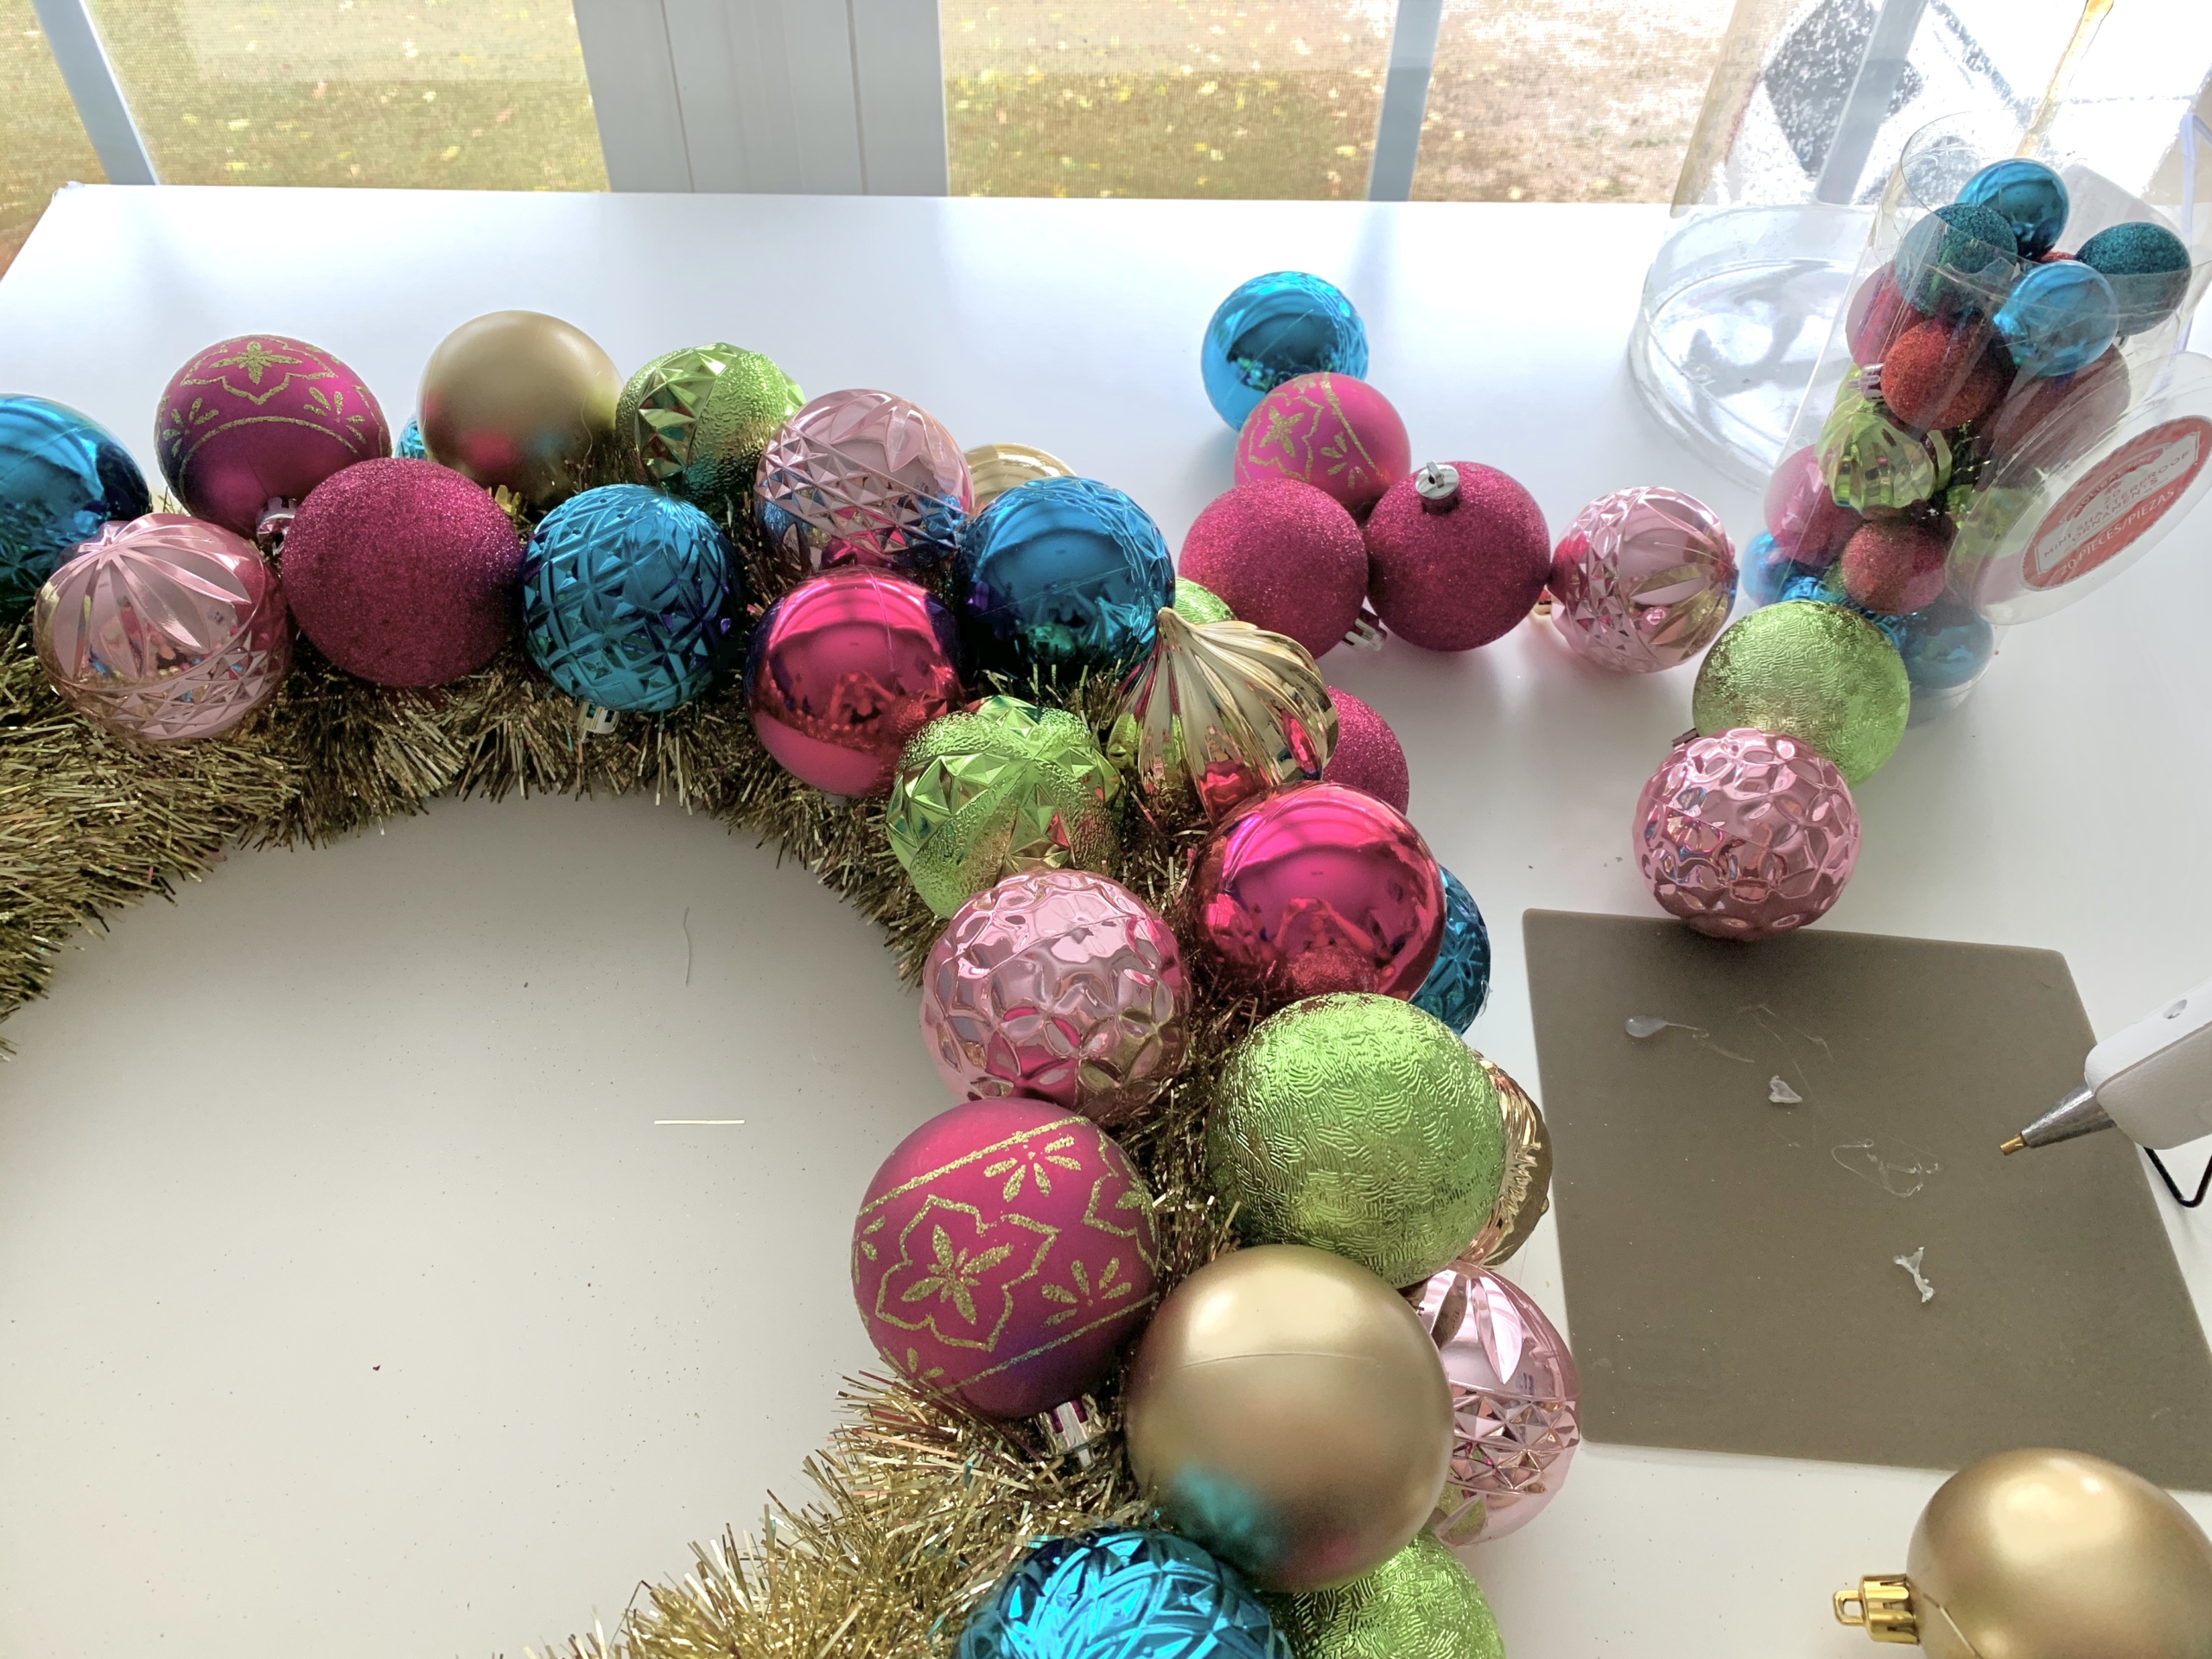
5. Fill in with Mini Baubles
Next, fill in the remaining gaps with small or mini ornaments. This is also a good time to use your specialty ornaments or vintage costume jewelry.
For these small ornaments, place a ring of hot glue around the bottom 1/3 of the mini ornament and press it into the gap between the standard size ornaments. Keep filling in until the wreath is fully covered and there are no gaping holes.
For this 15″ wreath form, it took two 40 mini bauble ornaments to fill in all of the gaps on the face of the wreath. I also had enough to fill in any gaps on the sides and outer ring.
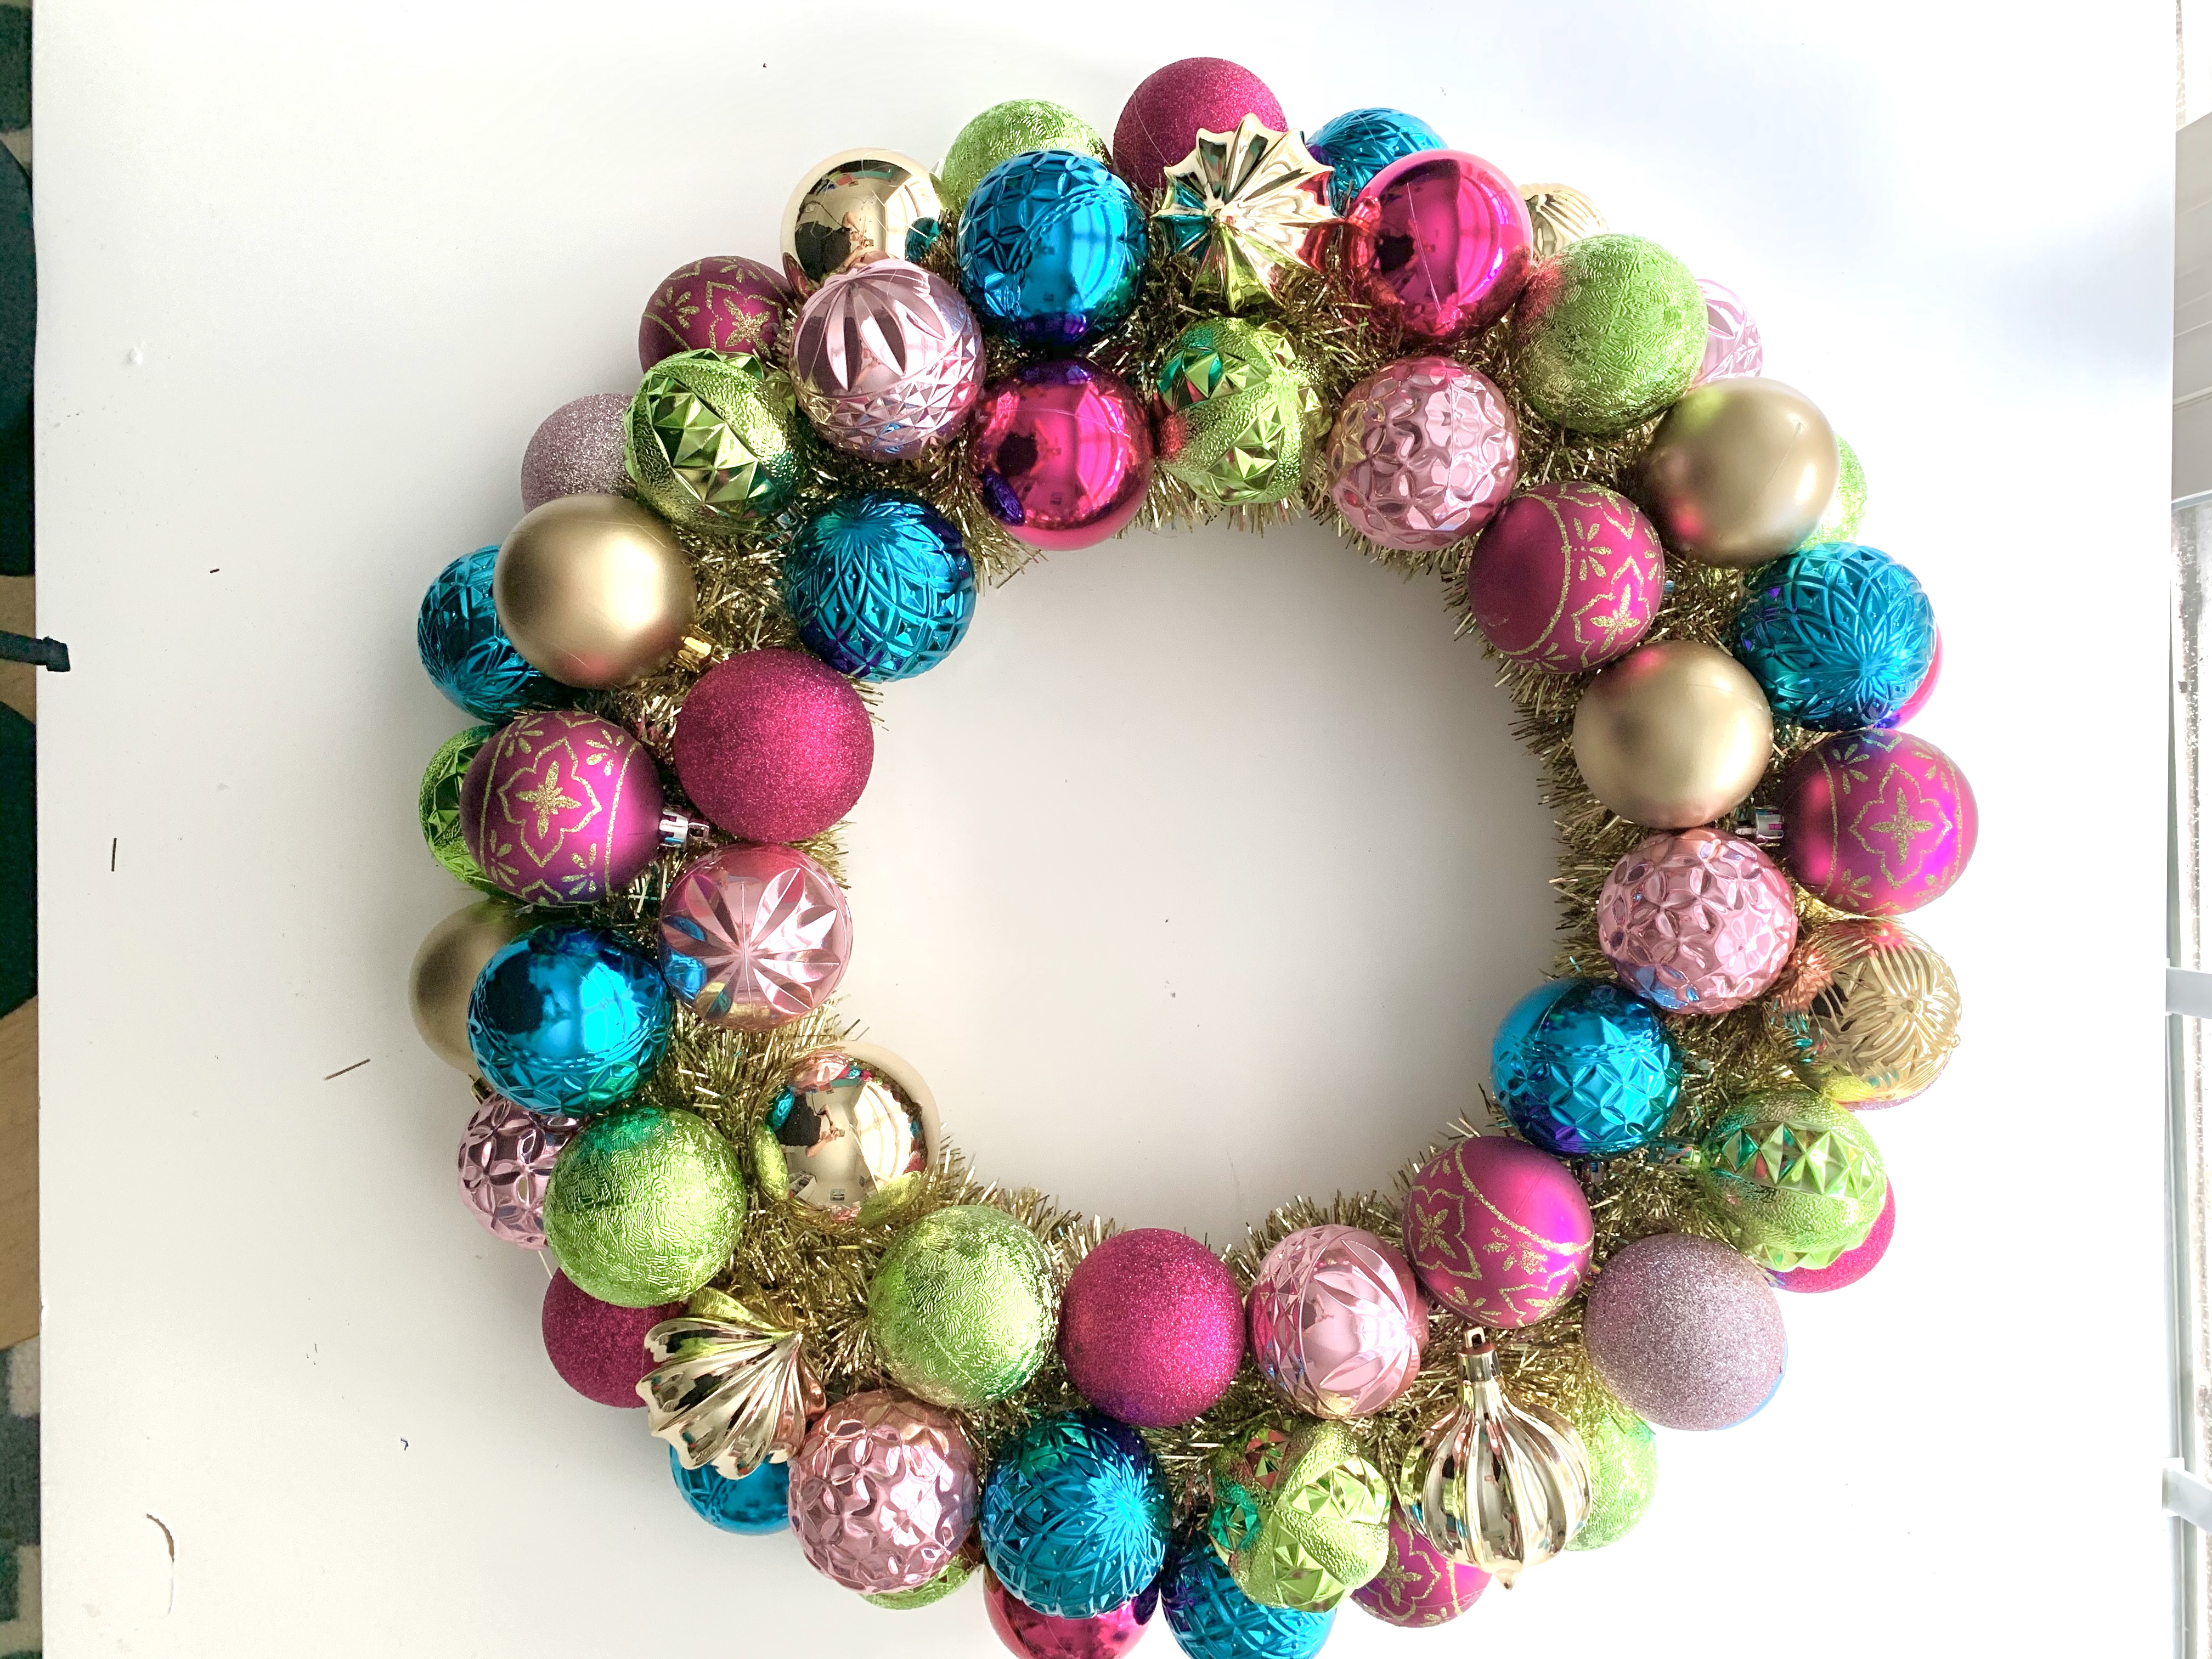
6. Tie it with a Bow
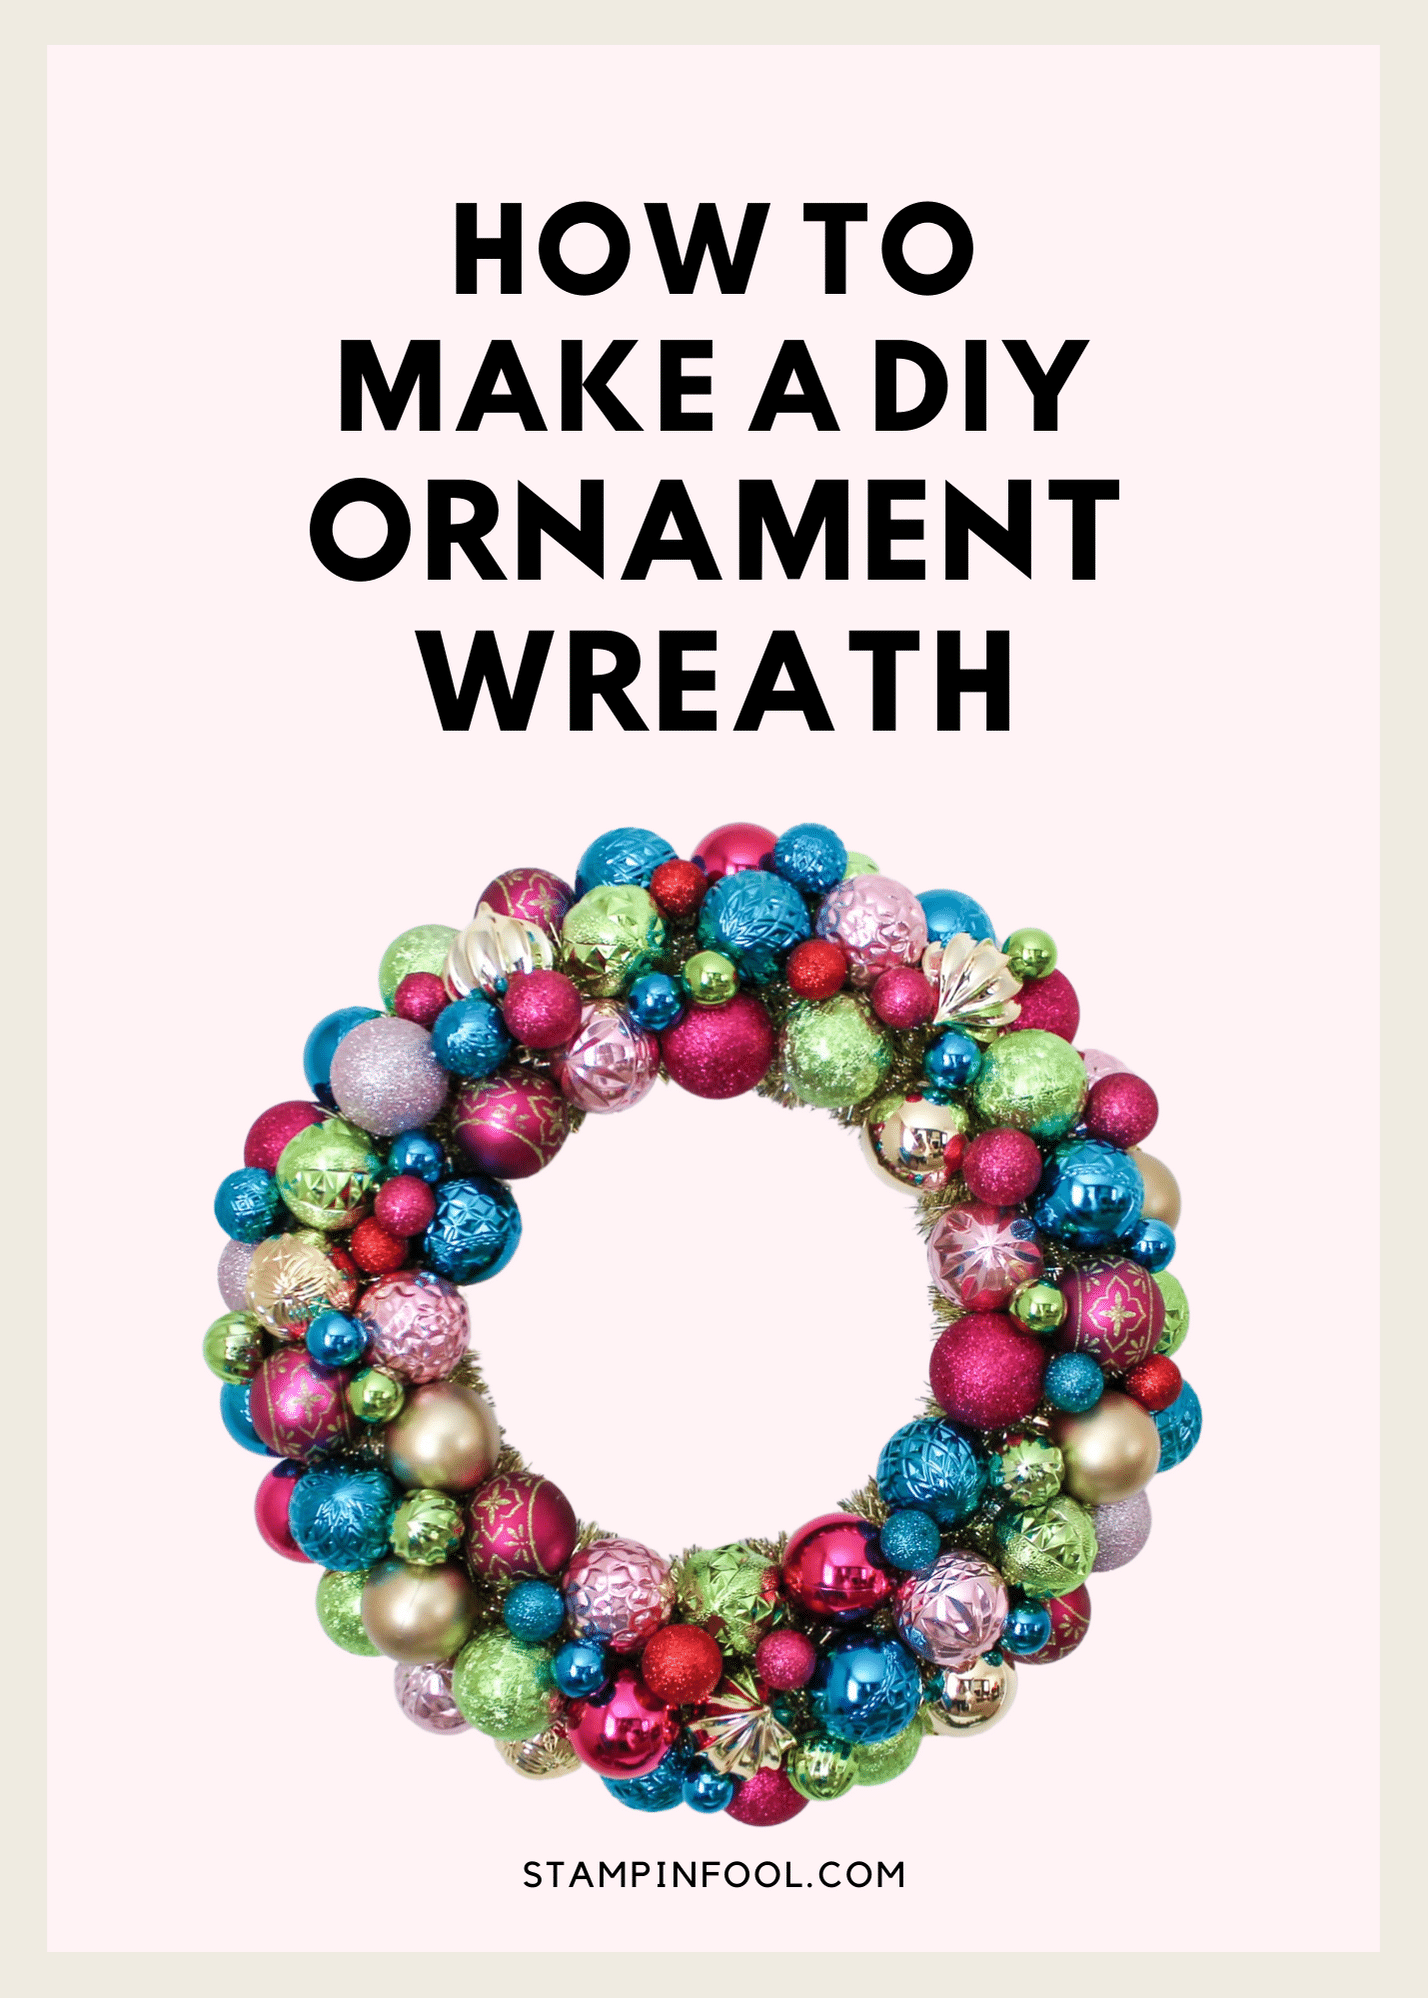
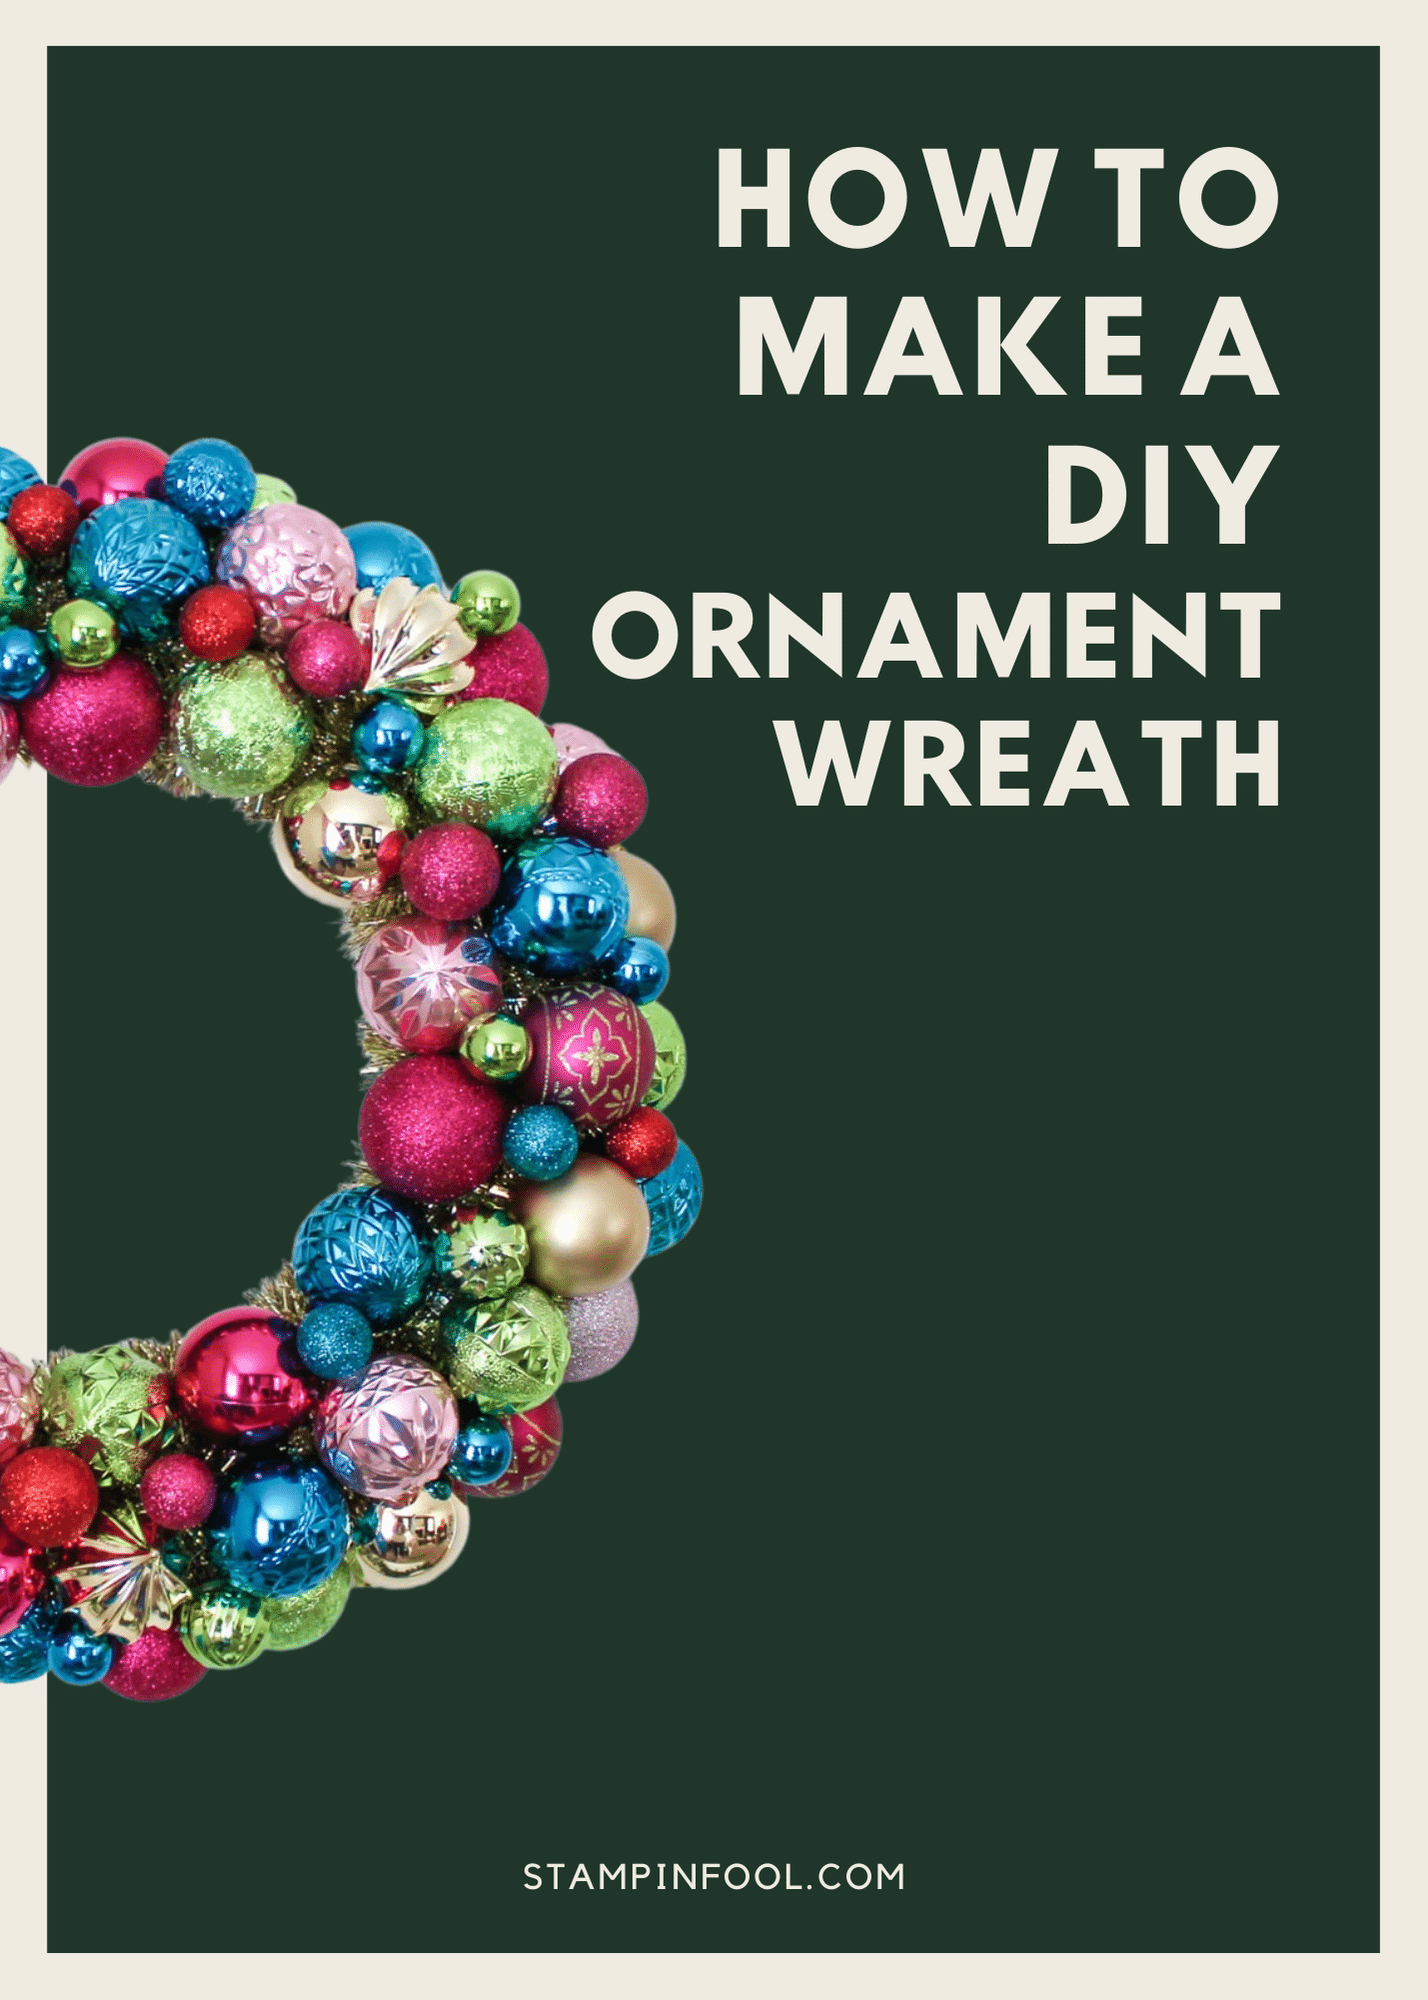
What do you think of the finished wreath!? It’s amazing isn’t it? These ornament wreaths are gorgeous and super simple to make.
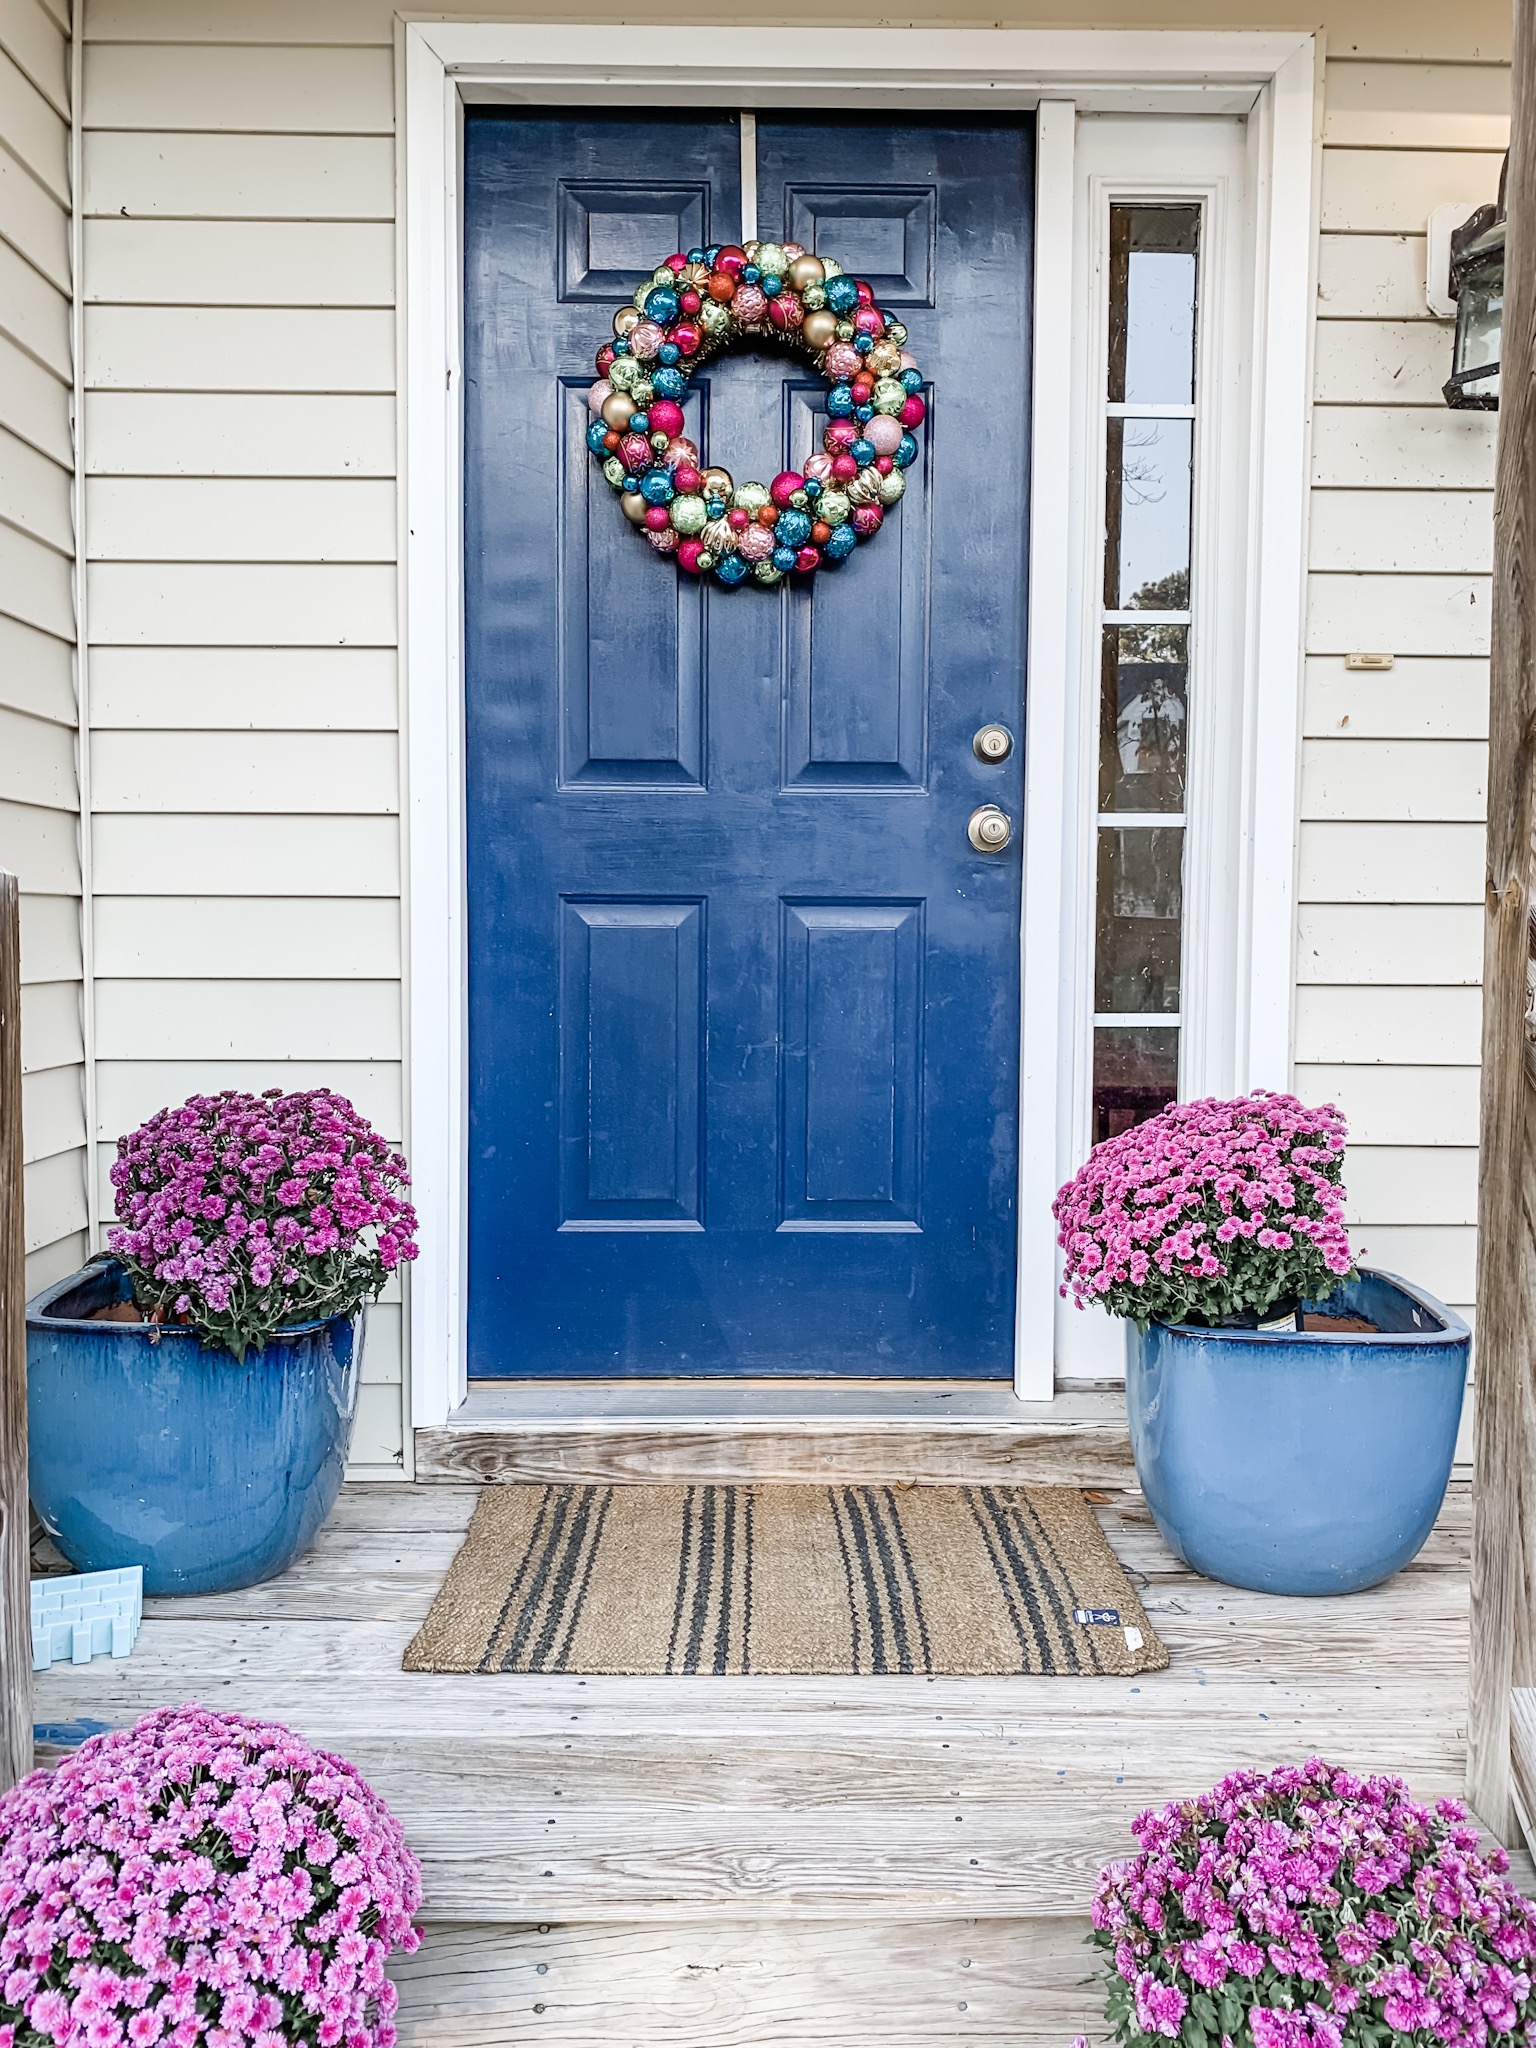
To finish up, you can tie it up with a bow and hang it on your door.
These are best hung inside on an interior door due to extreme temperate changes. You will get the longest wear out of it indoors. But I couldn’t resist a photo on our Sherwin Williams Naval door.
Time needed: 35 minutes
How to Make A DIY Christmas Ornament Wreath
- Gather supplies
- High heat hot glue gun, Gorilla large glue sticks, 15″ foam wreath form, 15′ thick tinsel garland, Silicone craft mat, 90 Shatterproof ornaments in multiple sizes & shapes
- Wrap the wreath
Choose a starting point on the back of the wreath. Apply hot glue blob to the wreath form. Press and hold garland to starting point.
Slowly wrap the garland around the wreath, adding glue every 3-4″. - Begin gluing the outer ring
To adhere the ornaments, place a blob of hot glue on the tinsel and hold the ornament to the hot glue firmly for a few seconds. Continue gluing the large ornaments around the outer ring of the wreath form (on top of the tinsel garland).
- Glue front facing ornaments
After you have completed the outside ring, begin gluing ornaments on the front of the wreath, directly against the existing row of ornaments, working your way in a circle.
Continue with the next row on the front filling in the wreath. - Fill in with mini baubles
Next, take the smallest, mini baubles and fill in the gaps and blank spaces. place a ring of hot glue around the bottom 1/3 of the mini ornament and press it into the gap between the standard size ornaments.
- Tie it with a bow
To finish up, tie a 3″ or 4″ wide fabric ribbon bow. Create a 12″ loop with ribbon around the wreath top and tie it in a knot. Then tie a large bow with a squared knot over the ribbon loop. Hang the wreath on your door or gift it to a friend!
Christmas Ornament Wreath Conclusion
Whether you decide to make this DIY ornament wreath for yourself or as a gift, it will undoubtedly be a keeper. It brings back the nostalgia of Christmas’s past while giving you the freedom to choose the color palette and style that fits you best.
It takes approximately 75- 90 large ornaments and 25-40 mini ornaments to make an ornament wreath out of a 15″ wreath form.
You can use vintage ornaments or shatterproof ornaments to make an ornament wreath.
How do you make an ornament wreath with a wire frame?
You make an ornament wreath out of a wire frame much like a foam wreath form, start by wrapping it with garland. Then follow the directions to adhere ornaments.
There’s something so satisfying about making your own holiday decorations. It’s a chance to tap into your creative side and add a personal touch to your home. Plus, DIY projects are a great way to save money during the holiday season.
If you’re looking for a festive way to spruce up your home this year, why not try making a DIY ornament wreath? This project is easy to do and only requires a few supplies.
You can go for a traditional look with red and green balls, or get creative with different colors and patterns. There’s no wrong way to do it!
Hang your wreath on your front door or in a prominent place inside your home, and enjoy the compliments from all your holiday guests.


Do you have any links for those ornaments?
I’m sorry that last comment about the glue gun was from me! The page timed out or something. I left my name and email address this time.
Happy holidays!
Amanda
Hi there! I’m excited to make this wreath! Thanks for the great video. I’ve misplaced my glue gun so I’m going to buy another. Would you use a mini or regular sized glue gun for this? Thanks again!!
Have you tried it with a green garland wreath? I have 4 of them 24 in
Thoughts?
Just made this wreath and I cannot wait hang it. Thanks for the easy directions.
I’m so glad to hear that! I kept mine out most of last year. I brought it in on snowy days, so I’m certain it will hold up in sunny CA.
Thank you! I hope you have as much fun making it as I did. It’s a great little project.
The wreath is beautiful. I can’t wait to make mine
Your wreath is beautiful, thank you so much! I will be making this next weekend but I will leave it outside on my front door as we don’t get too cold here in California. ????
Thanks Aunt Pat! Love you!
Love your work