
The Best $20 DIY Navy Blue & Gold Painted Vanity Bathroom Makeover
I have the best, DIY Navy Blue & Gold Bathroom Makeover with a painted vanity, painted floors and brand new fixtures to share with you! You’re going to love the look of this painted vanity and how easy it is to recreate if for around $20.00, plus you’ll have paint to spare. This post is part of the One Room Challenge and I’ve been working away at updating our Guest Bathroom, DIY style over a six week period. Are you ready for some awesome before and afters?!?
WHAT IS THE ORC?
From the ORC.com:THE ONE ROOM CHALLENGE™, CURRENTLY IN ITS SIXTEENTH SEASON, IS A WIDELY ANTICIPATED BIANNUAL EVENT EVERY APRIL AND OCTOBER. EACH ROUND, TWENTY DESIGN INFLUENCERS ARE SELECTED TO TAKE THE CHALLENGE, AS FEATURED DESIGNERS, AND TRANSFORM A SPACE. EVERY WEDNESDAY, THE DESIGNERS DOCUMENT THEIR PROCESS WHILE SHARING THEIR SOURCES AND PROFESSIONAL ADVICE OVER SIX WEEKLY POSTS.
IN ADDITION TO FOLLOWING ALONG, EVERYONE WITH A BLOG OR INSTAGRAM ACCOUNT, IS WELCOME TO JOIN THE FUN AS A GUEST PARTICIPANT BY LINKING THEIR OWN ROOM TRANSFORMATIONS UP DURING THE SIX WEEKS. EACH THURSDAY, THE INTERNET AND SOCIAL MEDIA ARE FLOODED WITH INTERIOR DESIGN INSPIRATION, IDEAS, AND ENCOURAGEMENT.
TO DATE, MORE THAN 3,400 ROOMS HAVE BEEN TRANSFORMED THROUGH THE ONE ROOM CHALLENGE™. THE EVENT, AND MANY OF THE SPACES, HAVE BEEN RECOGNIZED AND FEATURED.
In addition, BETTER HOMES & GARDENS IS THE OFFICIAL MEDIA PARTNER OF THE ORC, meaning two of the completed rooms will be Featured by BH&G!
I already have the decorating bug, so syncing up with the One Room Challenge is a great way to motivate myself to finish ONE of the many projects I’ve started or planned, but haven’t put into action.
WHY YOU SHOULD PAINT YOUR BATHROOM VANITY
First, before I show you the before and beautiful after photos, it’s important to discuss the why behind my decision to paint the bathroom vanity navy blue. Before committing to a painted vanity, I read over 100 articles on painting furniture and took two hands-on painting classes.
Next, I researched and learned about multiple types of paint and after experimenting, with chalk paint, milk paint, rusotleum, and acrylic paint I was able to make an informed decision. At this point I have multiple pieces of painted furniture in my house. Hands down, I am most comfortable with General Finishes Milk Paint and it’s reliability, plus how well it holds up.
Why not chalk paint?
I get this question a lot. I have seen the thousands of chalk paint tutorials and it’s ease of use. I’ve also painted some small decor gifts (trays, side tables) with chalk paint. What I learned is that this GF Milk Paint is just as easy to use, requires just as little prep, but it gives much better coverage with a smoother finish.
In my opinion, the chalk paint for lack of a better description looks chalk painted. It isn’t entirely smooth, and definitely not glossy. You can see the variation in coverage, and for a dark color like navy, you really want full coverage so that the vanity looks professionally sprayed and not DIY hand painted.
My preference for vanity paint is 100% General Finishes Milk Paint. I love the quality and how easily it goes onto the vertical sides. It goes on smoothly, self levels, and looks flawless. This paint holds up great to rough kids and slamming doors. There isn’t another paint I recommend more, and I’ve tried a lot of paints. 
![]() For this project, I chose to paint the vanity navy blue by custom mixing Lamp Black and Klein Blue paint until it was a rich navy color. The mix is approximately 25% Klein Blue and 75% Lamp Black. It sounds crazy, I know, almost black. But because Klein Blue is so strong and vibrant, you really only need a bit to achieve a navy blue color.
For this project, I chose to paint the vanity navy blue by custom mixing Lamp Black and Klein Blue paint until it was a rich navy color. The mix is approximately 25% Klein Blue and 75% Lamp Black. It sounds crazy, I know, almost black. But because Klein Blue is so strong and vibrant, you really only need a bit to achieve a navy blue color.
Additionally, the cost for the entire vanity paint was $20.00 and I used the excess paint to paint a kitchen table. A quart of General Finishes is $34 and can easily cover multiple projects, bringing down the cost of the vanity paint project.
TIPS FOR PAINTING A VANITY
My guess is that if you’re here reading this post, you either a) know me, b) saw an article on the Today Show or Apartment Therapy featuring my bathroom makeover, c) found this post from a search for a painted vanity. Because you are curious about how a bathroom can be significantly updated for under $500, I will give you those important pieces about painting the vanity so that you feel confident to paint your own vanity.
DIY Painted Vanity: How to Paint a Vanity
Let’s get started with the directions for this Navy & Gold Painted Vanity.
PREP
- Tape off the floor and walls. You should tape the vanity counter top so that paint doesn’t get onto it. I prefer frog Tape. It has a really great seal.
- Arm yourself with good supplies.
- Wooster Brush. Best. Can’t beat it. I have a 2″ and a 3″ angled brush.
- General Finishes Milk Paint
- Handy Paint Pail with clear liners. Not only the perfect size for DIY projects, the clear liners make it easy to custom mix color and be able to see the color. And even better, they added a magnet to the inside top to hold the brush. GENIUS.
- screwdriver to remove hardware and doors.
- Remove the Doors. Remove hardware from the doors. You have to remove the cabinet doors; don’t skip this step. A self leveling paint works best on doors (because the have an inset) if you lay the doors flat while painting them and while they dry. Tip: prop the doors up with solo cups.]
- Mix your paint. For this navy vanity, I mixed 25% Klein Blue to 75% Lamp Black.
- To calculate this, I used a HandyPaint pail liner. It’s clear and you can make marks on the side with Sharpie of four equal parts.
- Pour the blue until you hit the first line.
- Fill the rest with black.
- Drop the liner back into the pail and stir really well.
- It’s important to do this in case you need another batch. If you didn’t mark your proportions, you can’t recreate the same color.
BEGIN PAINTING THE DOORS
- Now that you have removed the doors, lay them flat on dixie cups, back side up.
- Paint the backs of the doors first.
- If the backs are painted first, when it is time to paint the fronts, you don’t run the risk of making small indents (from the cups) while they are drying.
- If you were to paint the fronts first, you would have to lay them face down.
- While this is really hardy paint, you want to minimize any damage during the curing period.
- Apply thin, even coats of paint. Paint in the same direction with long strokes. Don’t worry if it looks like the paint doesn’t fully cover on the first coat. By the third coat it should have full coverage with no problems.
- Smooth out any blobs and drips right away.
PAINT THE VANITY
- Next, paint the vanity itself using the same method of thin coats in the same direction without brushing back and forth over the area too much.
- Don’t overwork the paint.
- Swipe up any drips.
- Paint with the grain.
- Let the doors and cabinets dry for the recommended recoat time. I am admittedly impatient.
- I waited until it was dry to the touch and did not smudge then applied the next coat. It was approximately an hour.
- Here is the official info on curing time, but it doesn’t address recoat time which is sooner than dry time: GF Info in drying & curing time.
- Continue with a third coat of paint if needed.
BACK TO THE DOORS/DRAWERS
- After each coat of the vanity is painted and drying, add a coat to the back of each door/drawer. After the backs have 3 coats and are dry to the touch, you can flip them over and start on the fronts. Wait 30 minutes to an hour before applying each new coat to the front. Ideally, you should wait a little longer. The fronts will be the focal point and you want to avoid smearing to streaking any prior coats you painted.
- Use light strokes, and work with the grain in one direction.
- Avoid overworking the paint or painting back and forth too much.
- The paint self levels, so go easy on the strokes with a full paintbrush. It will smooth out and dry beautifully.
- After 3 coats, if you are satisfied with the coverage, let dry overnight. The paint will begin to cure and will harden after 2 weeks.
SEAL & REINSTALL
- The most important step: Seal with a topcoat. This is best done after a solid few days of drying time. You should use a water based polyacrylic topcoat. Apply the topcoat and allow to cure.
- After the doors have cured, you can reattach them to the vanity.
- Reinstall hardware on the doors.
Now that we talked about some of the specifics of what goes into painting a vanity, let’s get to the good stuff- the before and after photos.
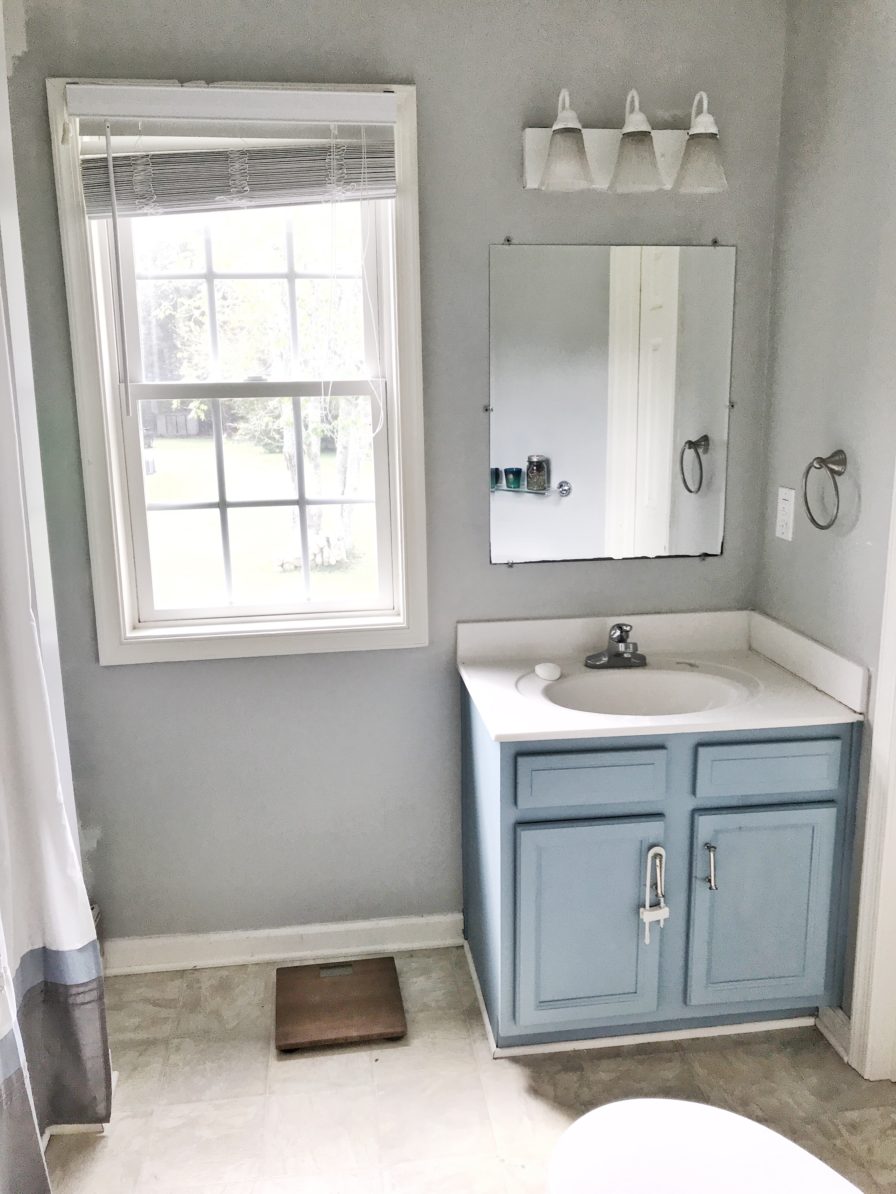
BUILDER BASIC BATHROOM: BEFORE
First, let me show you a few photos of my builder basic bathroom. This is the full bathroom upstairs that the kids use daily. It has two doors, one connected to a bedroom and one to the upstairs hallway, which means it is also the guest bathroom upstairs. It has an awkward layout because of the two doors and the placement in our floor plan. Due to the stair placement in our home, there’s no way change the current layout without significant cost & modification.
Taking that into consideration, painting the vanity and painting the vinyl floors was definitely the most cost effective way to update this bathroom and give it a lux feel on a dollar store budget.
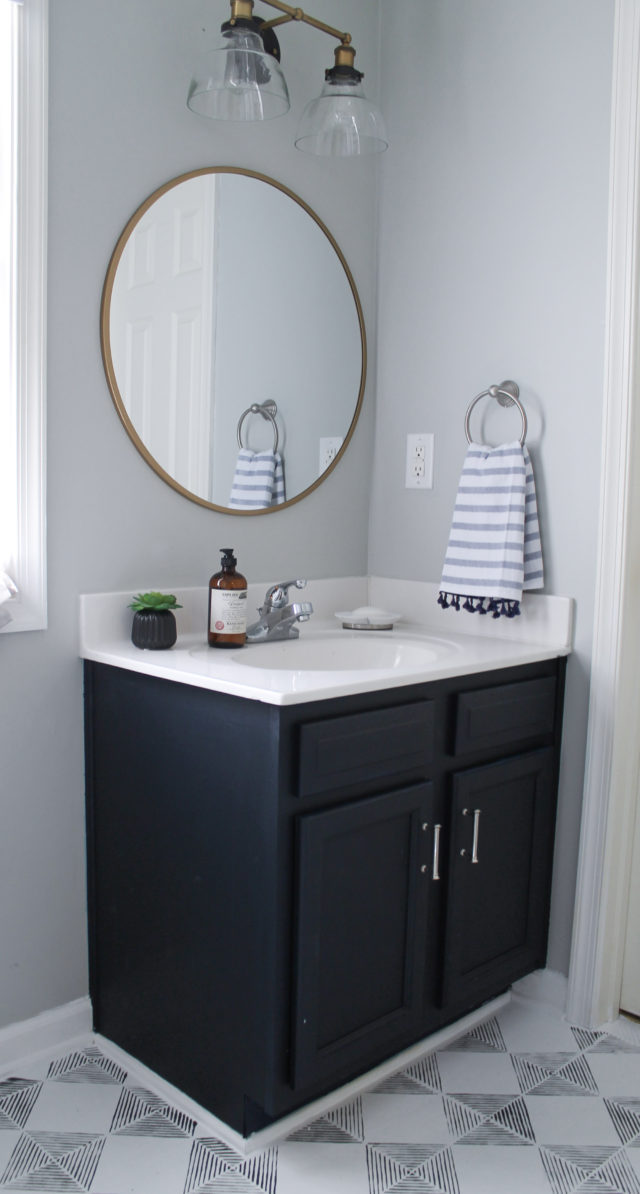
Here are the before photos. The bathroom isn’t terrible it’s just basic. It has basic lights, a standard clip in mirror, builder cabinet, and beige vinyl flooring. Maybe it’s a little terrible, but you get used to it.
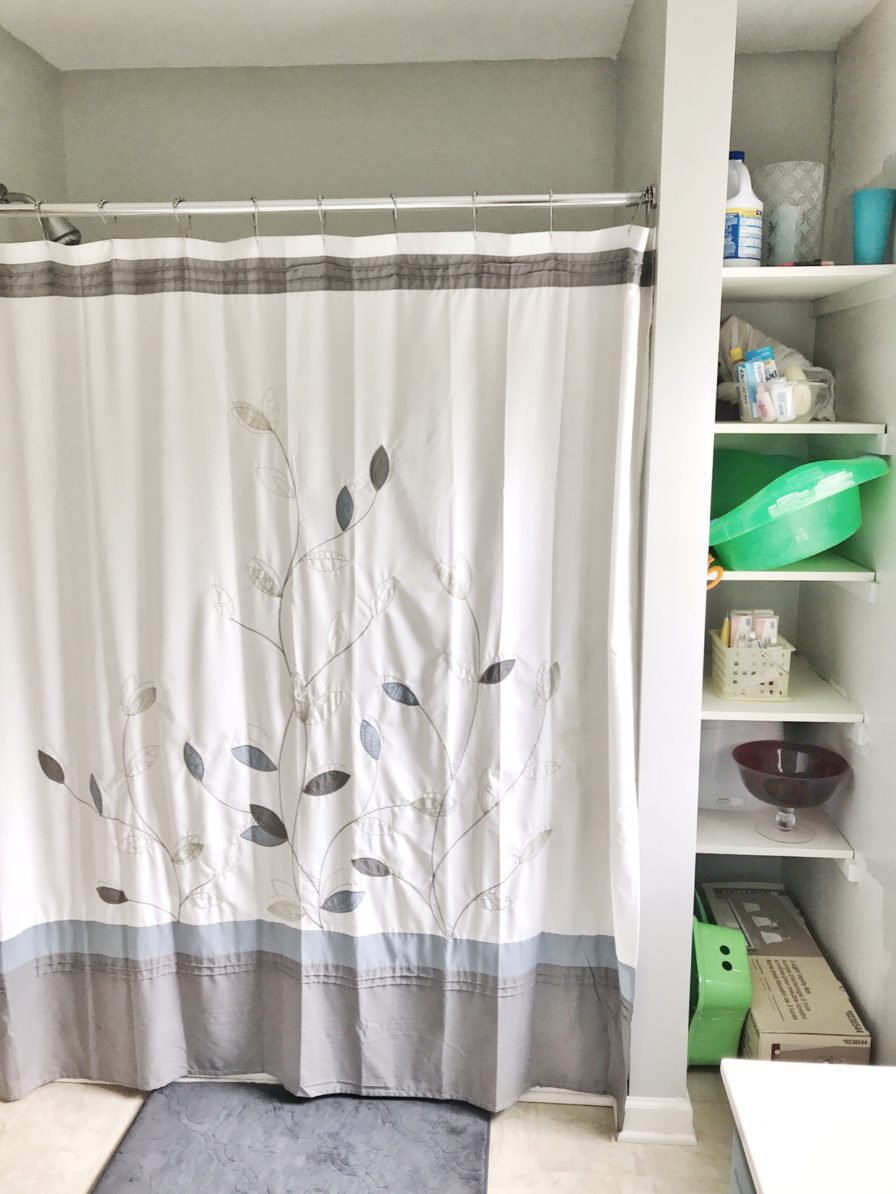
Prior to this bathroom makeover, I painted the vanity with a light blue Sherwin Williams paint. The color is similar to Blissful Blue. As you can see, I also kept all of the kid’s clutter stored on the shelves next to the tub. Including a light fixture we never installed, which is now outdated and I will be donating.
In case you missed the previous week updates and DIY tips, here’s a recap of the weeks you missed:
Week 1- Inspiration for the Navy Blue & Gold Bathroom Makeover
Week 2- DIY Painted Vanity Tips
Week 3- Floor Stenciling Tips
Week 4- How to Paint Vinyl Floors
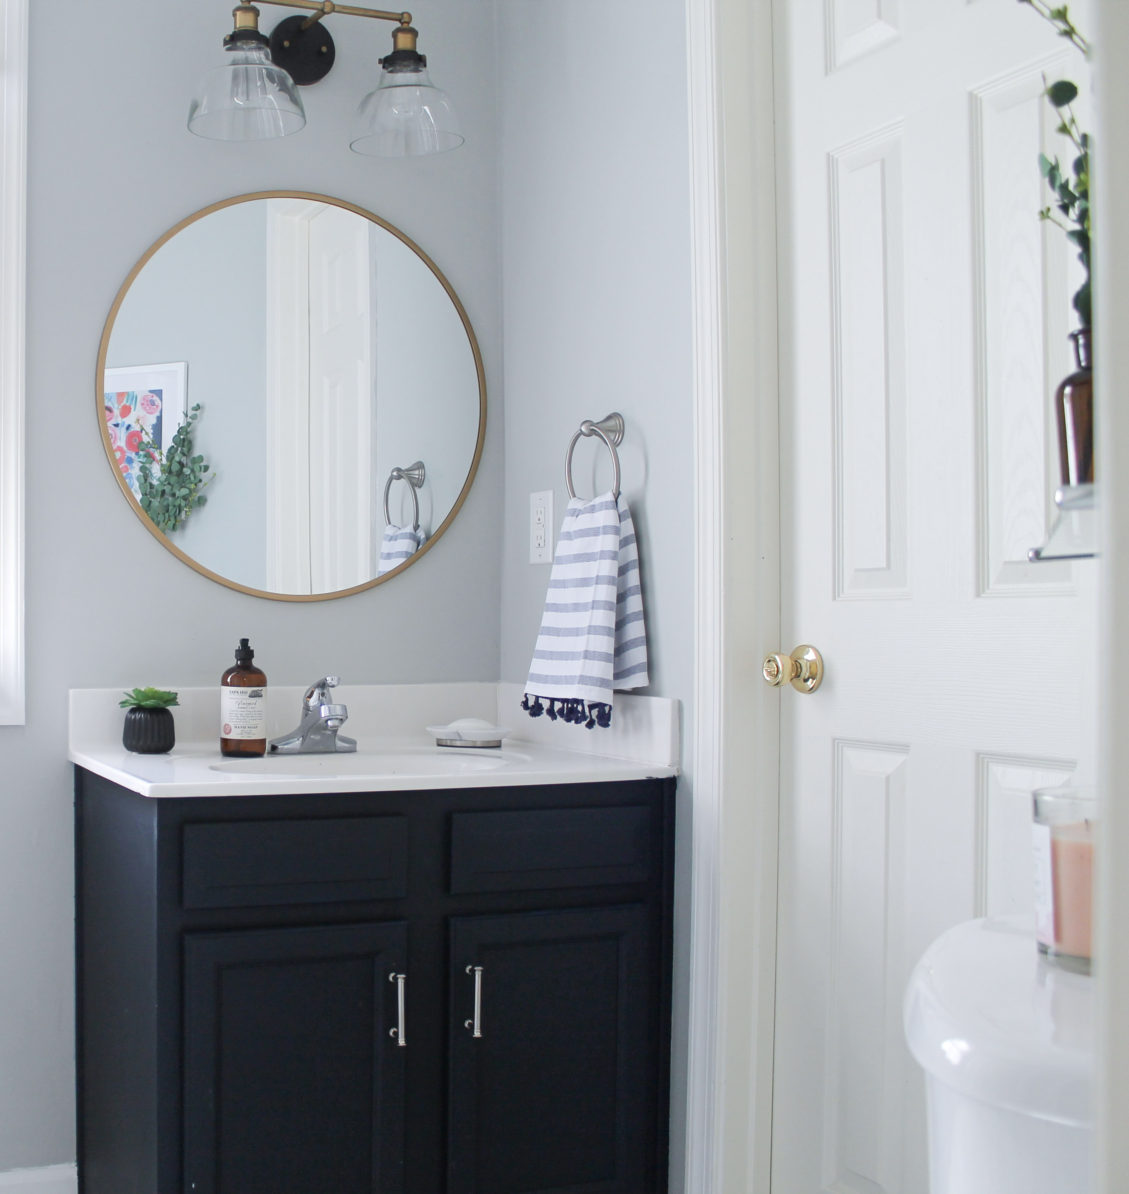
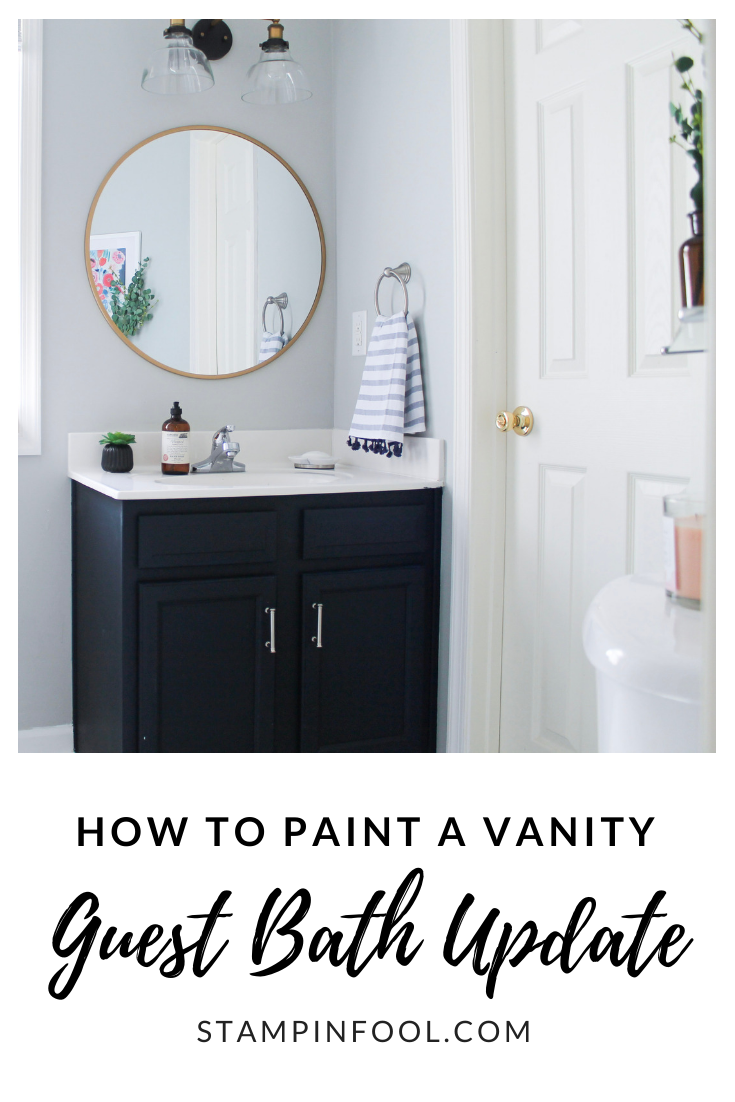
AFTER: NAVY VANITY & MIXED METALS REVEAL
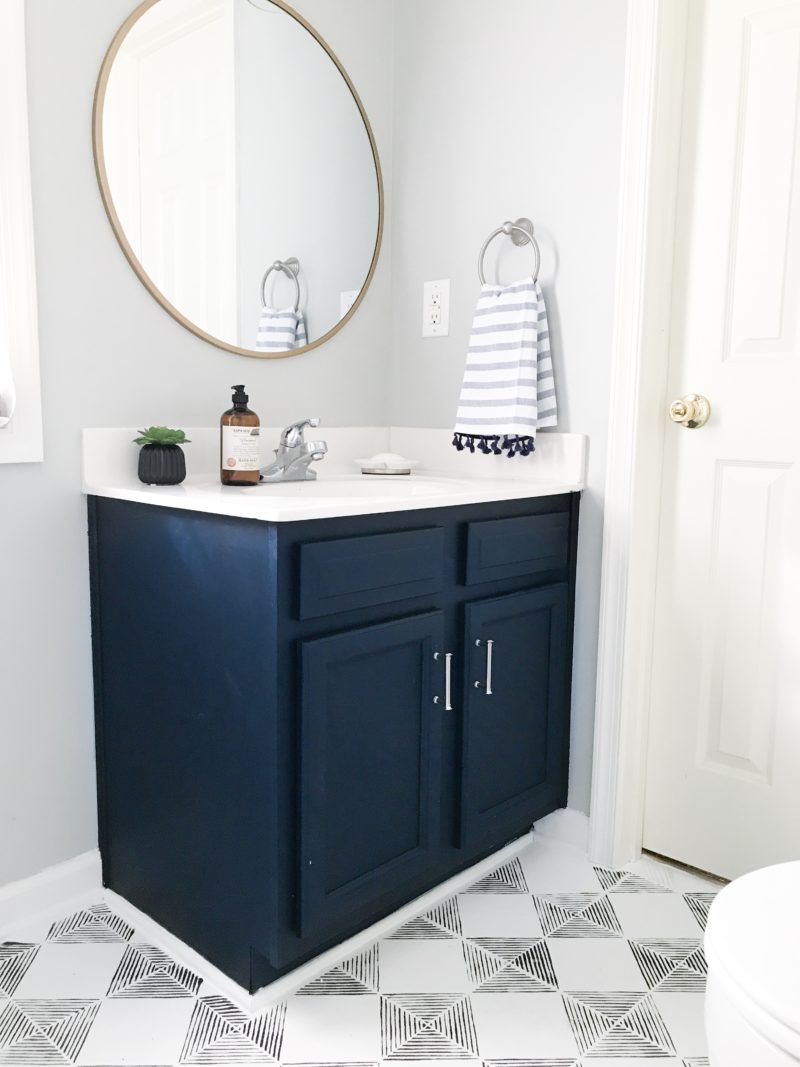
Are you ready to see the finished Navy Blue and Gold Bathroom Makeover? The time has come to show off how this amazing project turned out. Starting from the top down, the light fixture and mirror were replaced with beautiful black and gold fixtures. Also, the vanity is painted navy blue in a custom mix by General Finishes.

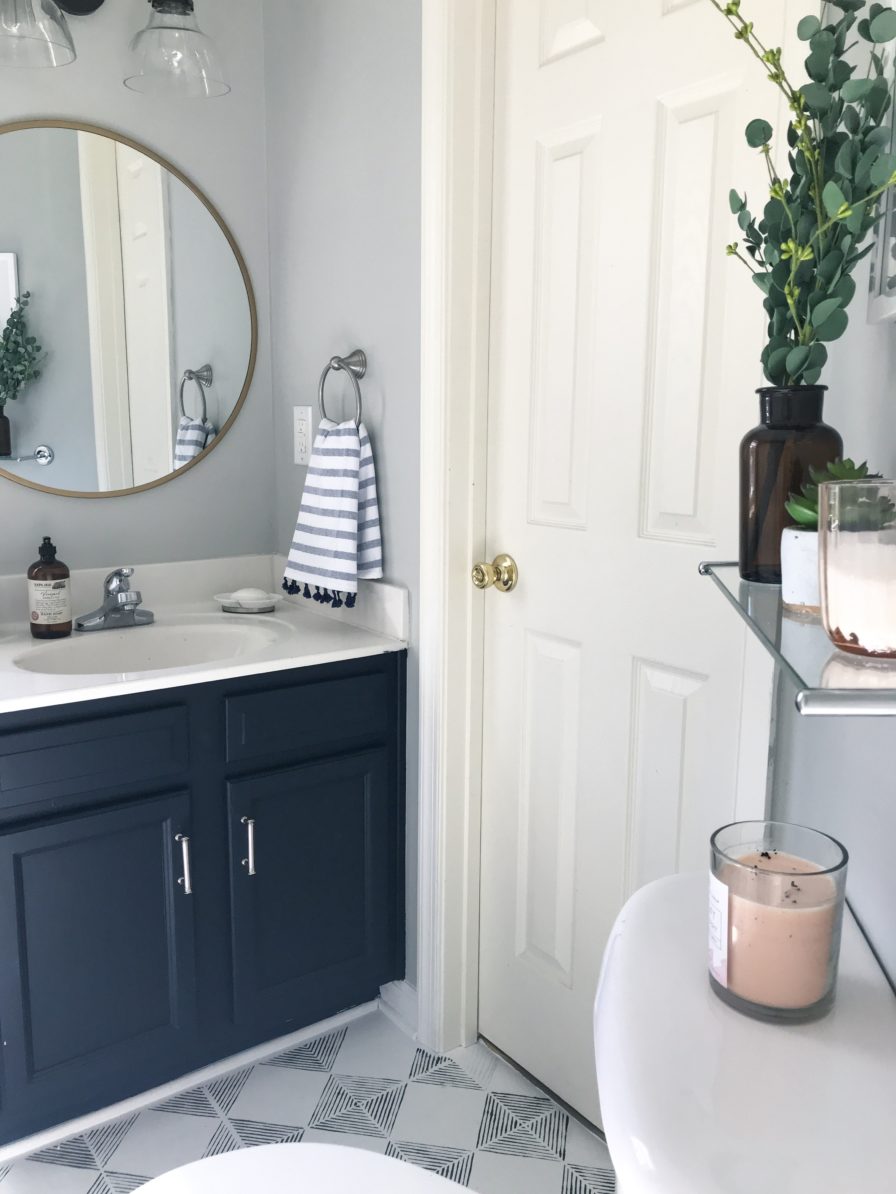
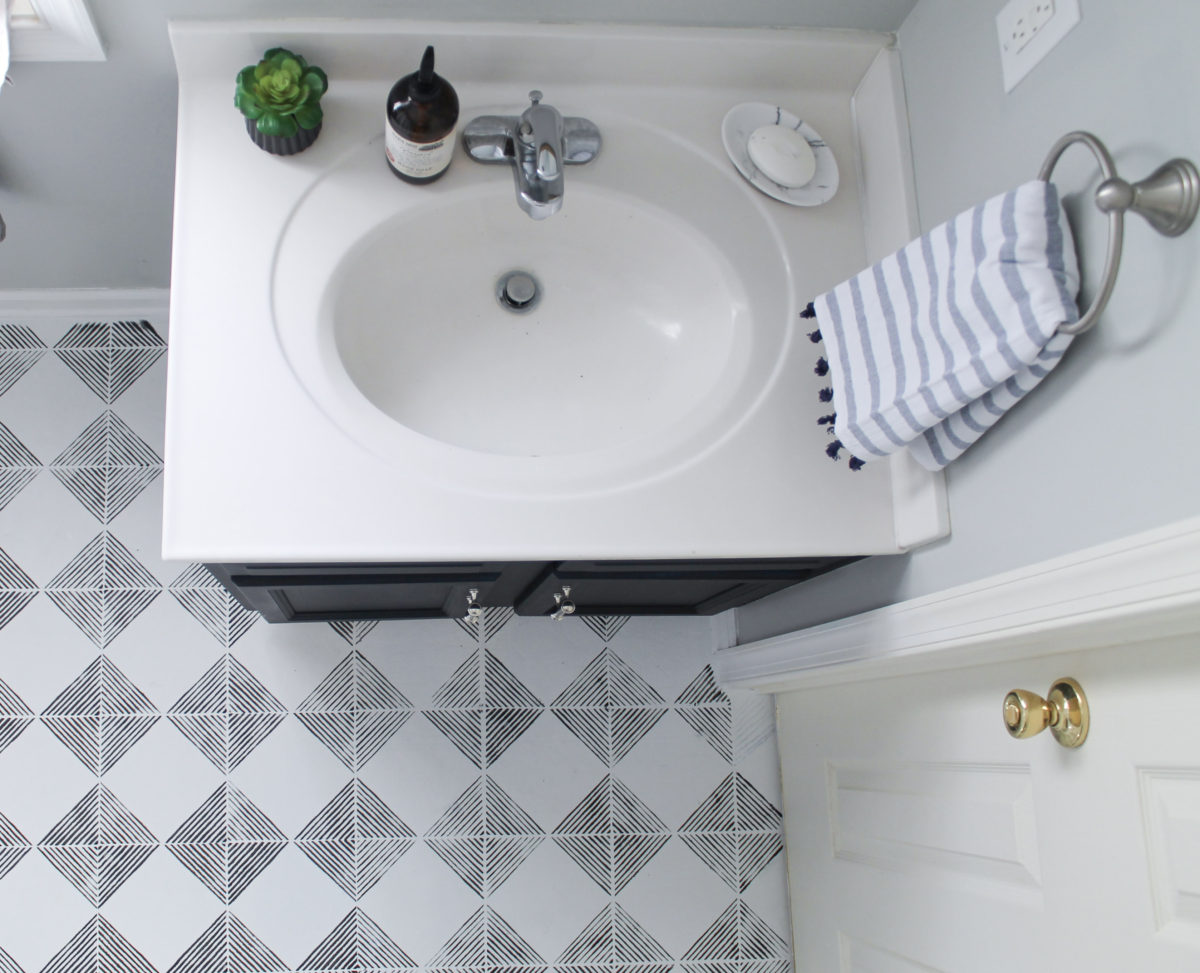
In the photo above, you can see a peek of the painted vinyl floors. They look like real hand painted cement tiles. For the full details check out this post: How to Paint Vinyl Floors: Step-by-step
A great way to see the transformation is with a side by side of the before and after.
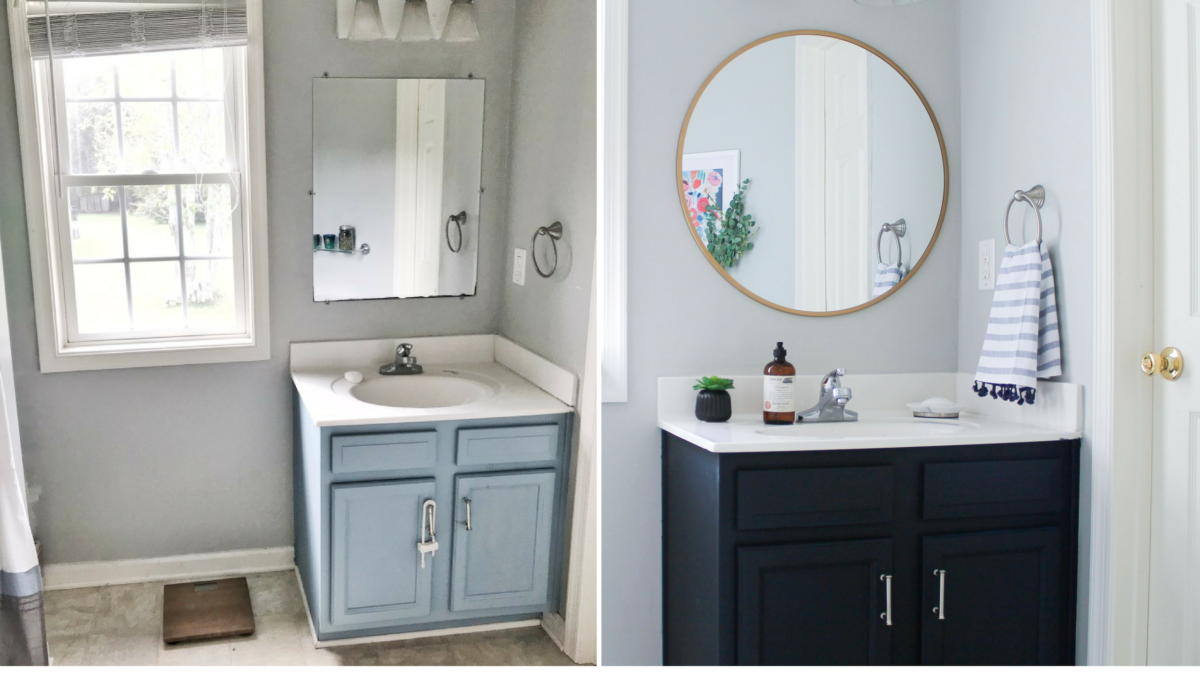
WOW! Are you as blown away as I am? Changing out the builder grade clip on mirror for a round brushed gold mirror made a huge difference. The navy vanity looks expensive and custom even though it’s builder grade materials + DIY & paint.
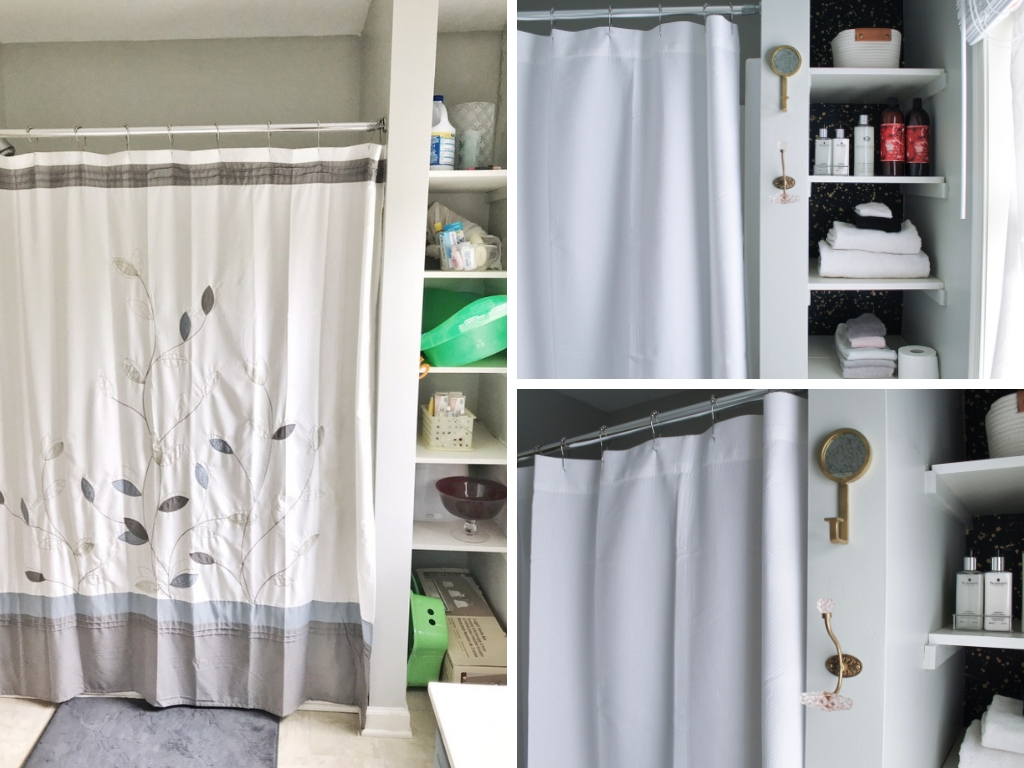

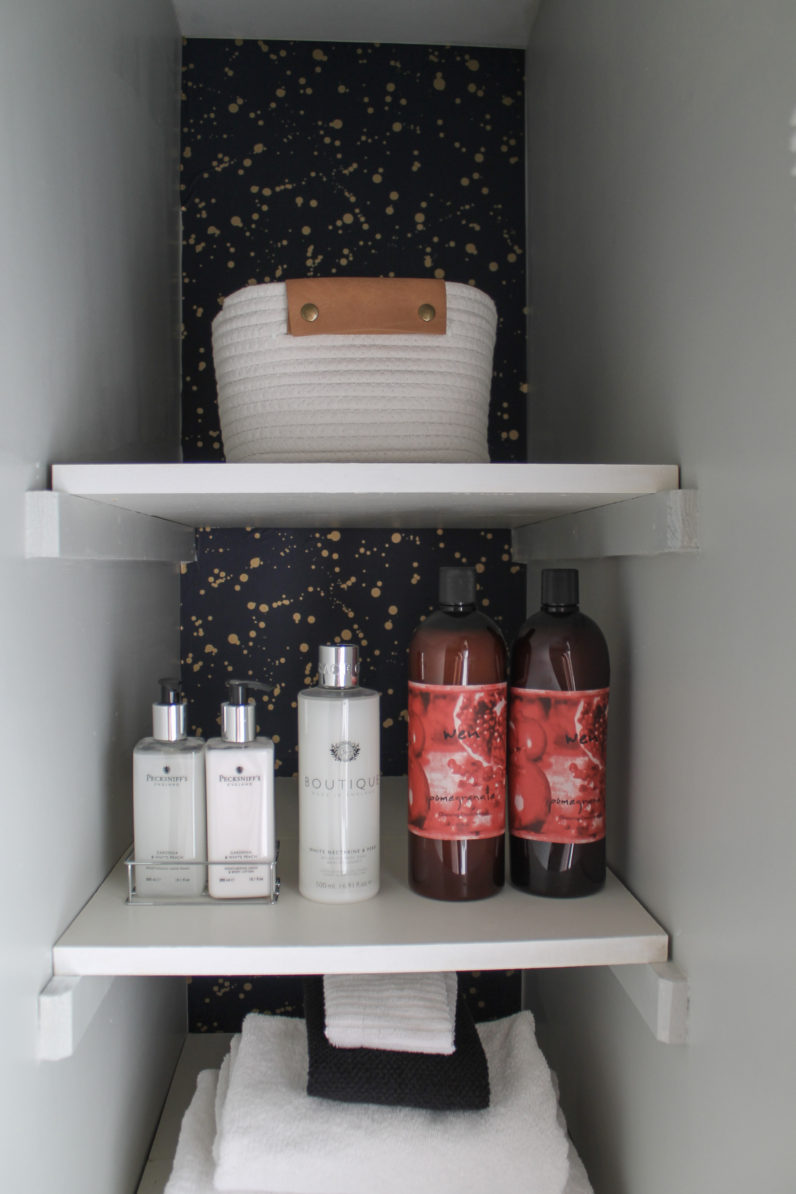
If you’ve kept up with my Instagram stories, you’ve seen the wallpaper poll. While I didn’t want to wallpaper the entire bathroom, a little navy and gold to tie in the vanity was just what these open shelves needed. You voted YES to wallpaper and this pattern overwhelmingly won. It’s perfect for this space. {Wallpaper: Devine Color Celestial available at Target}.
While it looks great, vinyl peel and stick wallpaper on such a tight corner with little cuts for shelves was a bear. It was more difficult to work with than traditional paper wallpaper. Traditional wallpaper can tear more easily. Consequently, for this project, the fact that the peel and stick wallpaper stretches made it almost impossible to get the bubbles out and have a flat application.
Luckily, it’s in a deep corner and that makes it very forgiving.
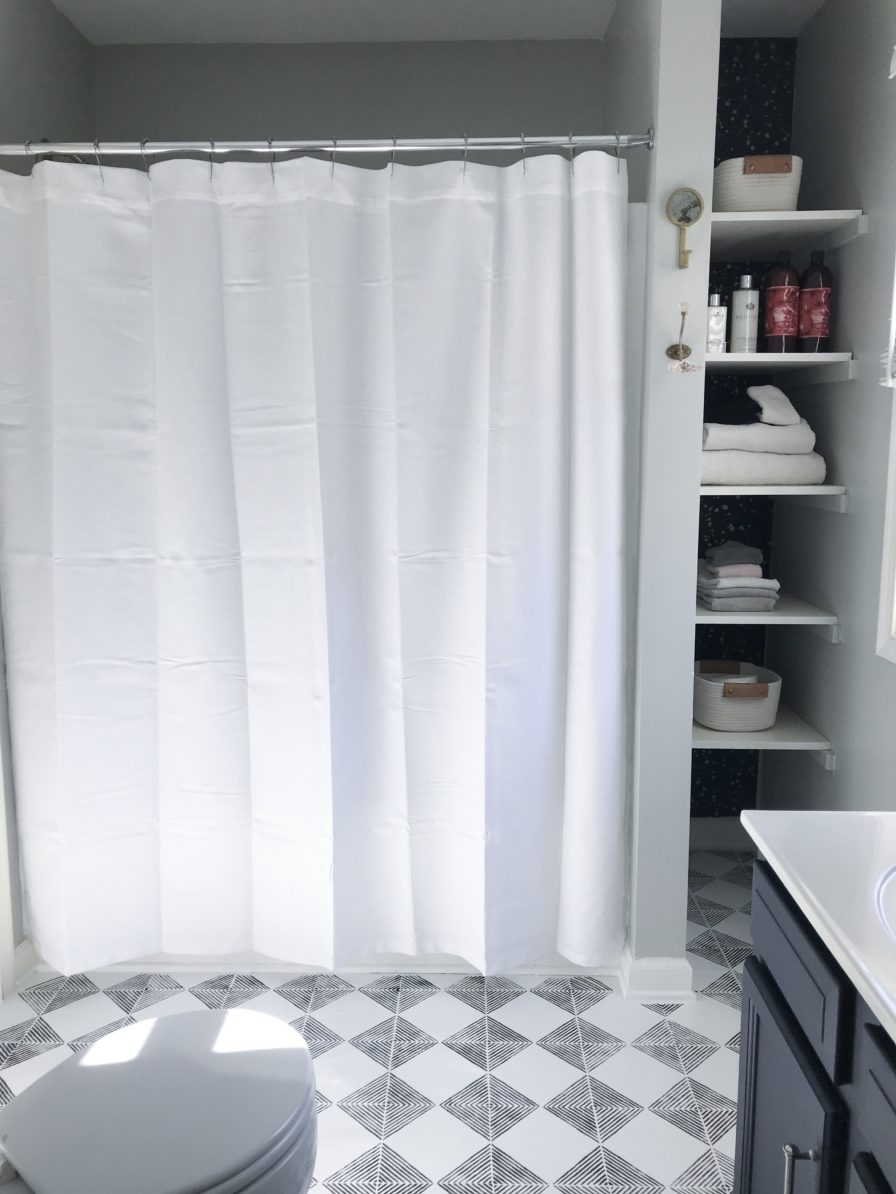
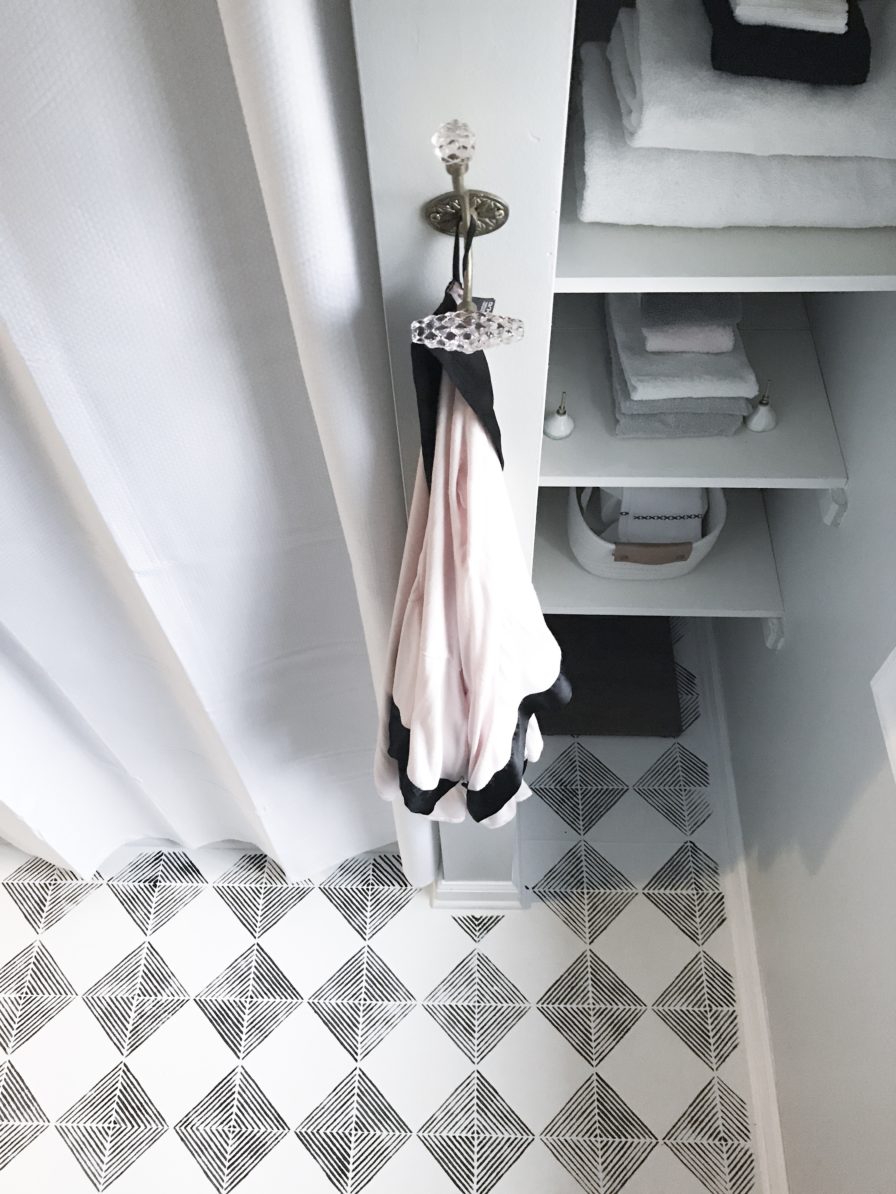
DIY PAINTED VINYL FLOORS
Let’s talk about UGLY floors. Did you know you can paint vinyl floors?? Check out these painted floors!!! The stenciled black Cutting Edge Nola Stencil on crisp white is a huge upgrade from the beige vinyl flooring that is underneath all of that paint.
Because hand painted cement tiles are in style right now, I decided to DIY the flooring and paint for a cement tile look. Why paint? I chose paint over tile for a few reasons:
- the cost is a lot cheaper, there is no cost for tiling tools
- second, it was easier to DIY the painting alone vs learning to lay and grout tile
- lastly, kids- they ruin everything!! I didn’t want to run the risk of a DIY tile job that lends itself to easier breaking.
Vinyl might be ugly, but it is durable, so for us, painting made sense. You can see the full tutorial on How to Paint Vinyl Floors here.
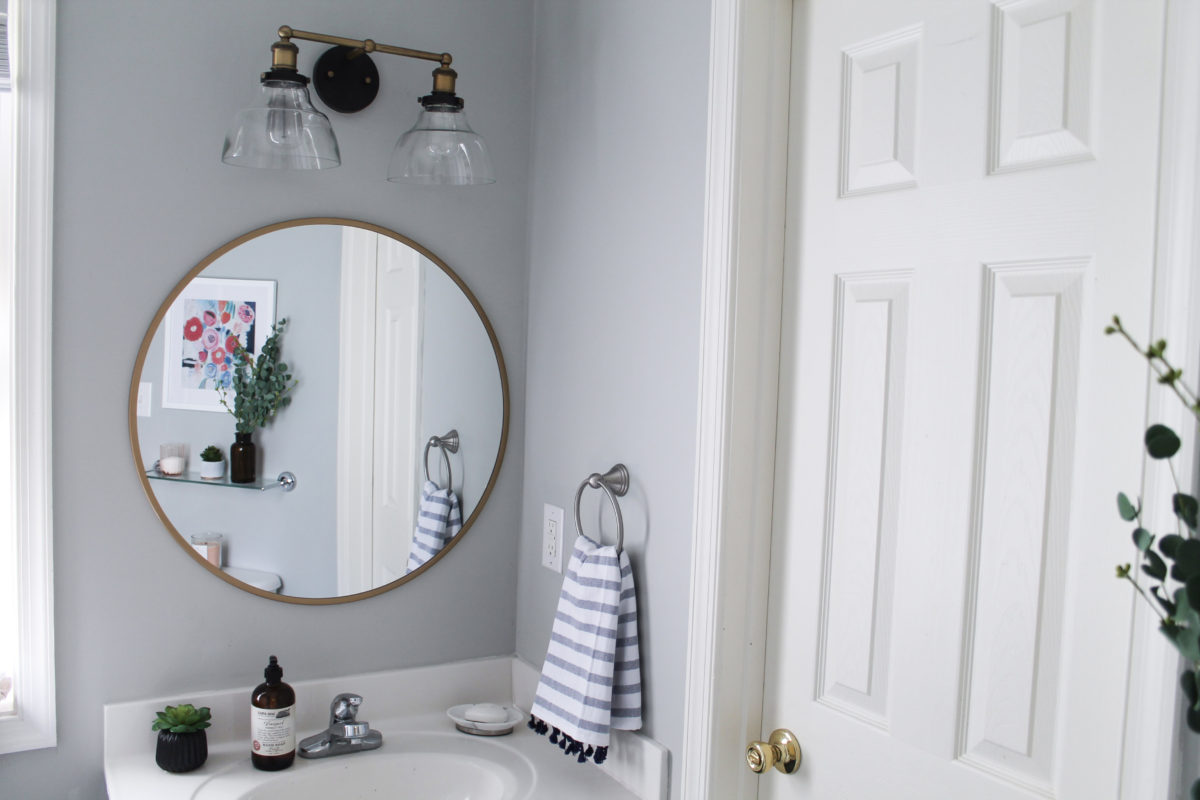
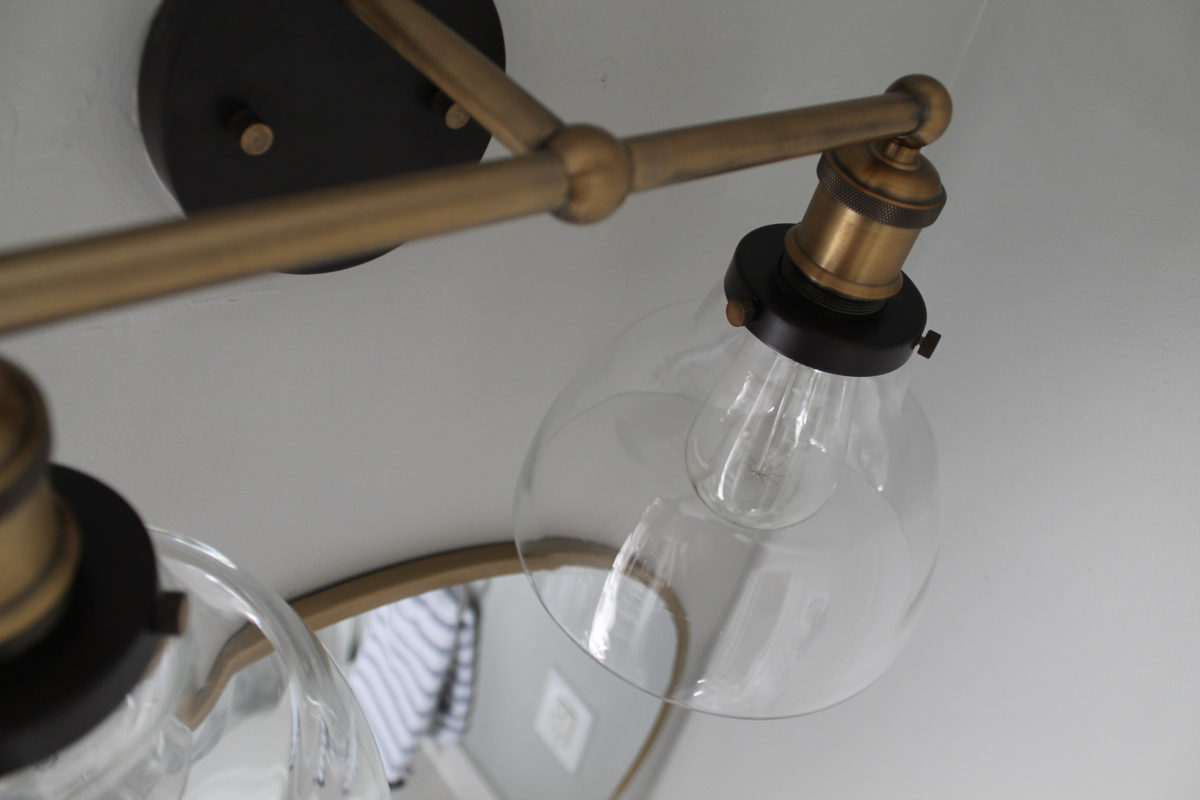
CUSTOM LIGHTING
One of my favorite features is this light fixture- I LOVE LOVE it. I went to the Ferguson lighting showroom to search for the perfect light and this fixture tied in the gold/brass mixed metal colors throughout the bathroom perfectly.
It was a quick switch out that made a huge difference from builder grade to a really custom looking bathroom. While I love this fixture, I will note that if you are going to spend money on a new light fixture, make sure you know how much light the room needs, whether you like warm or cool light and whether the fixture you choose will be sufficient.
In my case, these bulbs are warm and dim. Luckily, we get great natural light on this side of the house (even with blinds) so the natural light is the primary lighting source and the sconce is decorative. At night, I could not put on makeup with this lighting. So, be mindful of your preferences and what you need for the space when choosing lighting for a room.
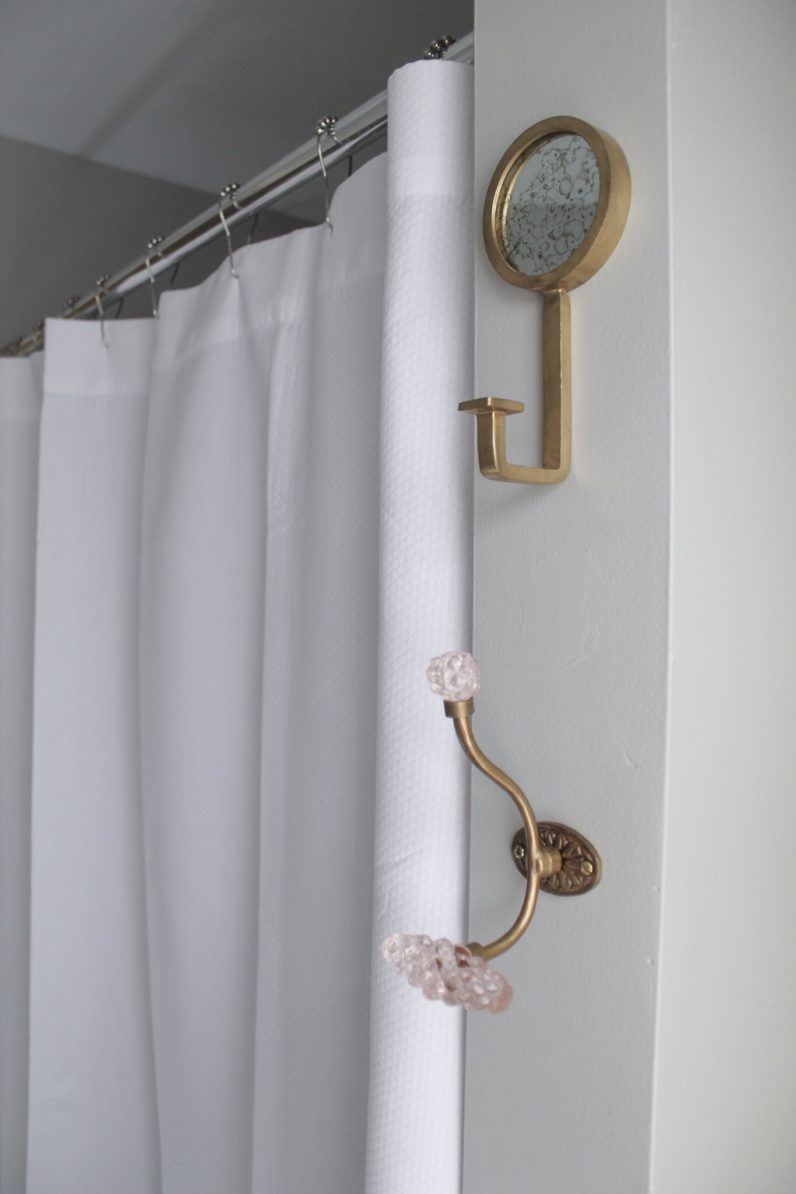
WALL HOOKS: #Anthrofinds
Lastly, I found these wall hook gems at Anthropologie and fell in love. They are solid pieces, yet delicate looking and coordinate perfectly with the other mixed metals in this bathroom.
One of the challenges of this bathroom is that there isn’t any wall space for a traditional towel bar. The window takes up all wall space (but I wouldn’t trade that natural light for anything) so using shelves and towel hooks was a great alternative.
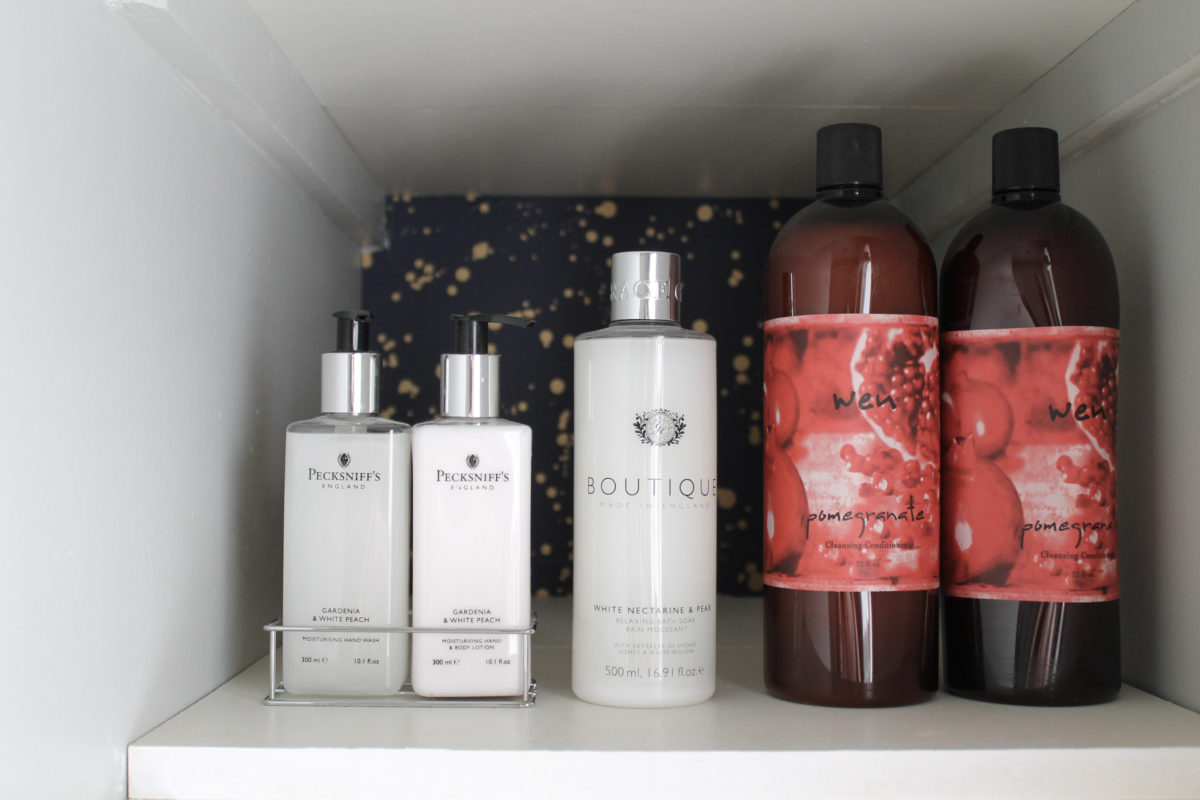
The shelves are stacked with extra guest towels and hand towels. My kids use the hooks to hang towels before bath time.
HOW TO GET THE MOST FOR YOUR MONEY
In the end, while I would LOVE a fully tiled shower and floor, as well as a new toilet and faucets, this bathroom update was a DIY budget makeover. I wanted to create something that was reproducible by anyone wanting to make a few updates on their own with a small budget. Painting a bathroom vanity is a great way to make a huge impact on the room’s decor with a small budget and a little sweat equity.
SOURCES
Here is the final source list and budget breakdown:
- light fixture: Ferguson Park Harbor “Mooretown” $150
- mirror: 28″ Project 62 from Target $40
- wallpaper: Devine Color Celestial from Target $30
- shelf: Lowes Delta Shelf $35
- shower curtain: Home goods $14
- woven baskets: Target $12
- succulents and eucalyptus: Hobby Lobby $10
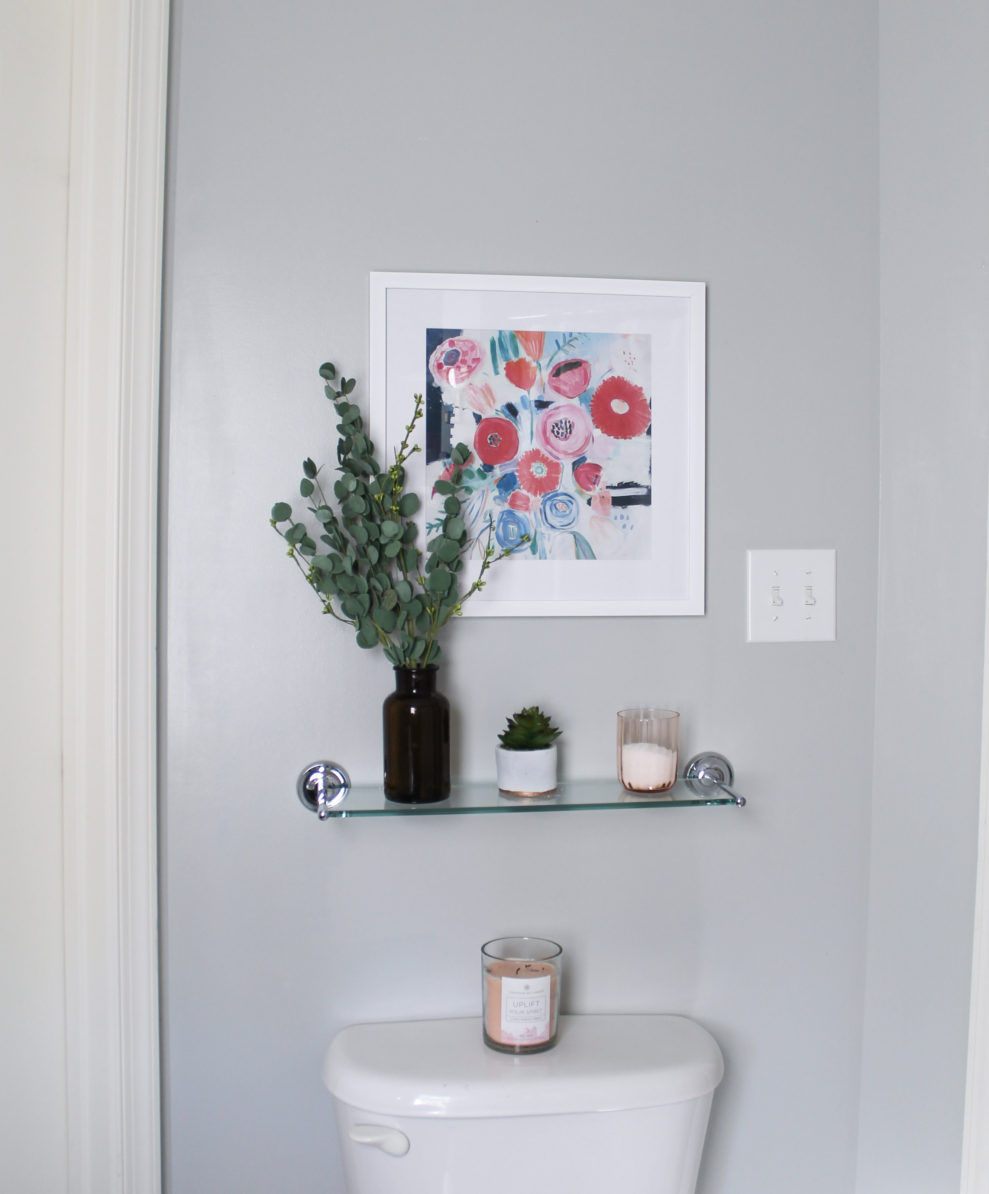
- floral framed photo: Hobby Lobby $15
- tile stencil + foam roller: Cutting Edge Stencils Nola $16
- paint: $150
- Sherwin Williams:
- floor and porch primer $27
- Minwax polycrylic finish $24
- Notre Dame wall paint $55
- General Finishes: Lamp Black and Klein Blue $40 with leftover paint
- All Painting Supplies: Gifted by HANDy Paint
- hand soap and towel: Target $8 + $3
Total: $479
Do you love our DIY updates as much as I do? Drop your favorite part in the comments!!
In case you missed my Instagram posts see them here under the highlights. Check out the reveals from featured designers, and don’t miss out on the guest participants!
yes, I love wooster and minwax brushes
Is Wooster the name brand on the paint brush you recommend?
I just went to Lowes and tried to get the paint. They didn’t have “Sherman Williams” Notre Dame, but Valpar did. Not sure if they just didn’t have it, or if it really was Valspar. Just wanted to let everybody know.
Notre Dame by Sherwin Williams
Wall Color: Notre Dame by Sherwin Williams
Notre Dame from Sherwin Williams
Is the wall color a secret?
Hi. What color is the wall paint please…..a couple of people have asked but I cannot find the replies….thanks so much
Loving the wall color! What color is it?
Hi Christine. I did not sand the entire vanity before painting. My kids are messy so I sanded a little bit of toothpaste off of the vanity, but a god cleaning is enough to work with milk paint!
Hi! It looks beautiful. Did you sand before painting the vanity? This will be my first project. I’ve never used chalk or milk paint before. Thanks!!
Hi…I love how the wall pairs with the navy vanity. What’s the color on the wall please?
Thanks! Go for it! I can’t wait to hear how it turns out!
This article is a wealth of information! I’ve been toying with the idea of painting my main bathroom’s vanity. This motivates me a bit more!
Hey Thanks! I’m so glad you’re going to paint the floors! They are going to look awesome. I am happy to say the floors stay clean looking. You would think with stark white it would show dirt, but I think because it’s in the kids bathroom we don’t wear shoes and it stays clean and white looking. I am a little past the one year mark and they look great!
Hi – your bathroom looks darling. I am about to paint my bathroom floor with the same Nola stencil. Did you find the bathroom floor often looks dirty where the white portion of the floor is? I am debating doing a stencil that has more coverage..?
Wow! It’s hard to believe you accomplished so much for so little money! Fabulous job!